[DMG] RS CleanAmp Universal
The CleanAmp replaces the original audio board with a modern and much louder Class-D amplifier. It can be used universally in all handheld consoles of the Nintendo Game Boy series.
Installation
Section titled “Installation”Always start by checking whether the sound works at all. The most common cause of missing sound is a defective speaker. The test isn’t strictly required (your speaker may be dead), but if your console works first, that’s a good sign.
- Open the Game Boy with a tri-wing screwdriver by removing the 6 screws on the back (2 of them inside the battery compartment).
- As you open the console, you’ll see a wide ribbon cable connecting the two halves. Grab it firmly and pull it out of the white connector on the bottom half.
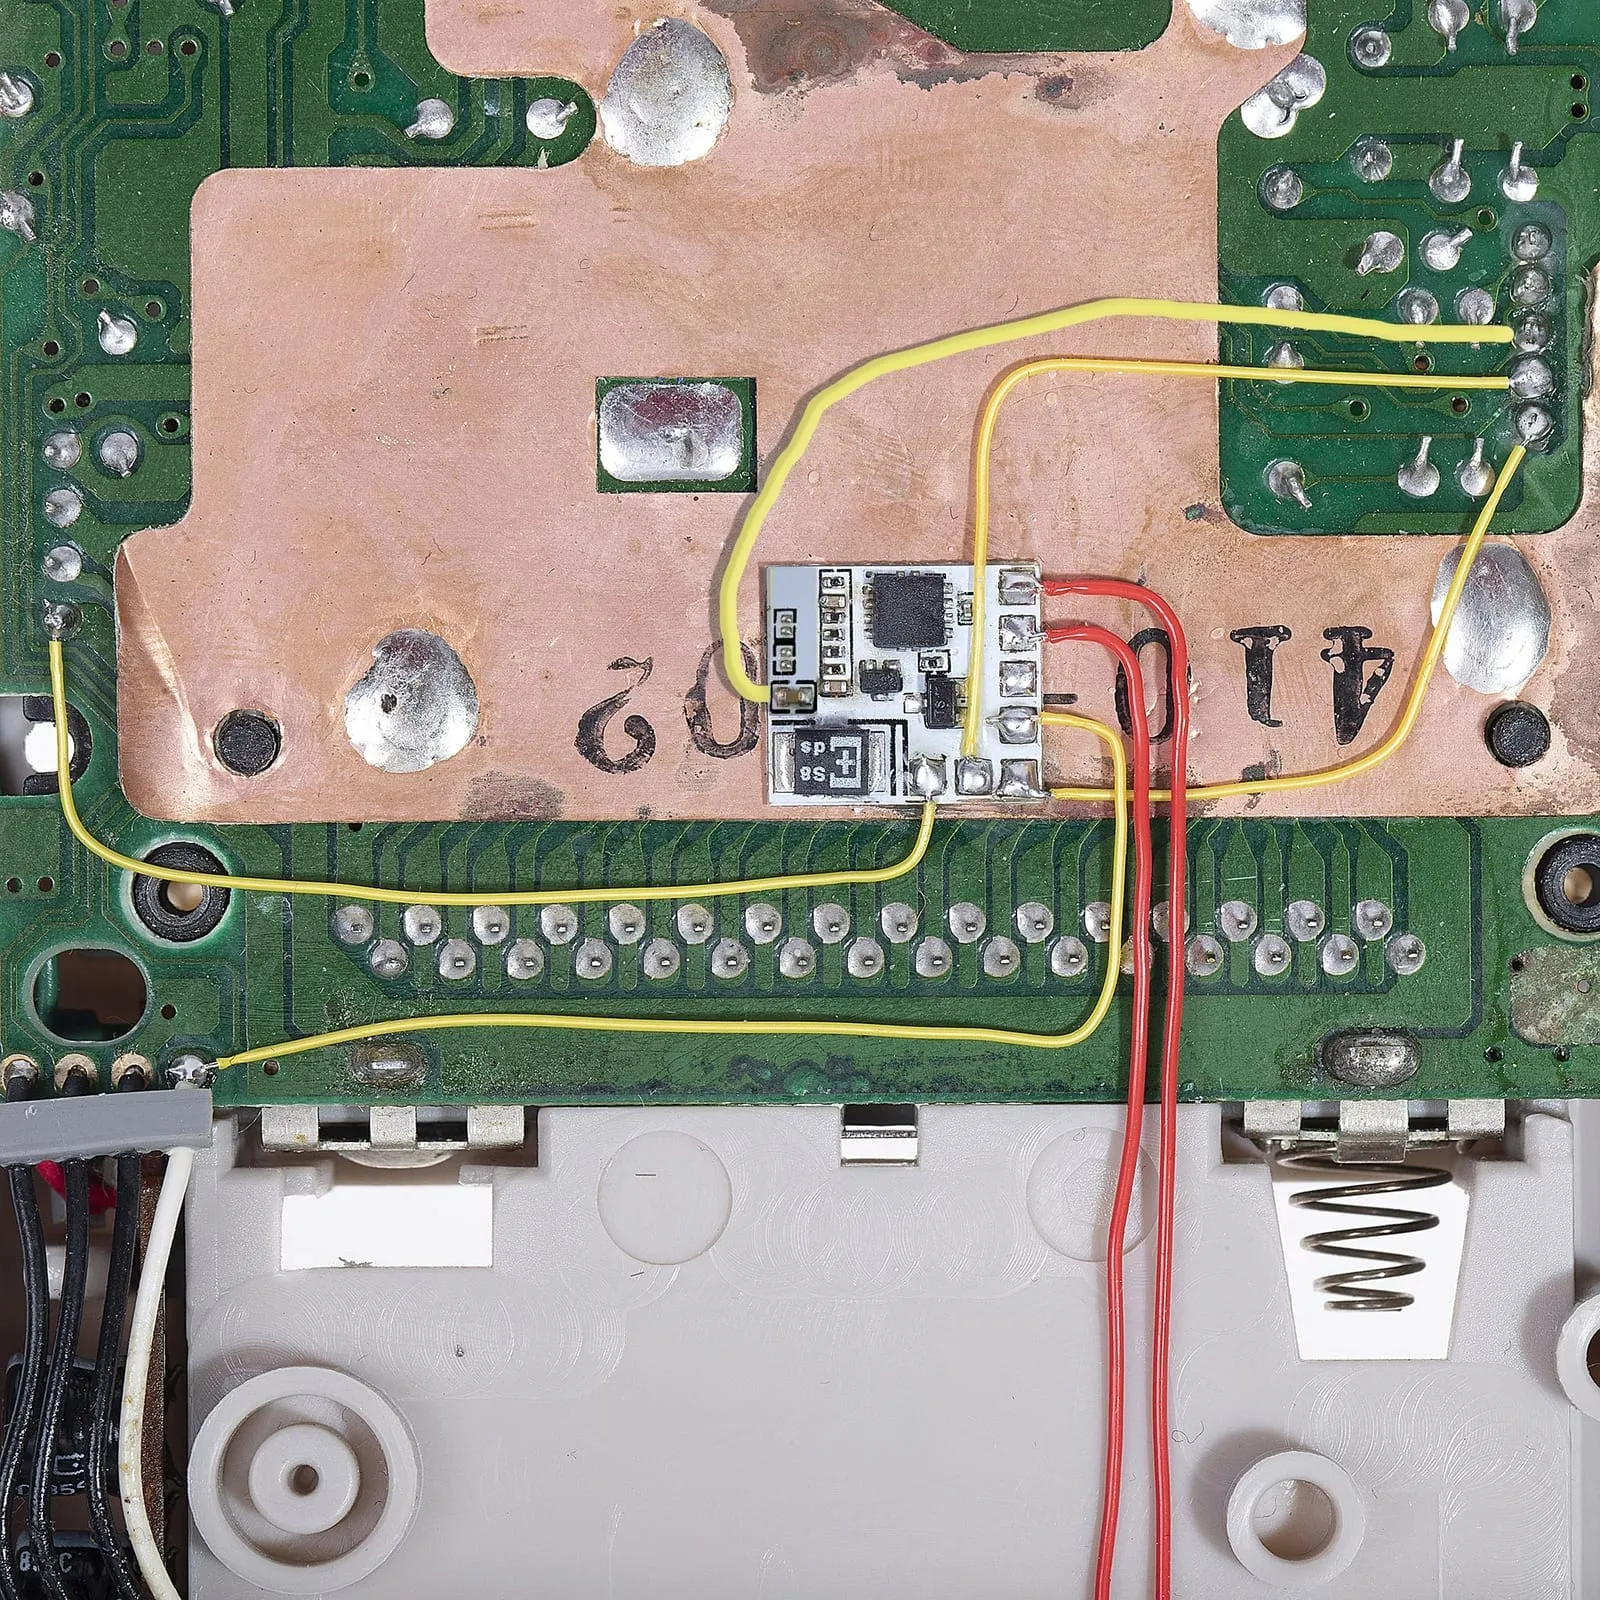
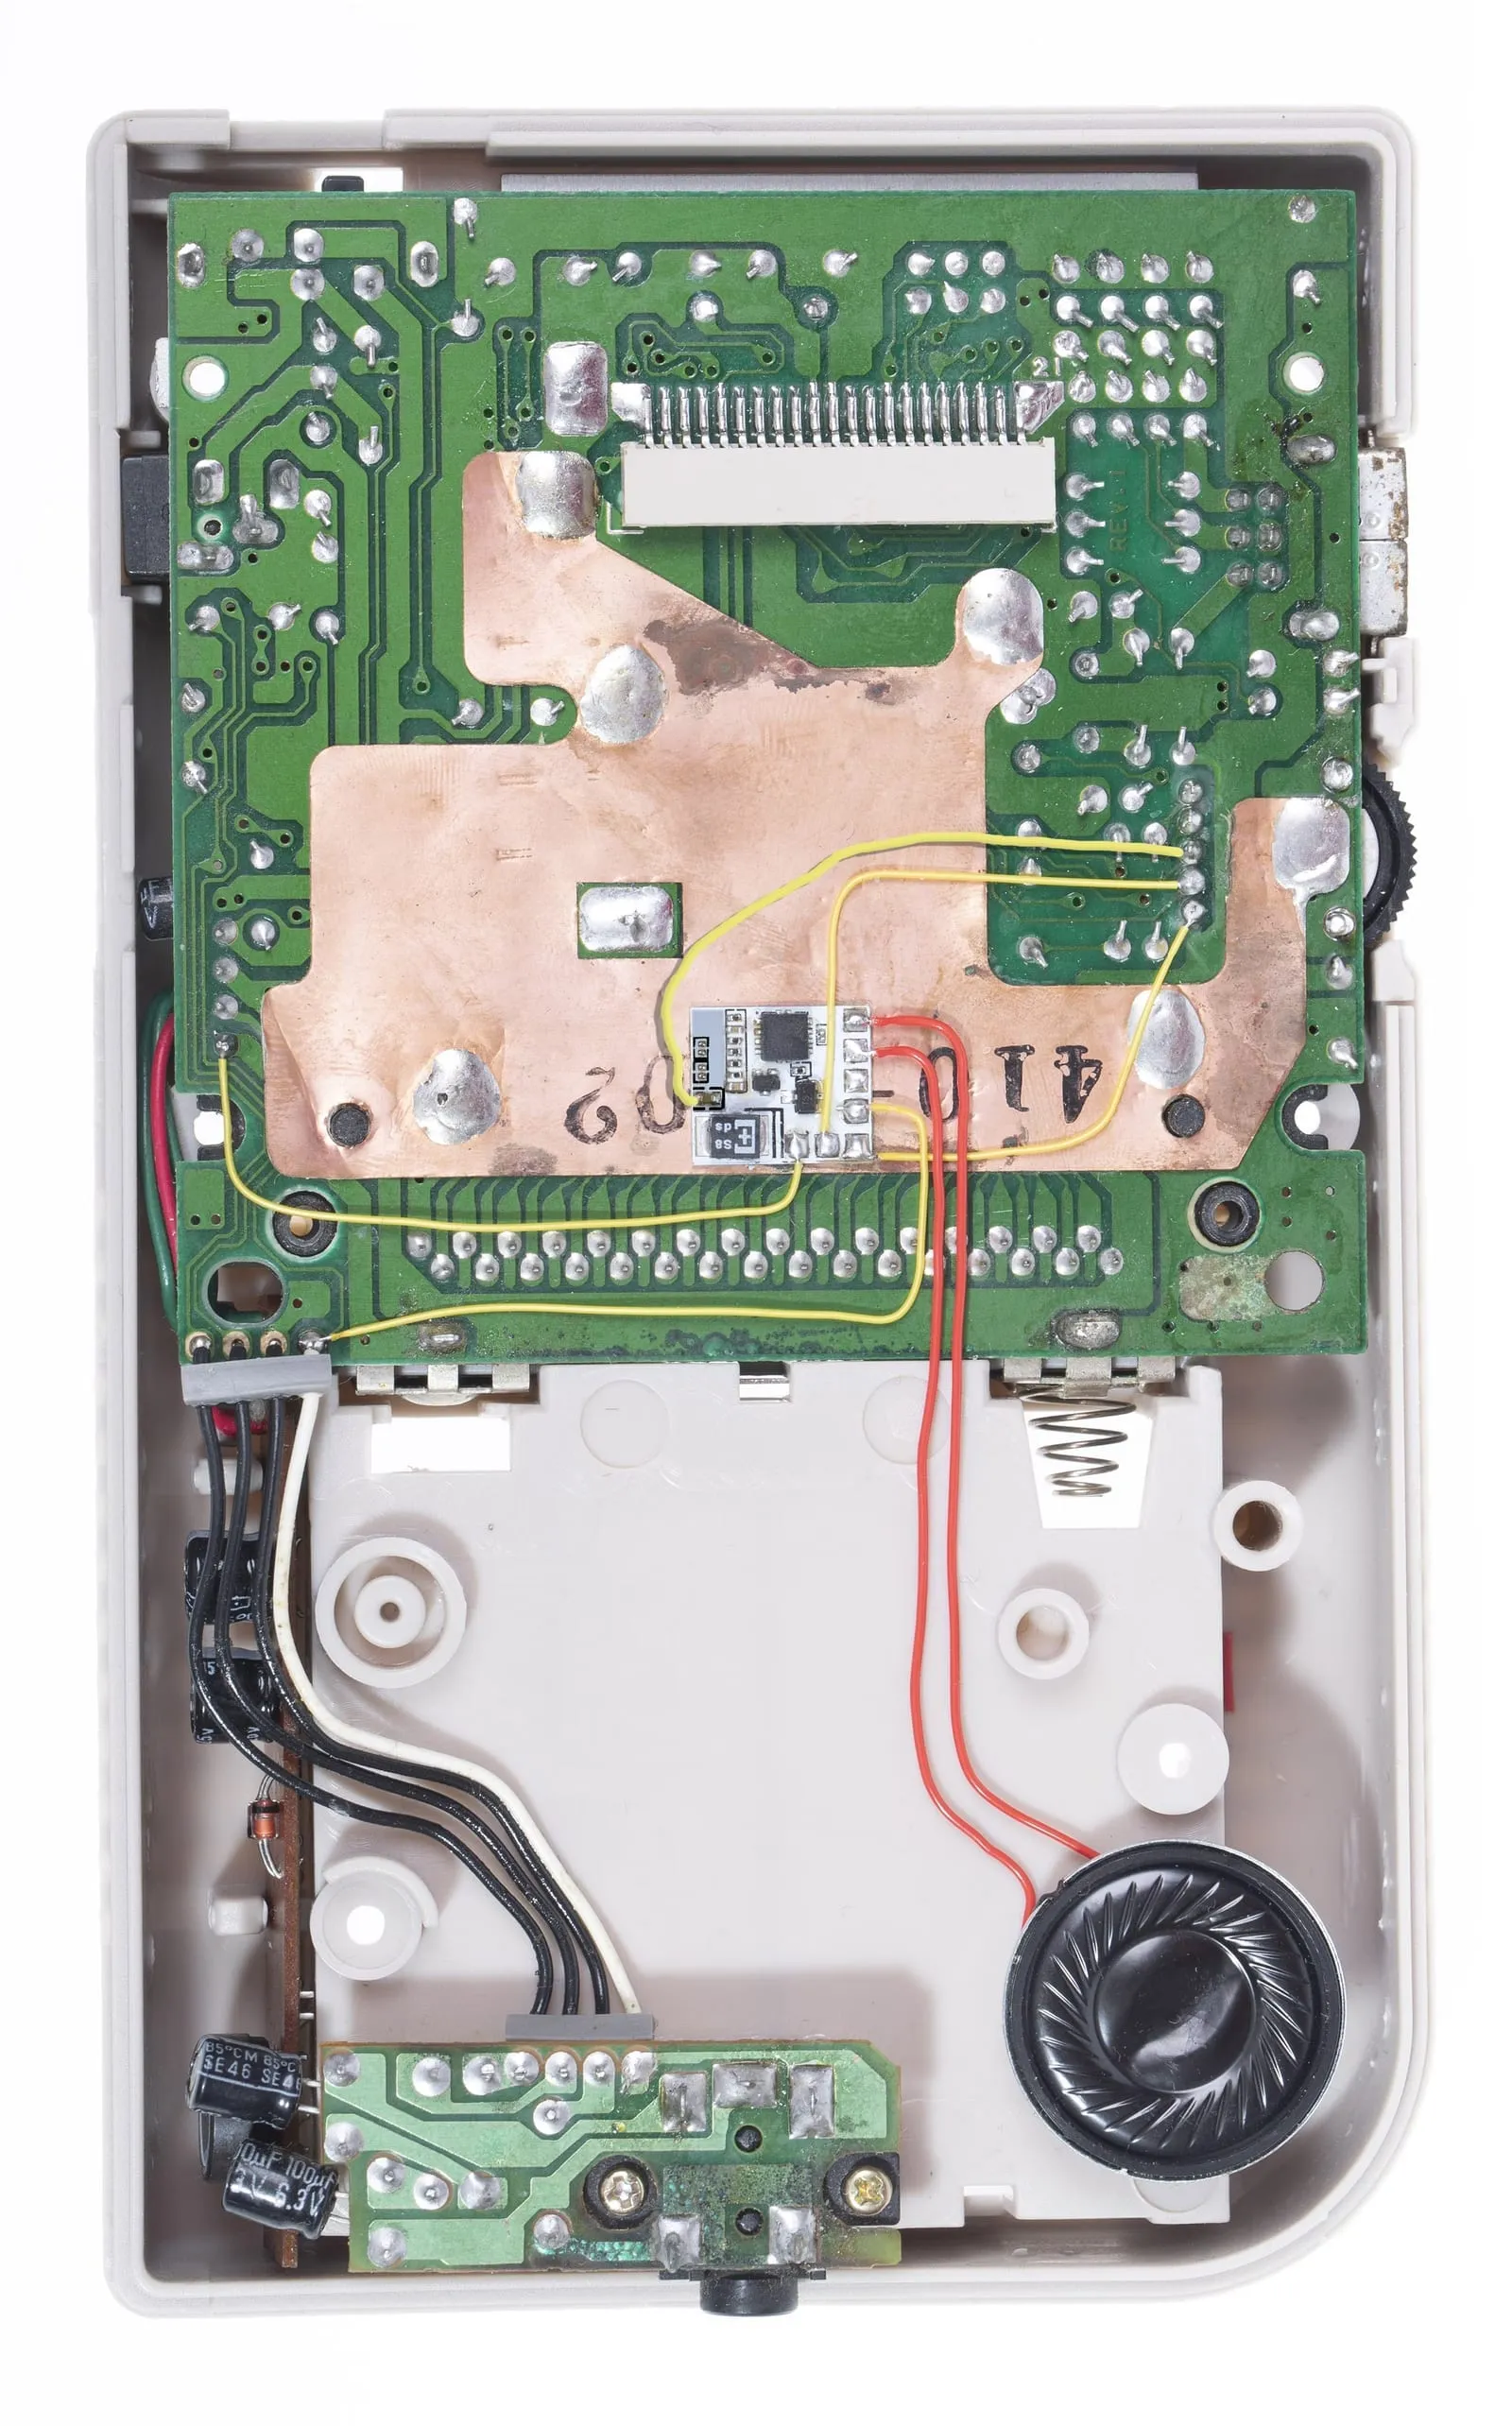
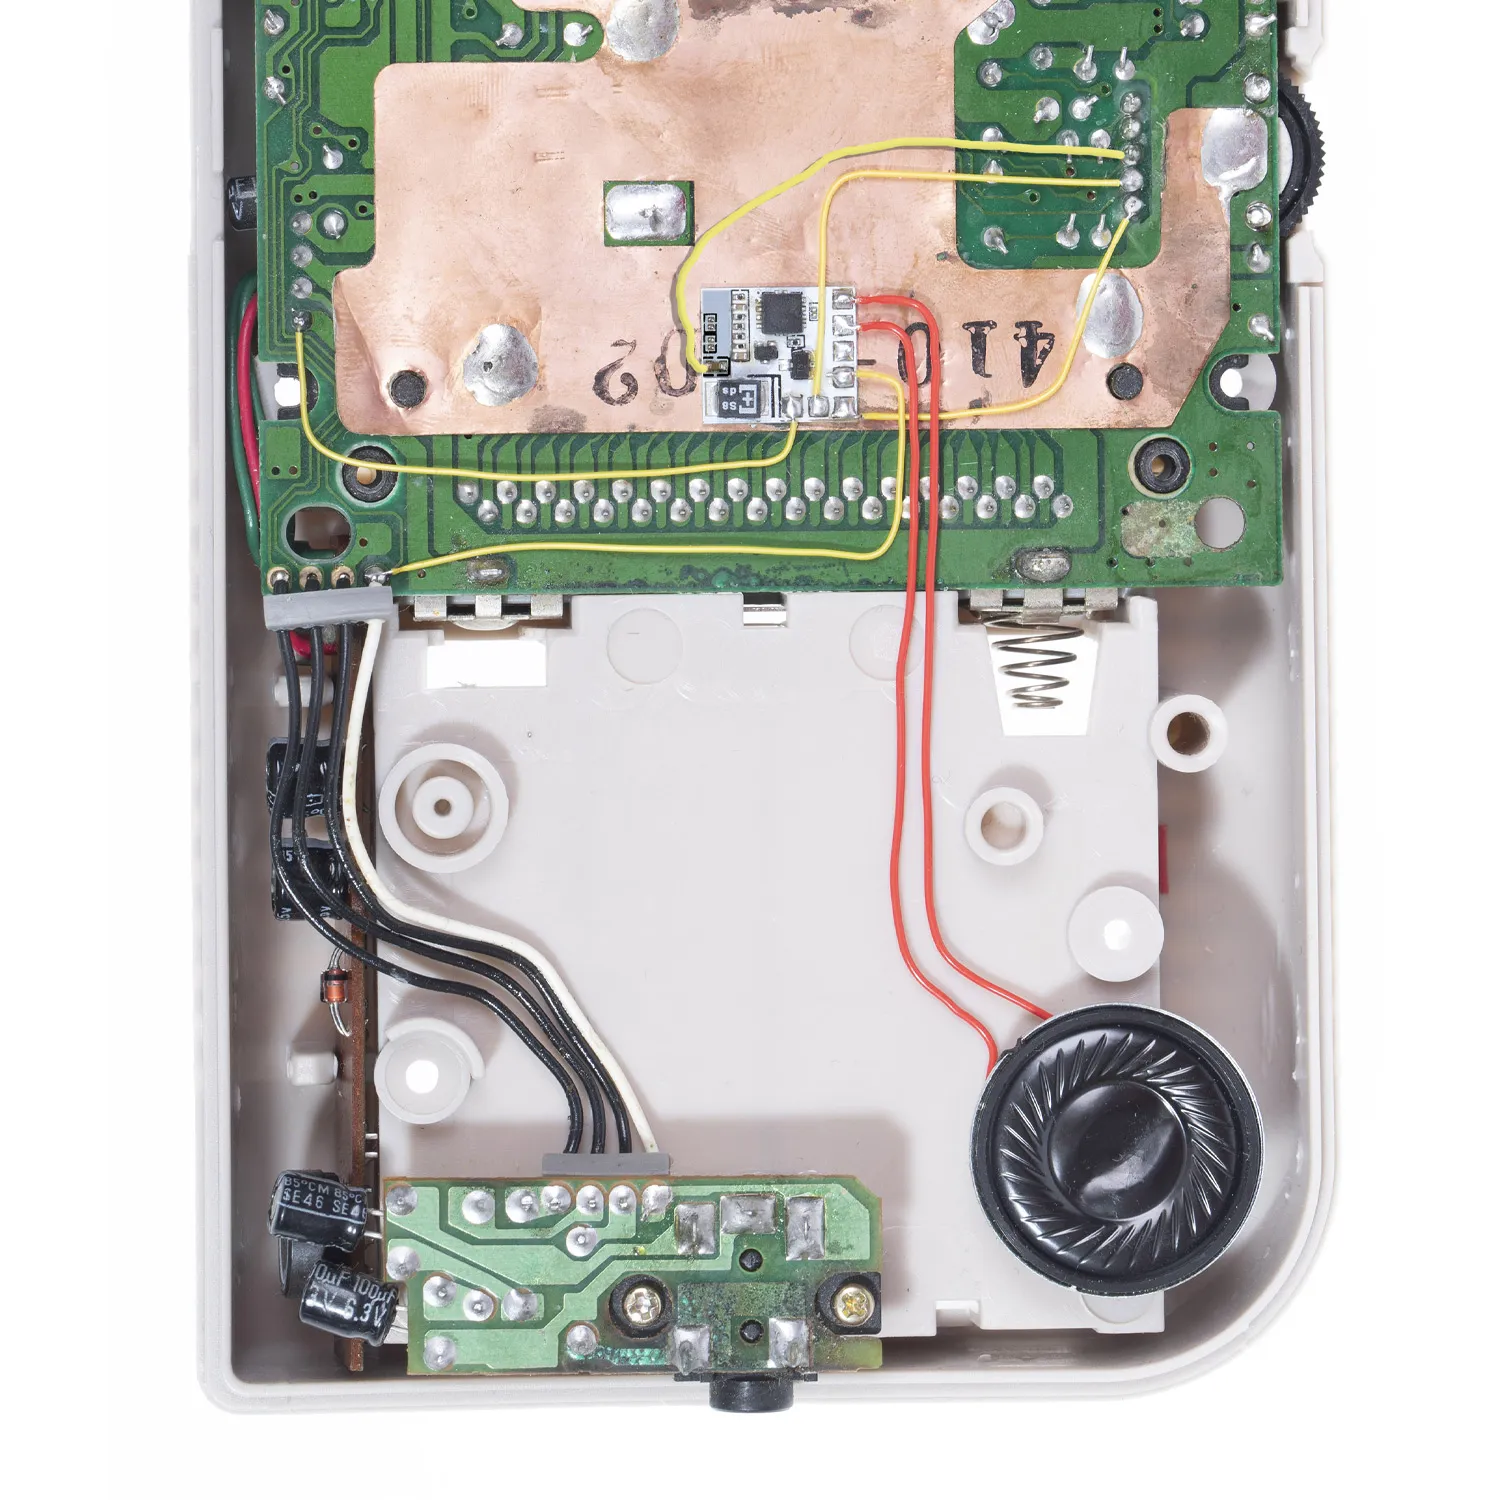
- Secure the CleanAmp in position as shown, optionally with double-sided tape.
- Take some thin Kynar/wrapping wire (30 AWG or 28 AWG), cut it to length and solder the points on the Game Boy to the pads on the CleanAmp as shown. Pretty much any insulated wire works, as long as it isn’t too thick and doesn’t block parts during reassembly.
- When soldering the CleanAmp pads, be careful not to short pads together or knock off the resistors or capacitors next to them.
- Solder the two wires on the top right of the CleanAmp to the outer two pads of the speaker. Polarity doesn’t matter. Stick the speaker in the spot shown with double-sided tape or hot glue. Place it exactly there, otherwise the top shell may hit the speaker and won’t close.
- Finally, remove the old speaker from the front PCB by cutting or desoldering its wires.
Even louder
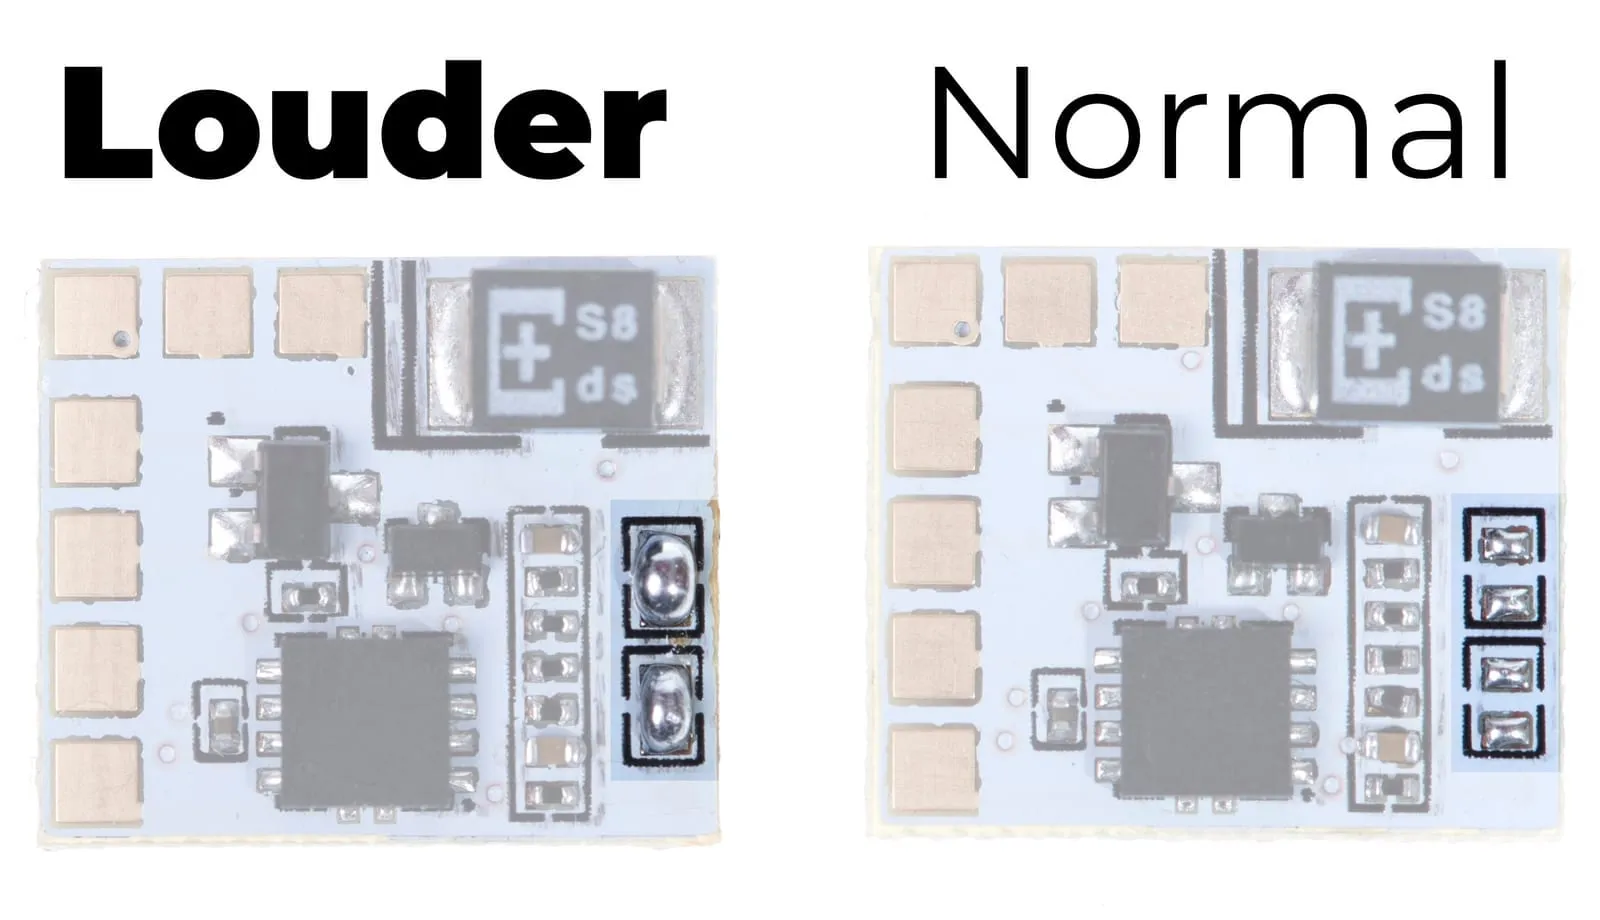
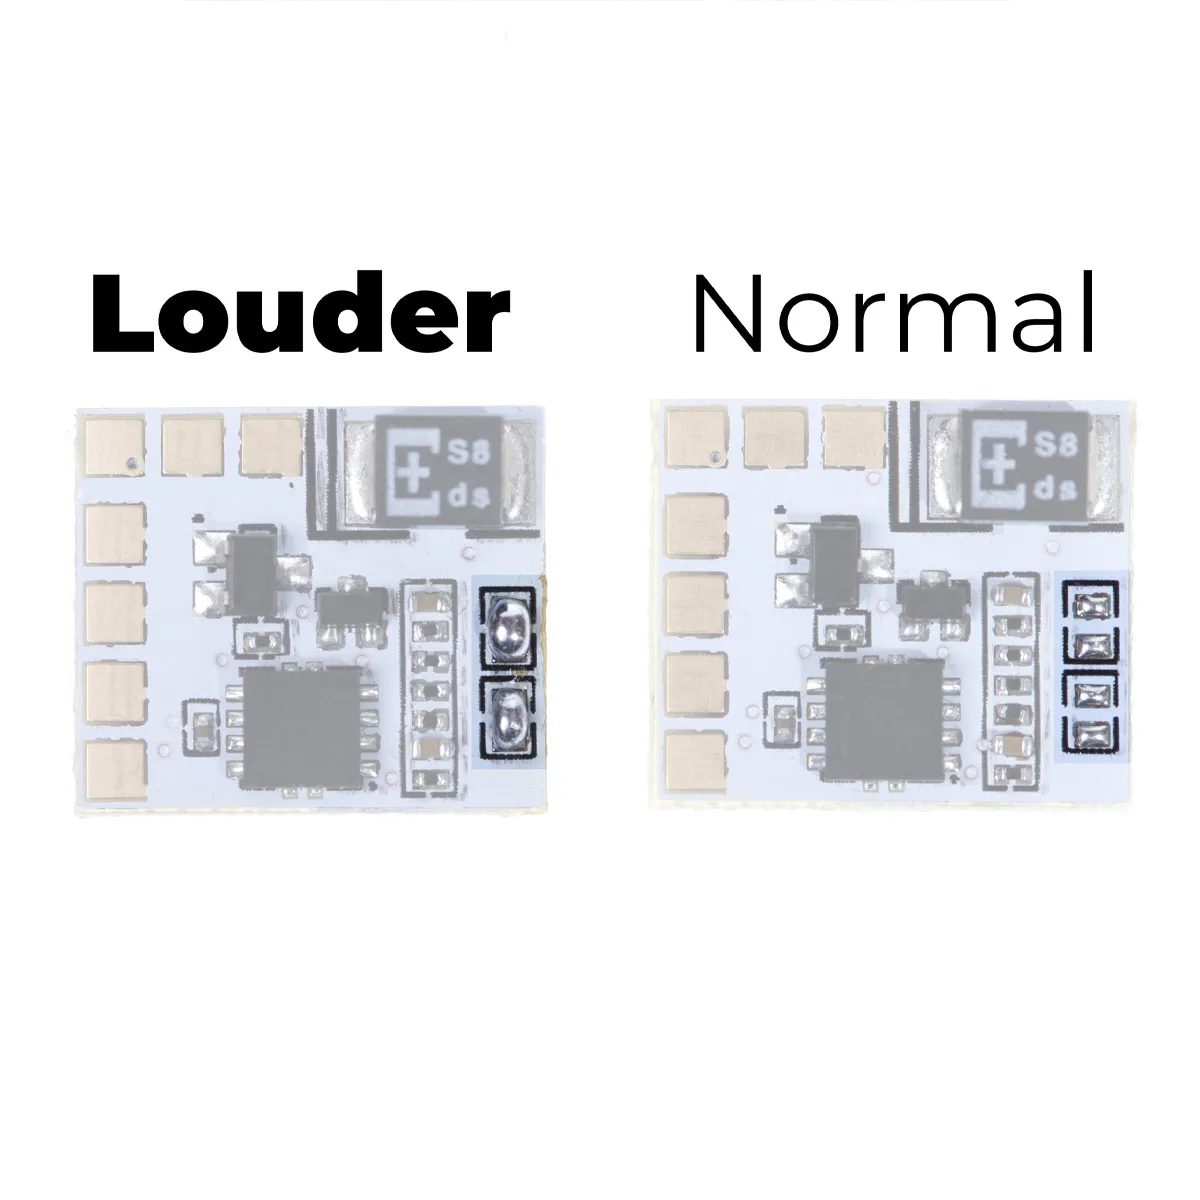
Section titled “Even louder”To make the sound even louder, you can bridge the jumpers on the right side of the CleanAmp board. This modification can easily be undone to restore the original volume: just remove the solder bridges again.
Troubleshooting
Section titled “Troubleshooting”- The wire on the far left is power in from the Game Boy. It should read 5 V.
- The wire on the bottom left is the headphone pin. It should be grounded when no headphones are plugged in and floating when they are. If you have no audio, first try soldering this wire to the same pad as the bottom right wire (ground). If audio works then, but not at the correct location, your headphone jack is damaged. You can leave the wire on the ground pad, but the speaker won’t turn off when you plug in headphones.
- The wire on the second pin (from the bottom) of the volume wheel is the audio input: the unamplified, volume-controlled sound from the console.
- The wire below it, on the bottom pin of the volume wheel, is ground.