
[GBC] Installing the FP RetroPixel 2.0 Laminated
With the GBC RetroPixel 2.0 IPS Upgrade Kit, the glass lens is already bonded industrially during production, which makes installation quick and easy.
Foreword
Section titled “Foreword”- Always do a function test , BEFORE you install the IPS kit! Kits that have already been installed cannot be returned under warranty. You can see how to test the kit externally here: How do I test the LCD
- The LCD is very fragile and sensitive to pressure, impacts, etc. Please be especially careful when handling the LCD during installation
- The IPS kit can generally be installed without soldering, but then you won’t be able to change the backlight color of the logo. The solder connection to the power switch is optional, but required to reach full brightness.
Preparation
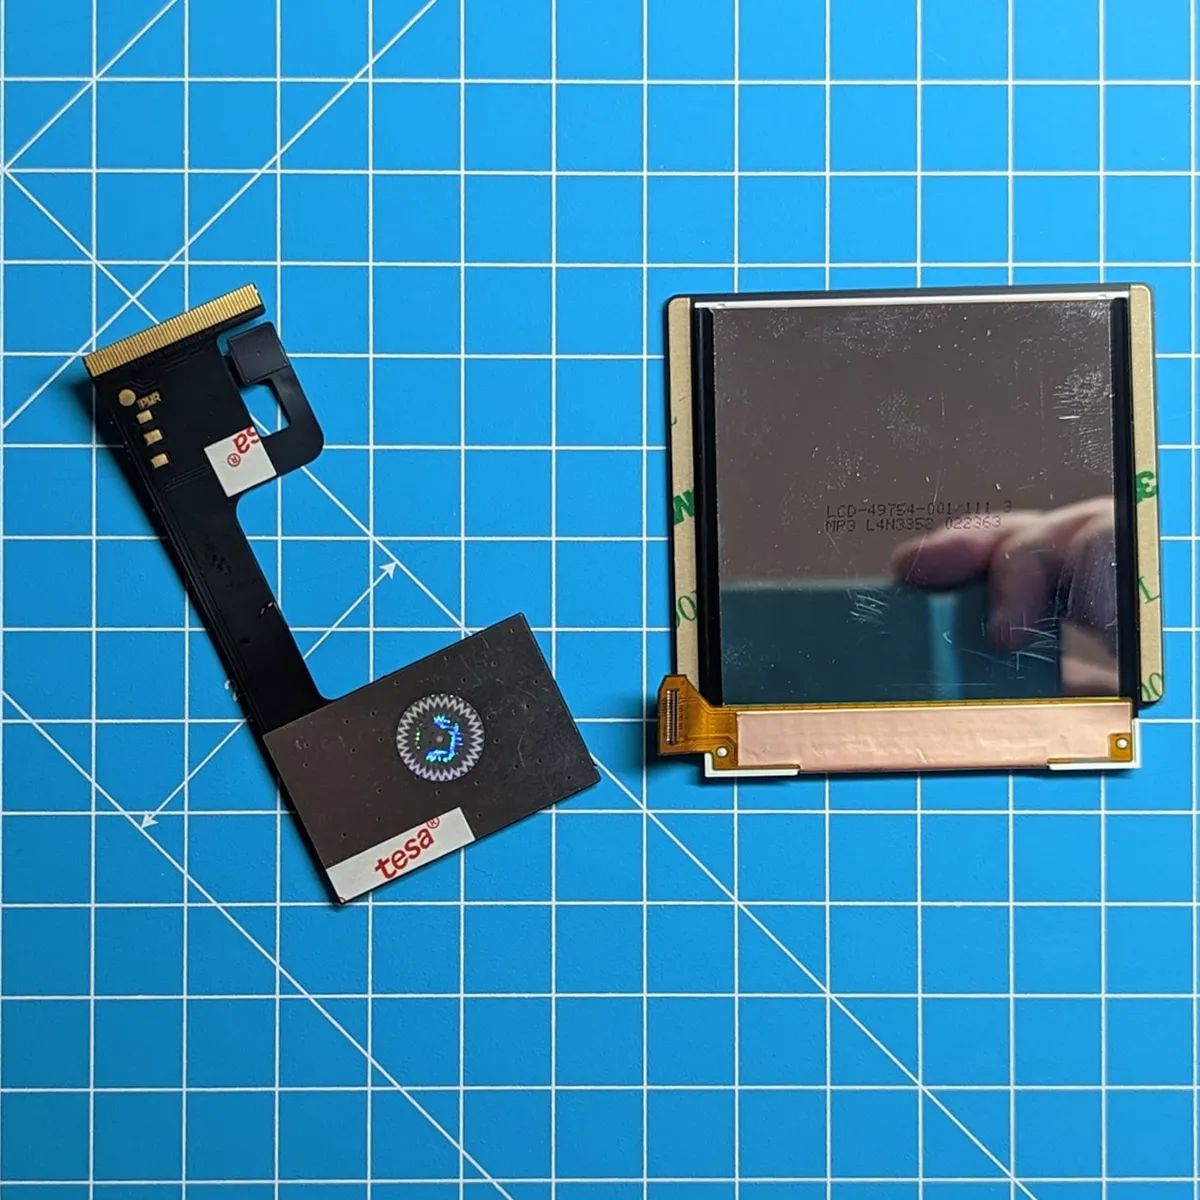
Section titled “Preparation”The kit includes the following components
To open the shell you need
You can find suitable tool kits here
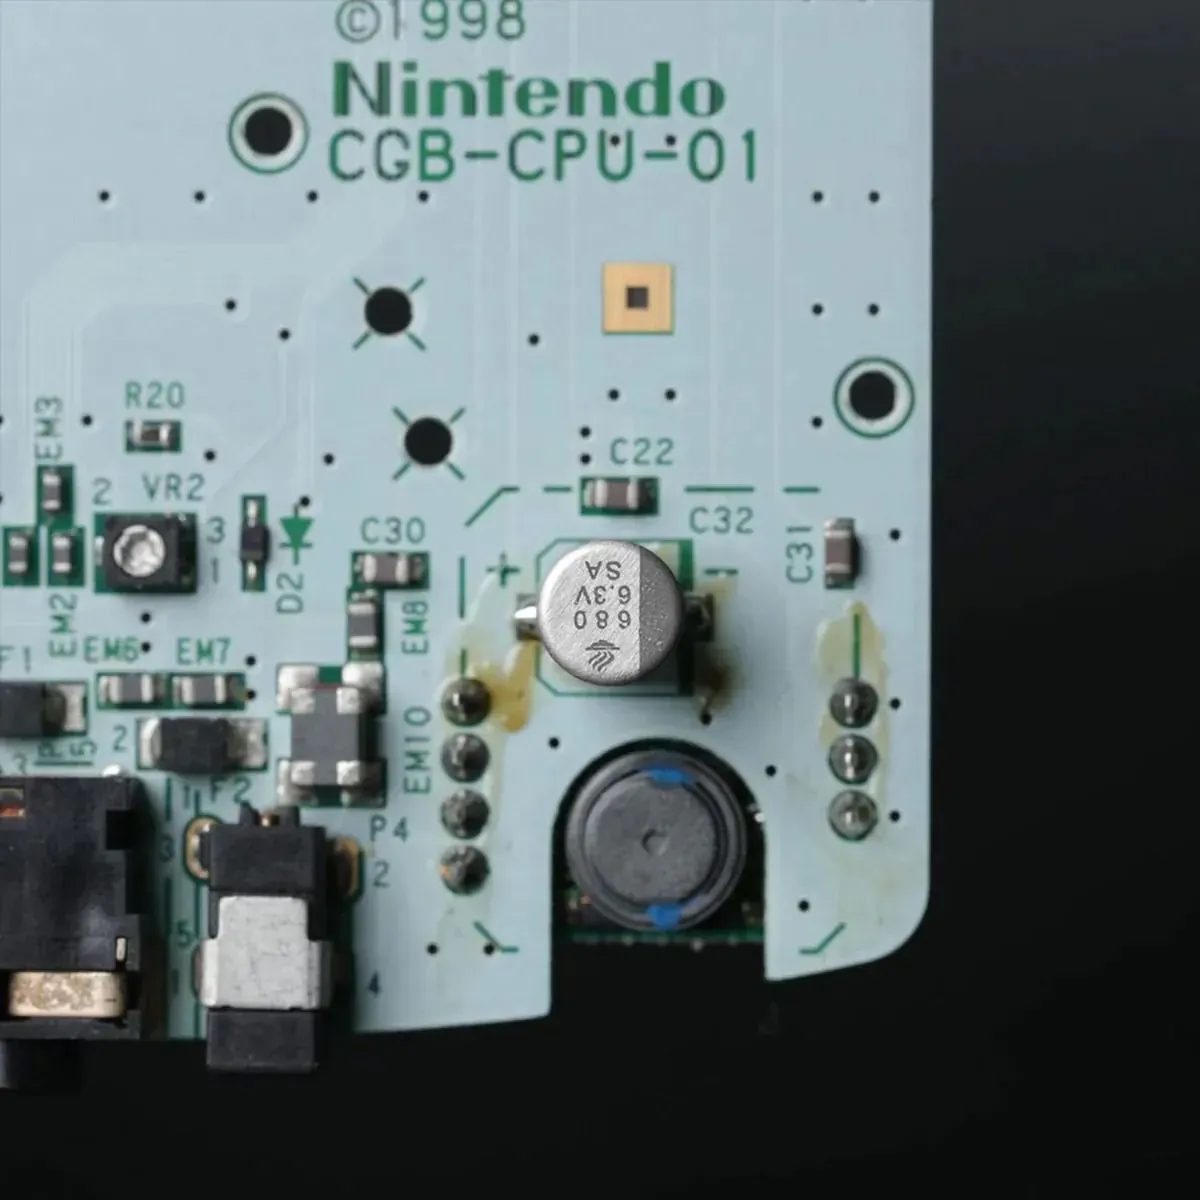
For an LCD mod, the 100uF capacitor should be replaced with a 680uF capacitor to reduce noise.
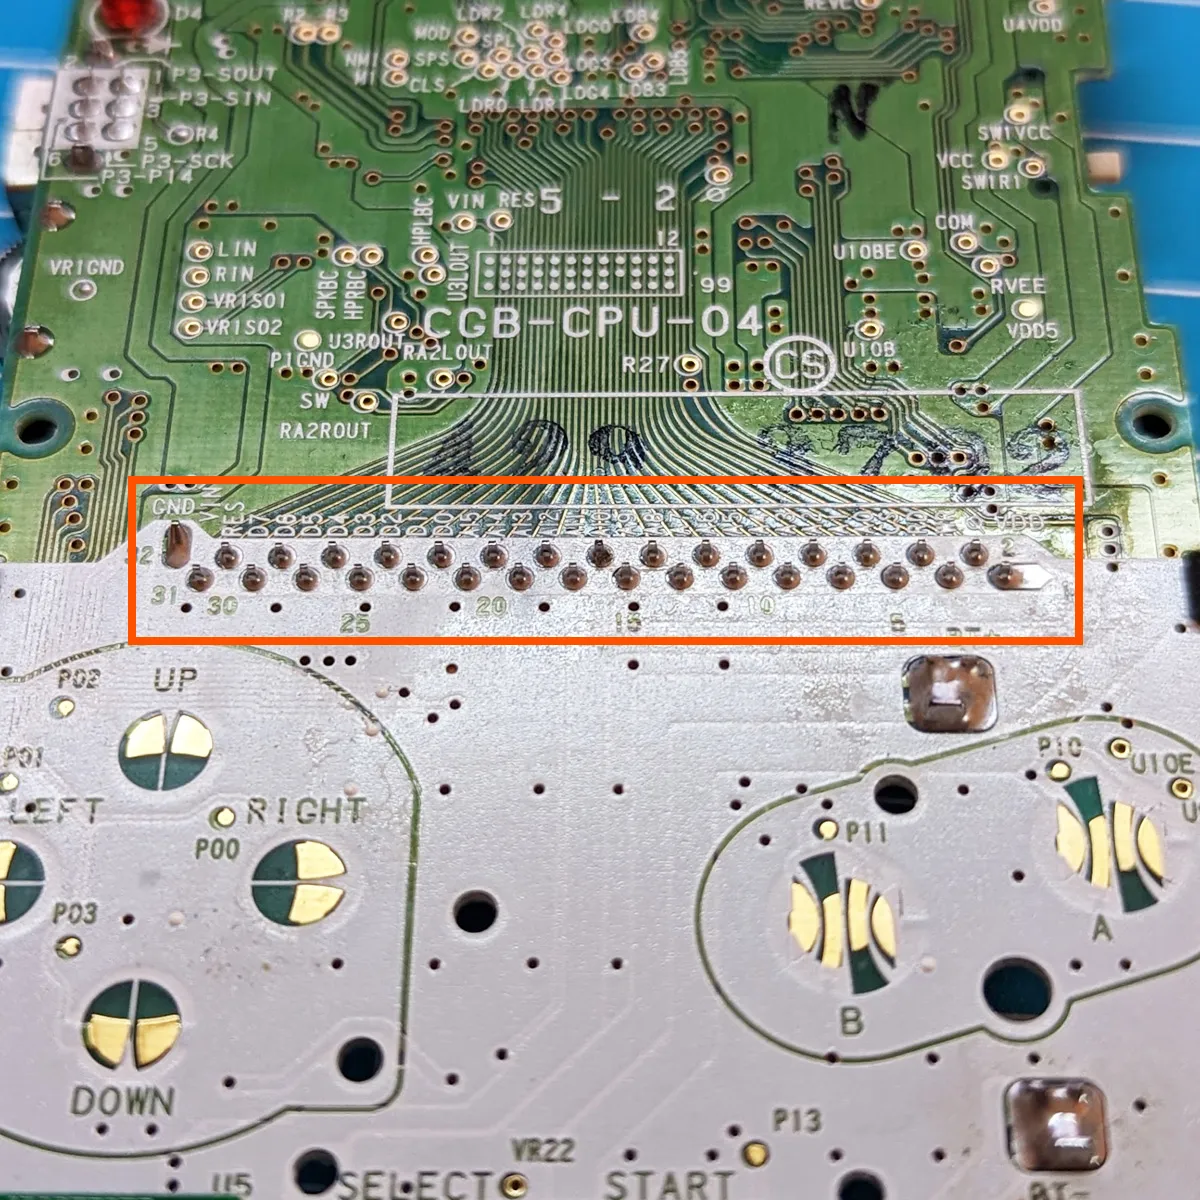
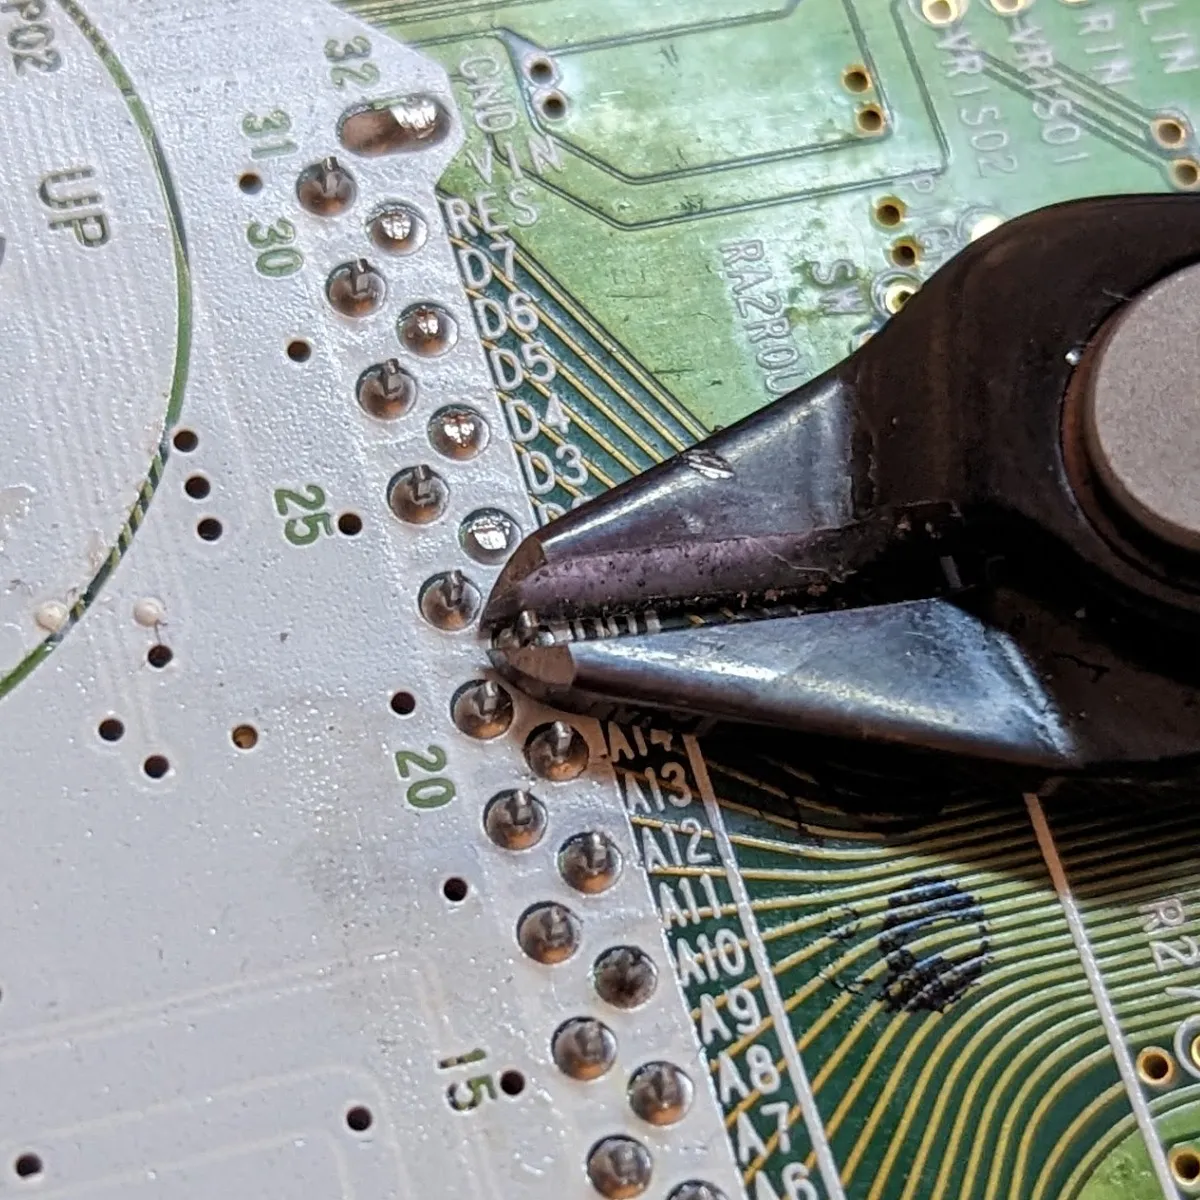
The pins of the cartridge port can put pressure on the LCD, which can cause permanent damage. That’s why the pins have to be trimmed as short as possible with flush cutters. Watch out for flying pieces and protect your eyes!
Preparing the shell
Section titled “Preparing the shell”With the purpose-made shells from FunnyPlaying, you simply drop the LCD in (drop-in). It is possible to use the kit with other shells, but that requires extensive modifications. You can find the shell trim guide here: [GBC] Trimming the shell. Note: RetroSix shells are usually not suitable.
Installation
Section titled “Installation”To make handling the LCD easier, you should disconnect the ribbon cable from the LCD.
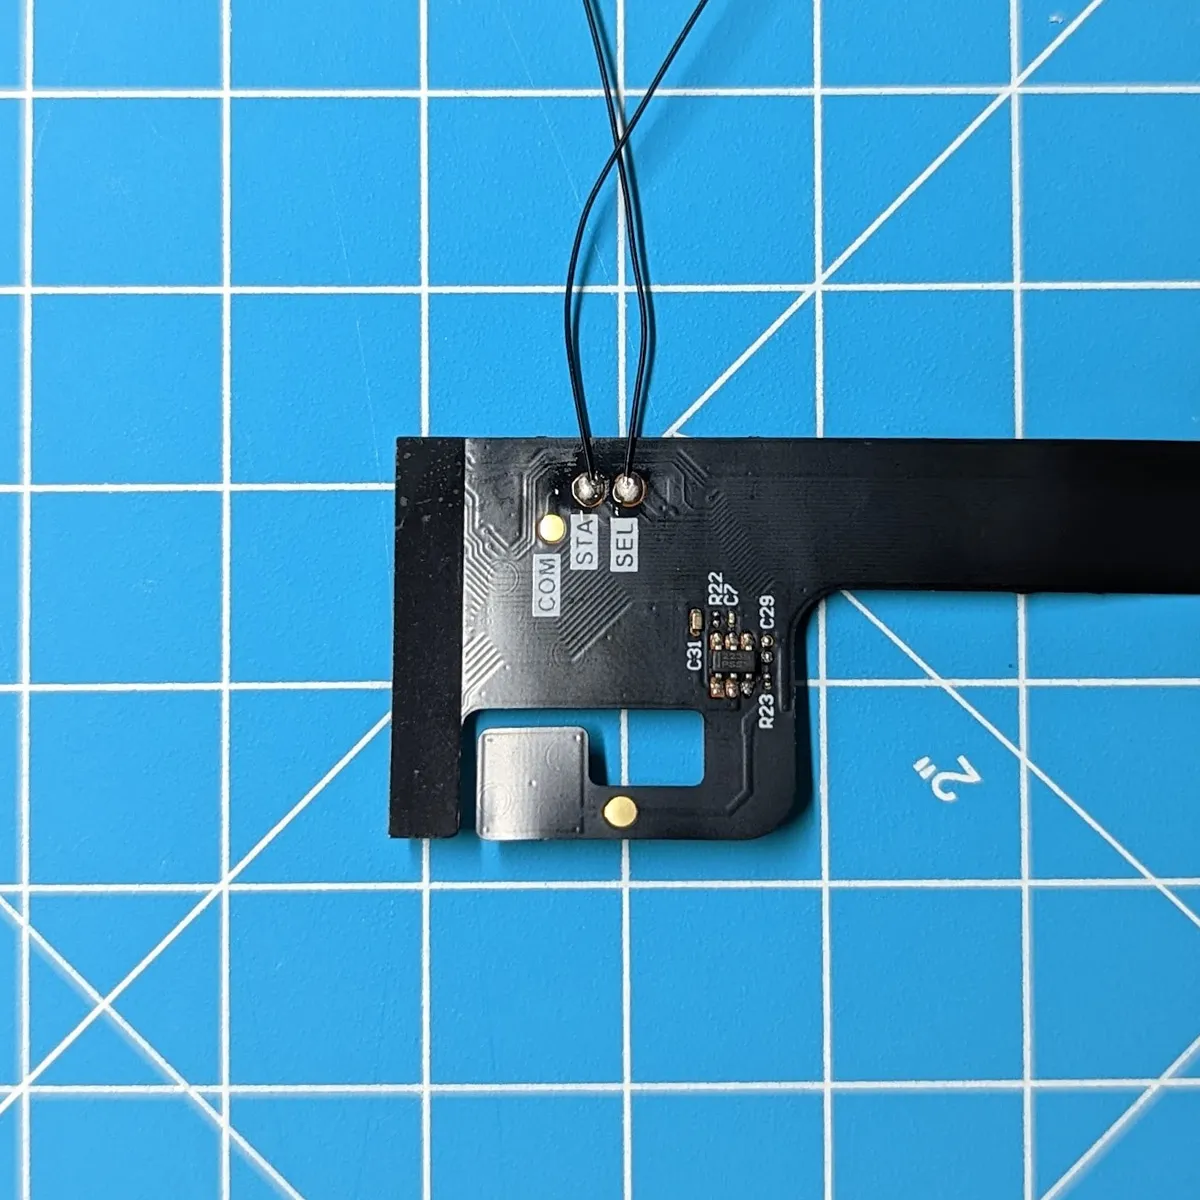
In the first step, connect the 2 long wires to the START and SELECT contacts on the ribbon cable.
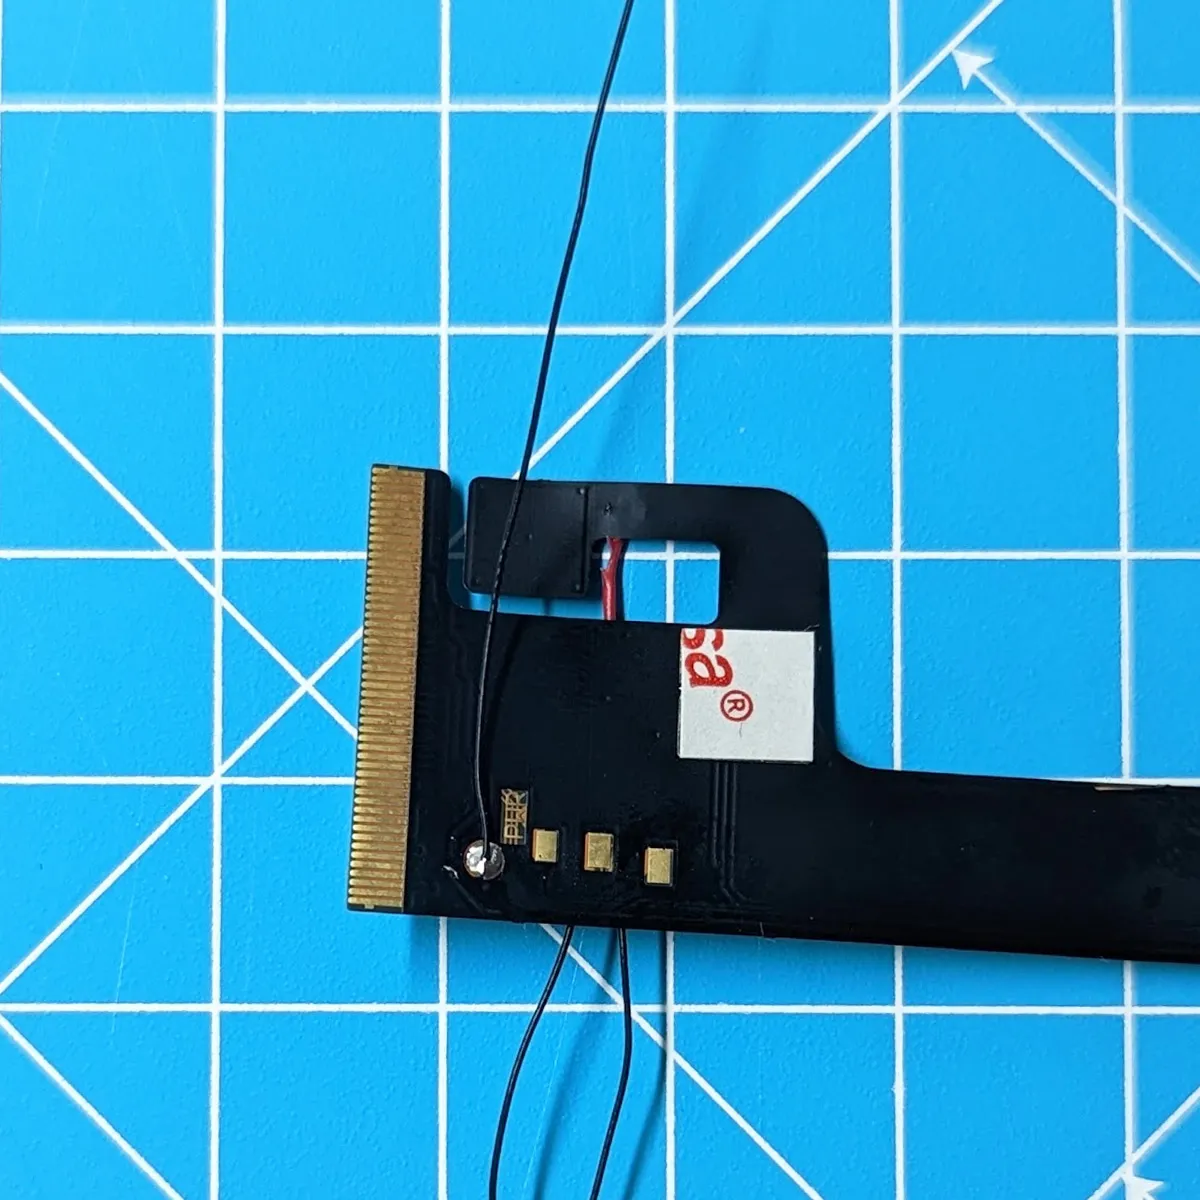
On the back of the ribbon cable is the power contact, where the short wire is soldered.
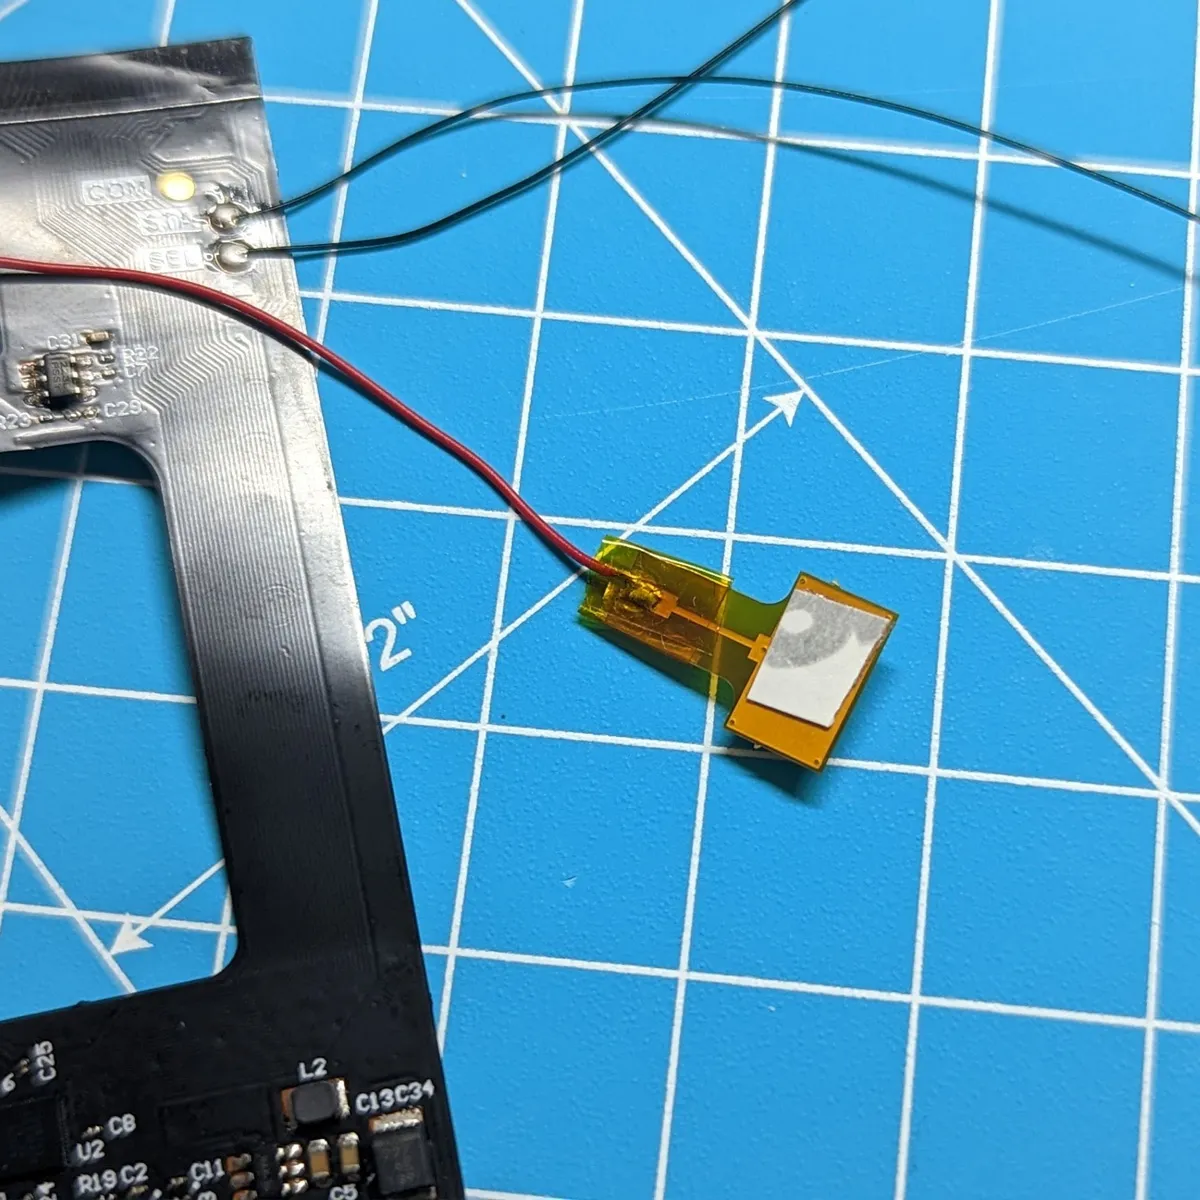
Optional: With the included external touch sensor, you can place the touch position anywhere you like. The integrated sensor has a contact for this, to which the 2nd sensor is soldered. Afterwards, the contacts of the external sensor should be insulated accordingly.
The insulating film is applied to the back of the LCD and prevents short circuits later on.
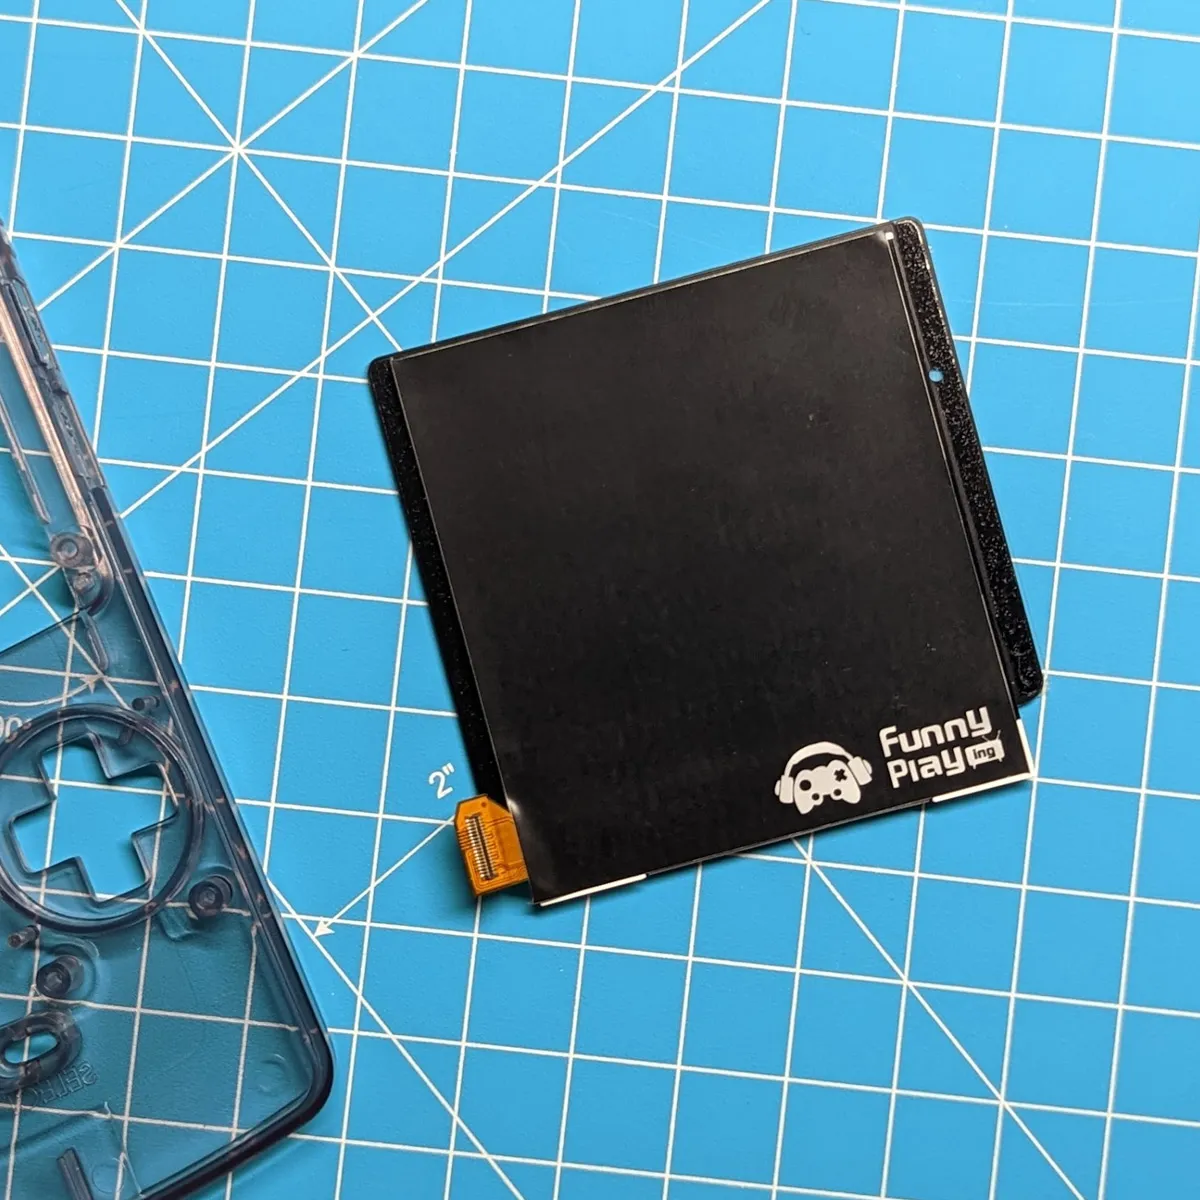
Now you can peel the backing off the two adhesive strips and insert the display into the shell from the front.
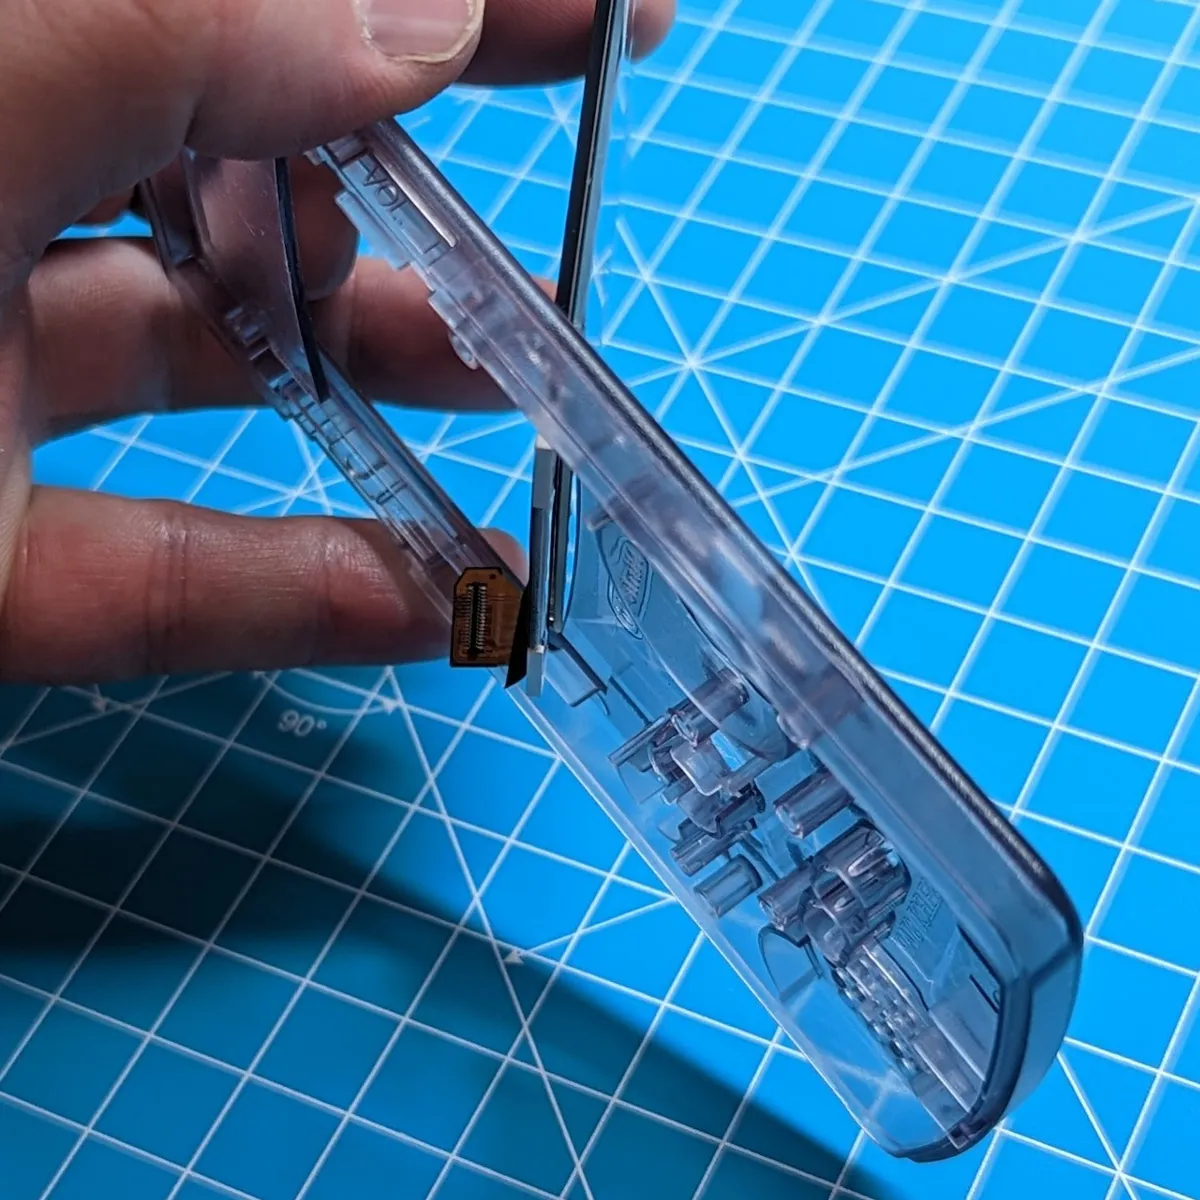
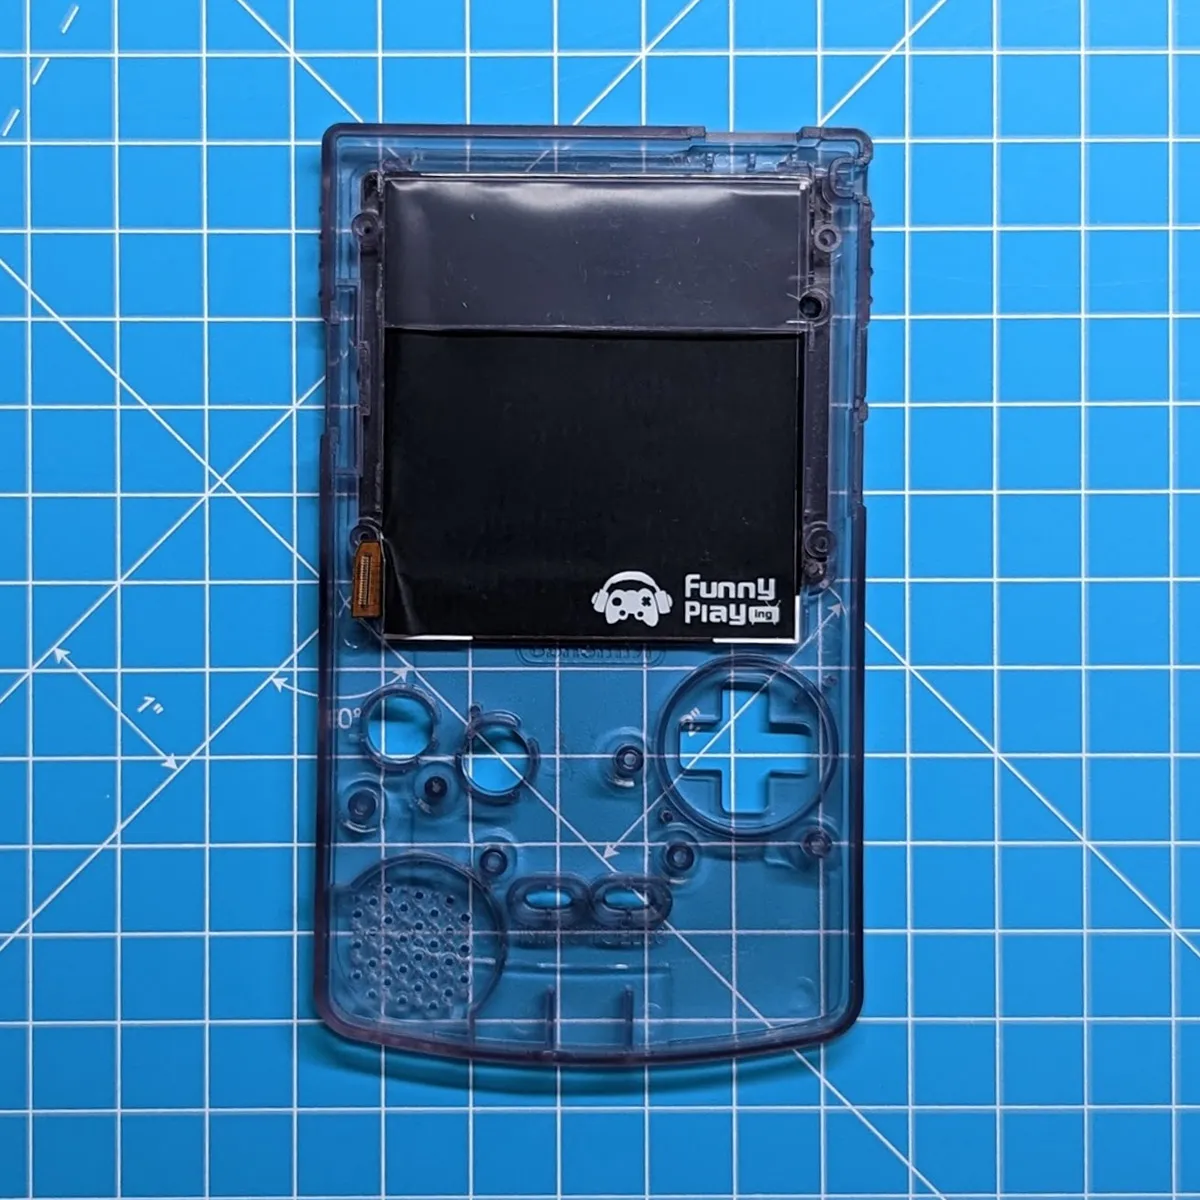
The flex cable can now be reconnected to the LCD. Caution: Do not put any pressure on the LCD!
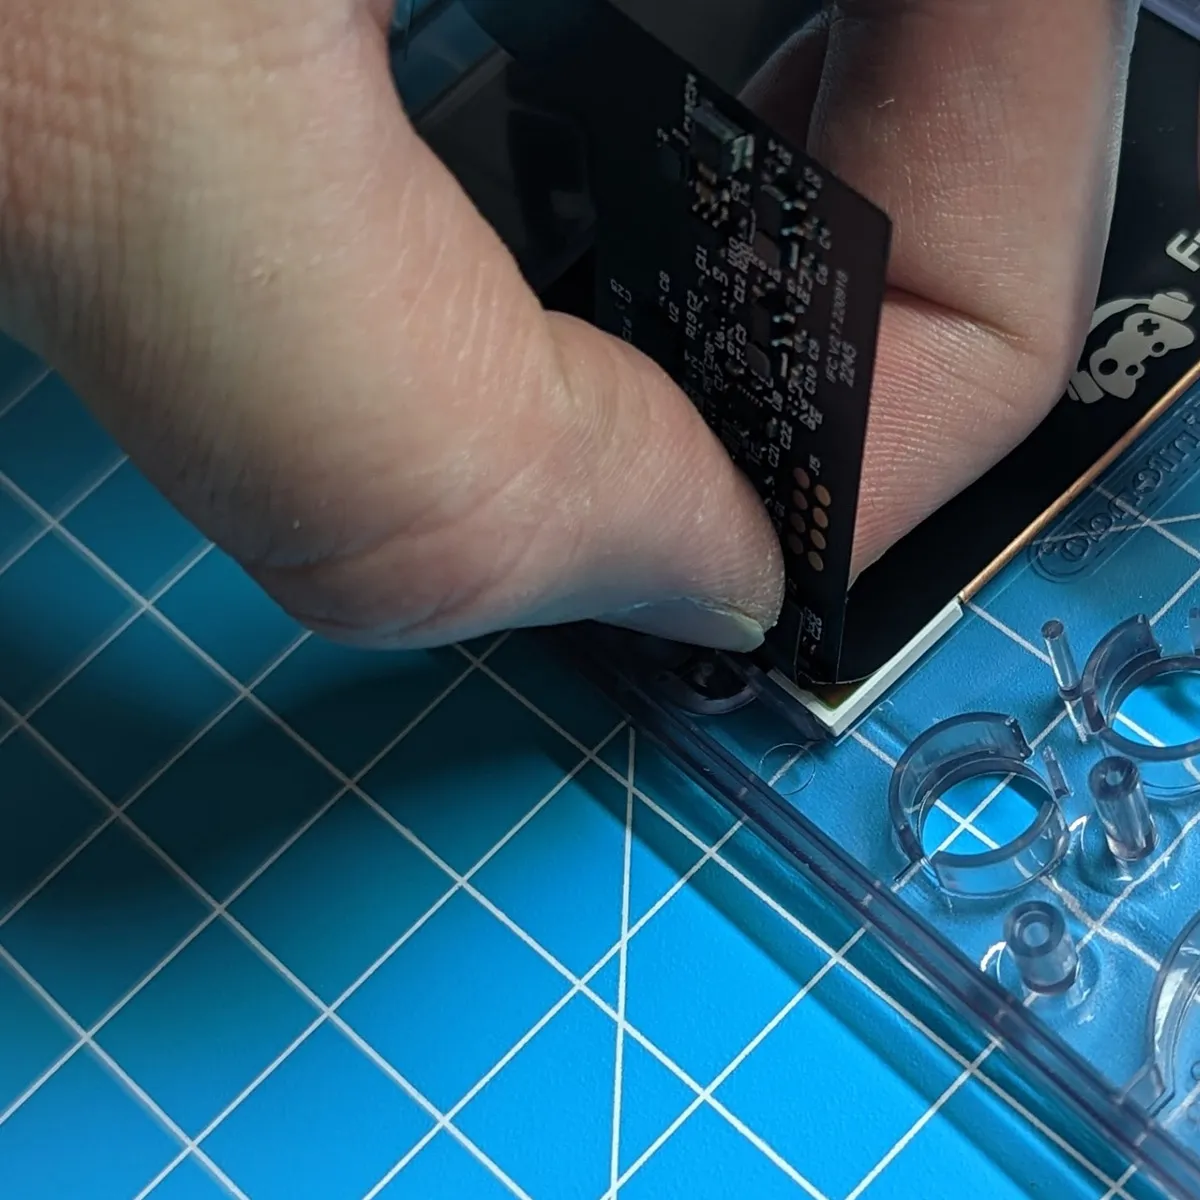
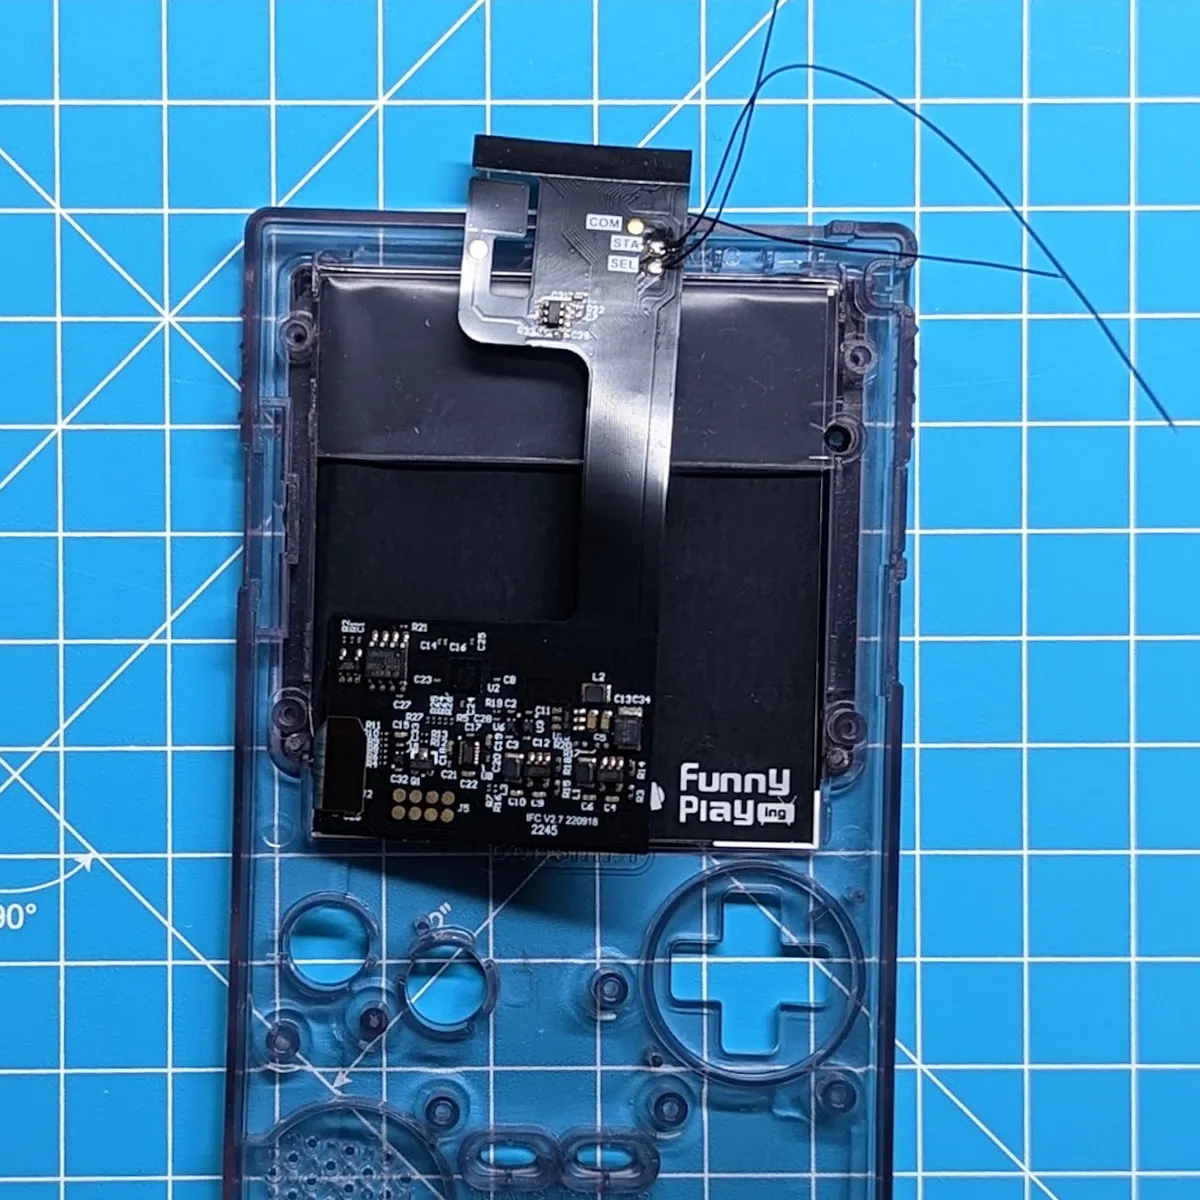
In the next step, the wires are connected to the Game Boy Color mainboard. You can use the START and SELECT test pads (bottom) or the two contacts above the cartridge slot.
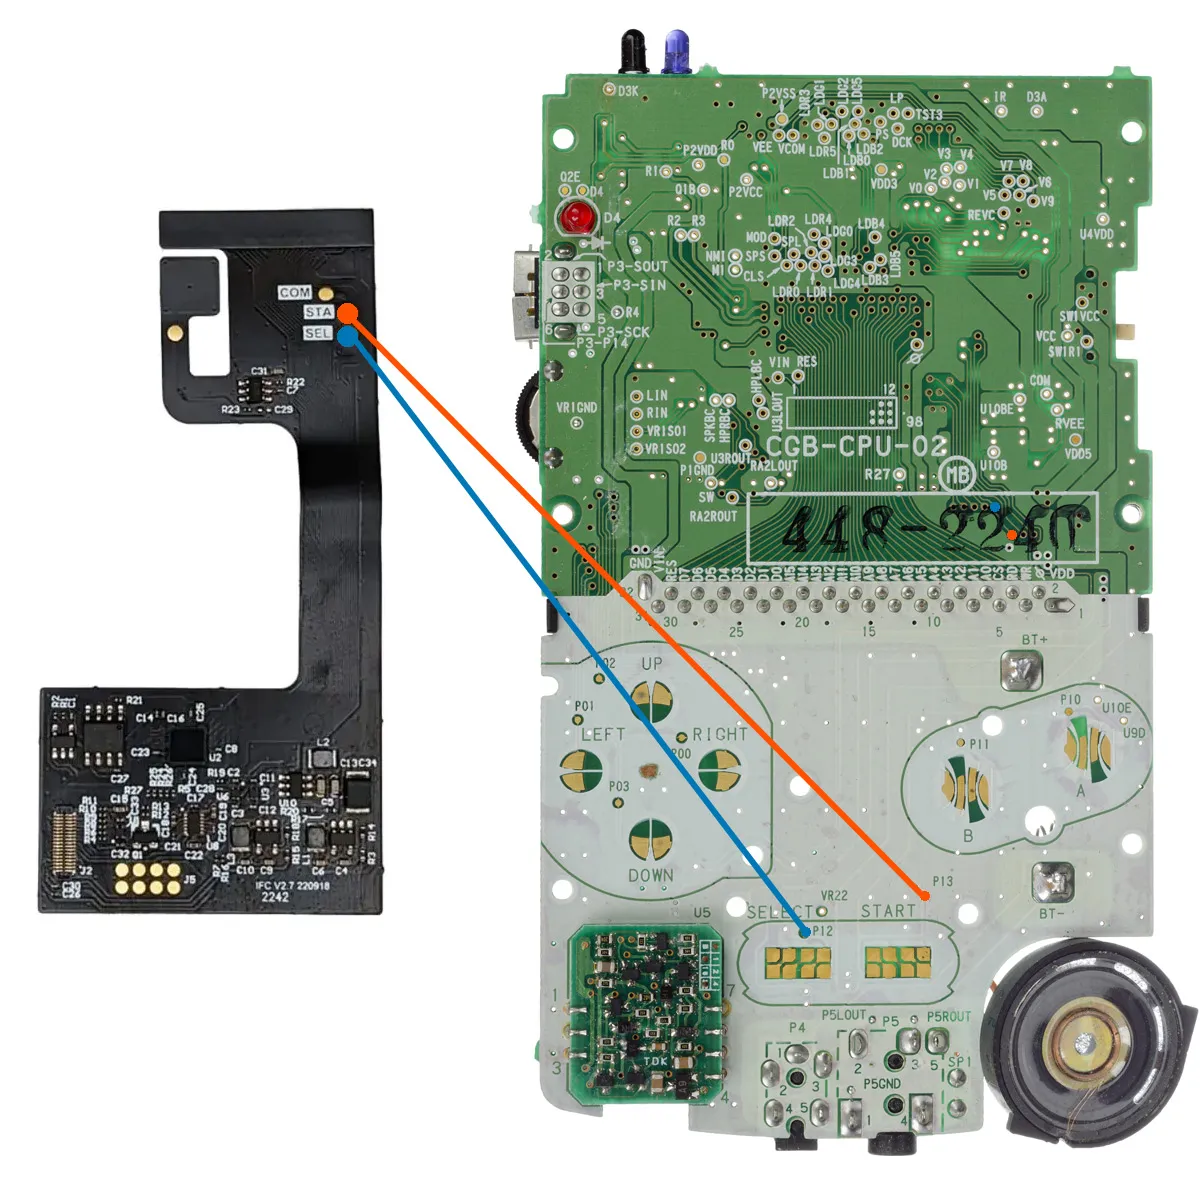
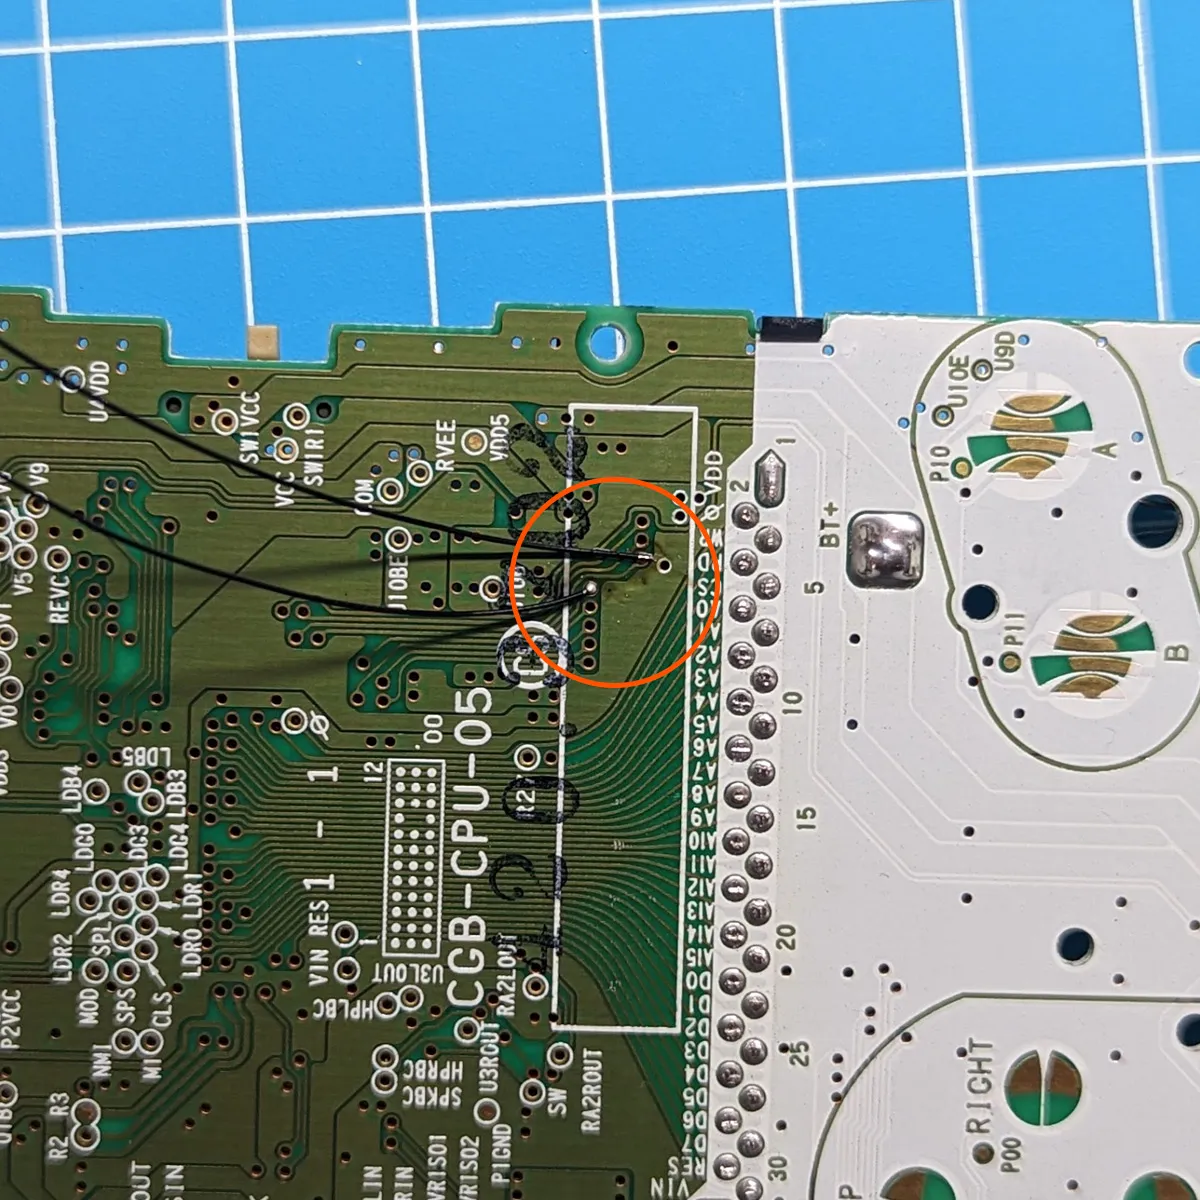
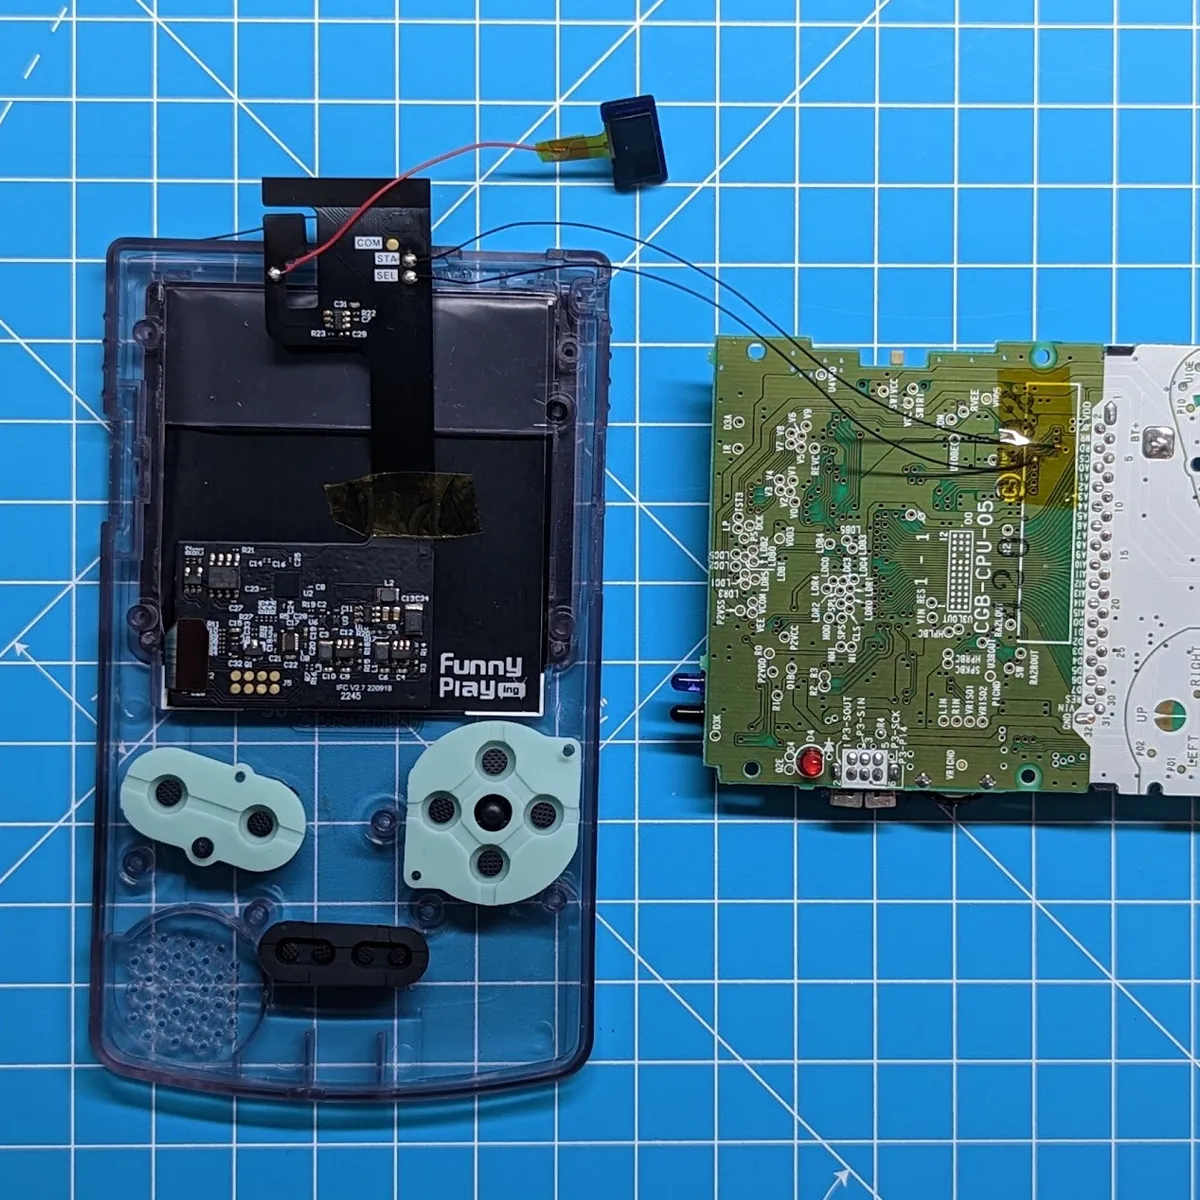
Now you can insert the buttons and pads and connect the mainboard to the ribbon cable. When inserting the mainboard, please keep the following in mind:
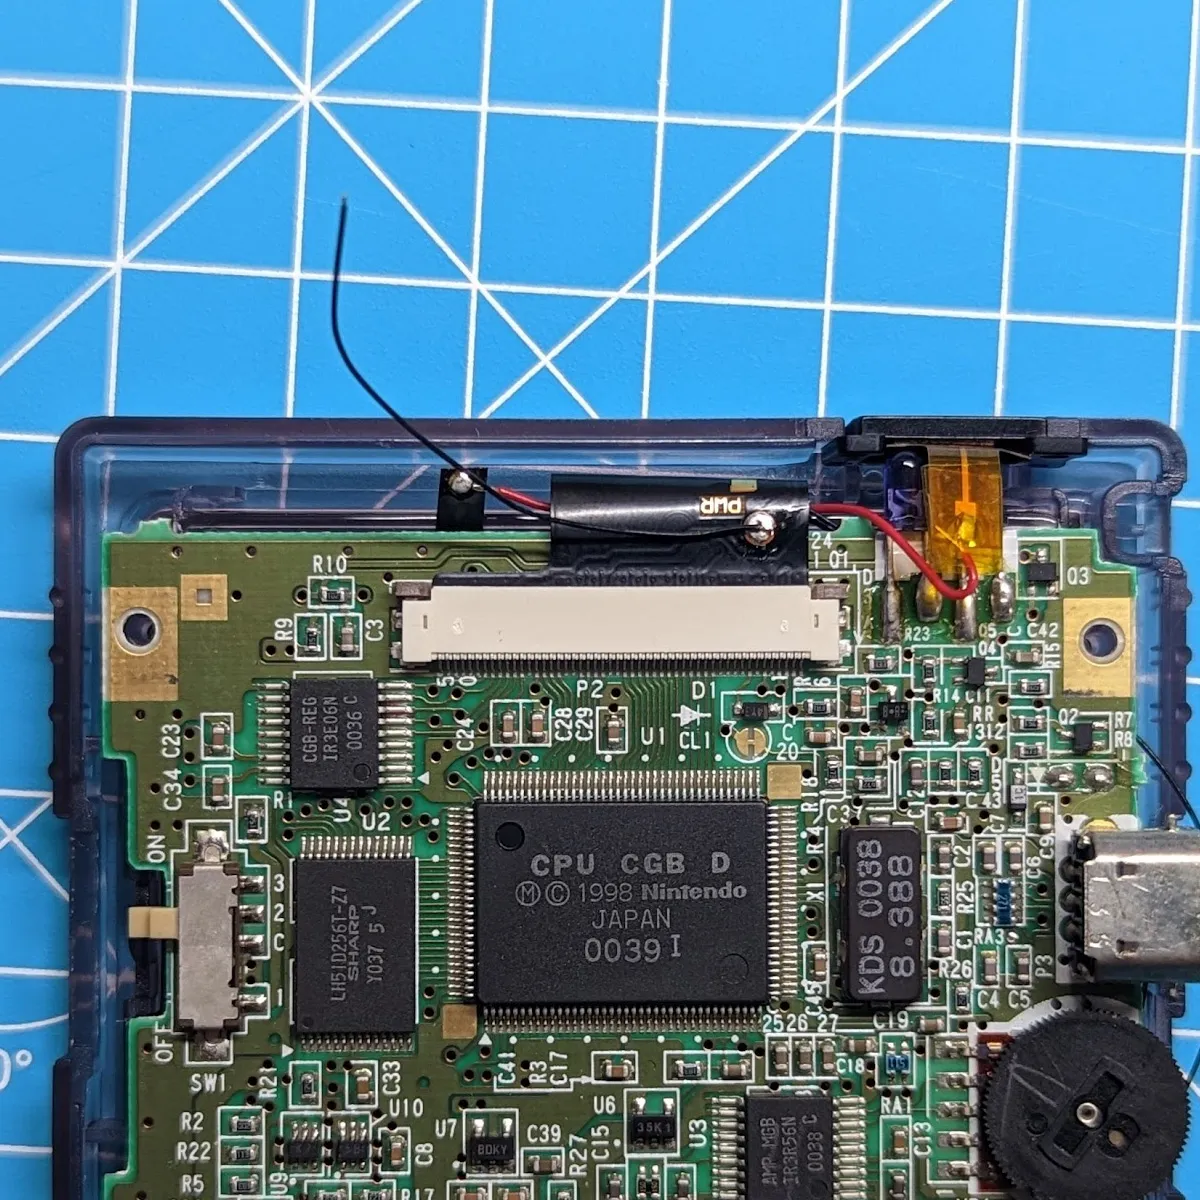
The integrated touch sensor is placed under the shell.
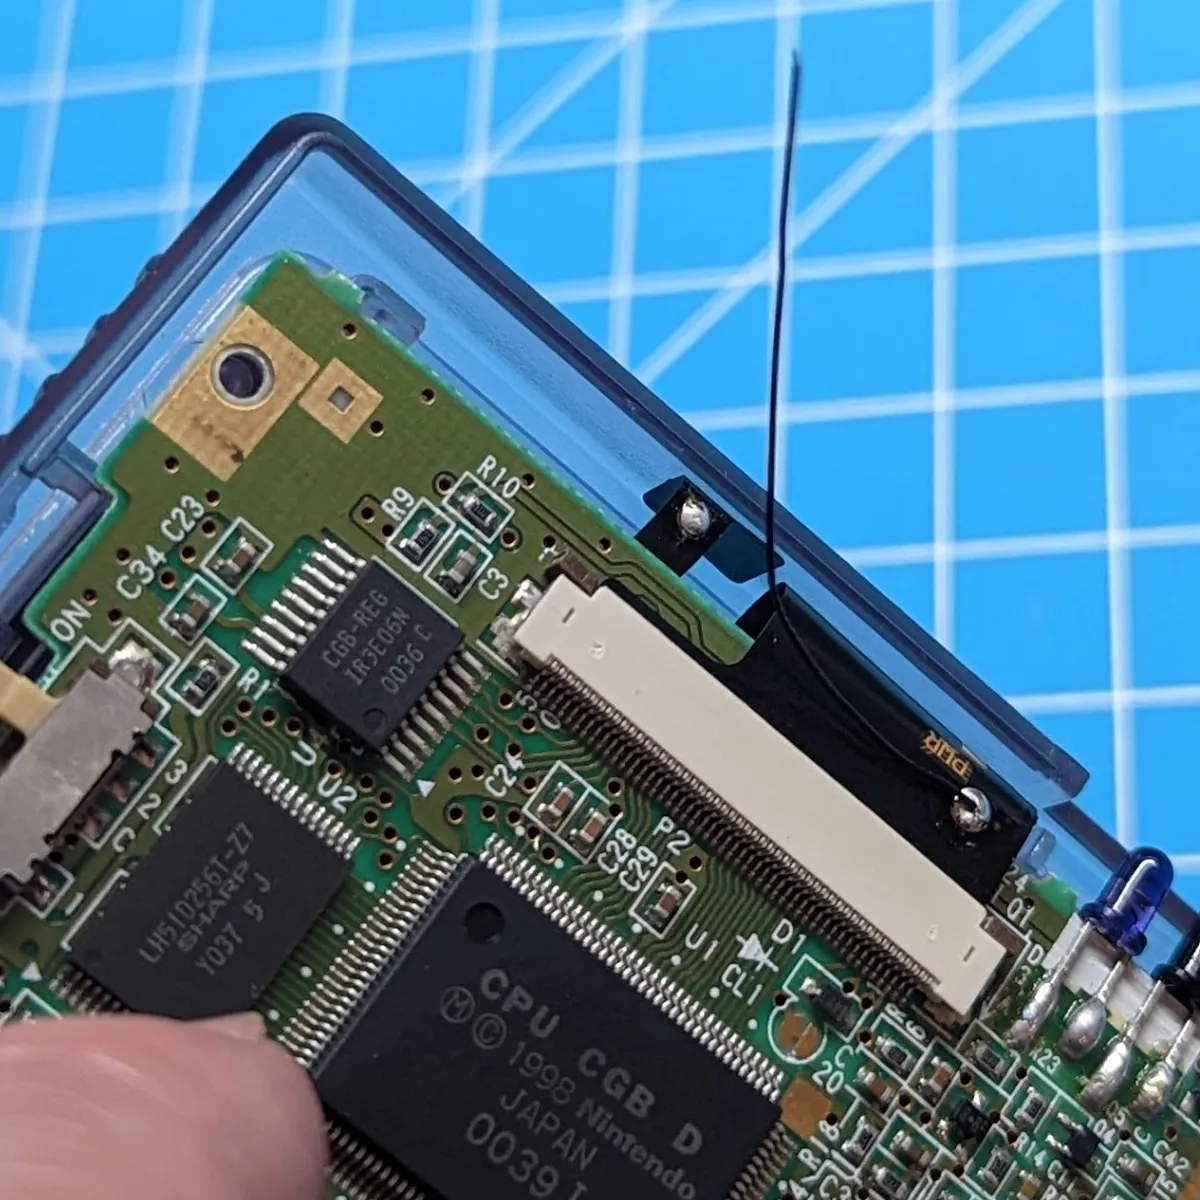
Optional: If you use the external touch sensor, you can cut off the integrated sensor with scissors above the contact. The example shows the sensor under the IR cover.
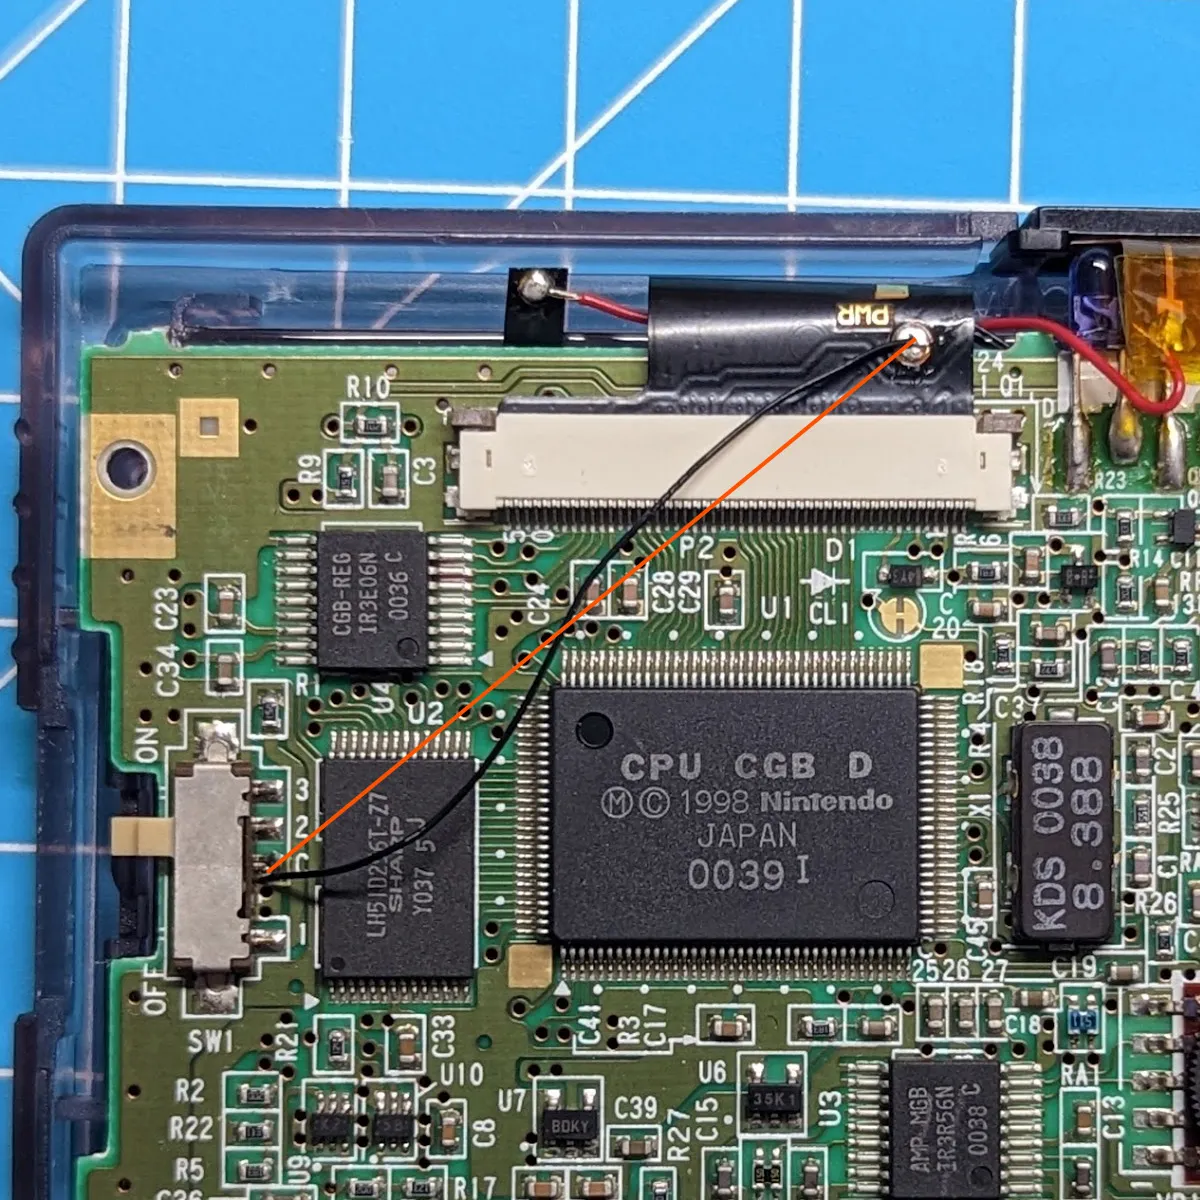
The short wire is connected to the power switch via contact “C” (3rd from the top).
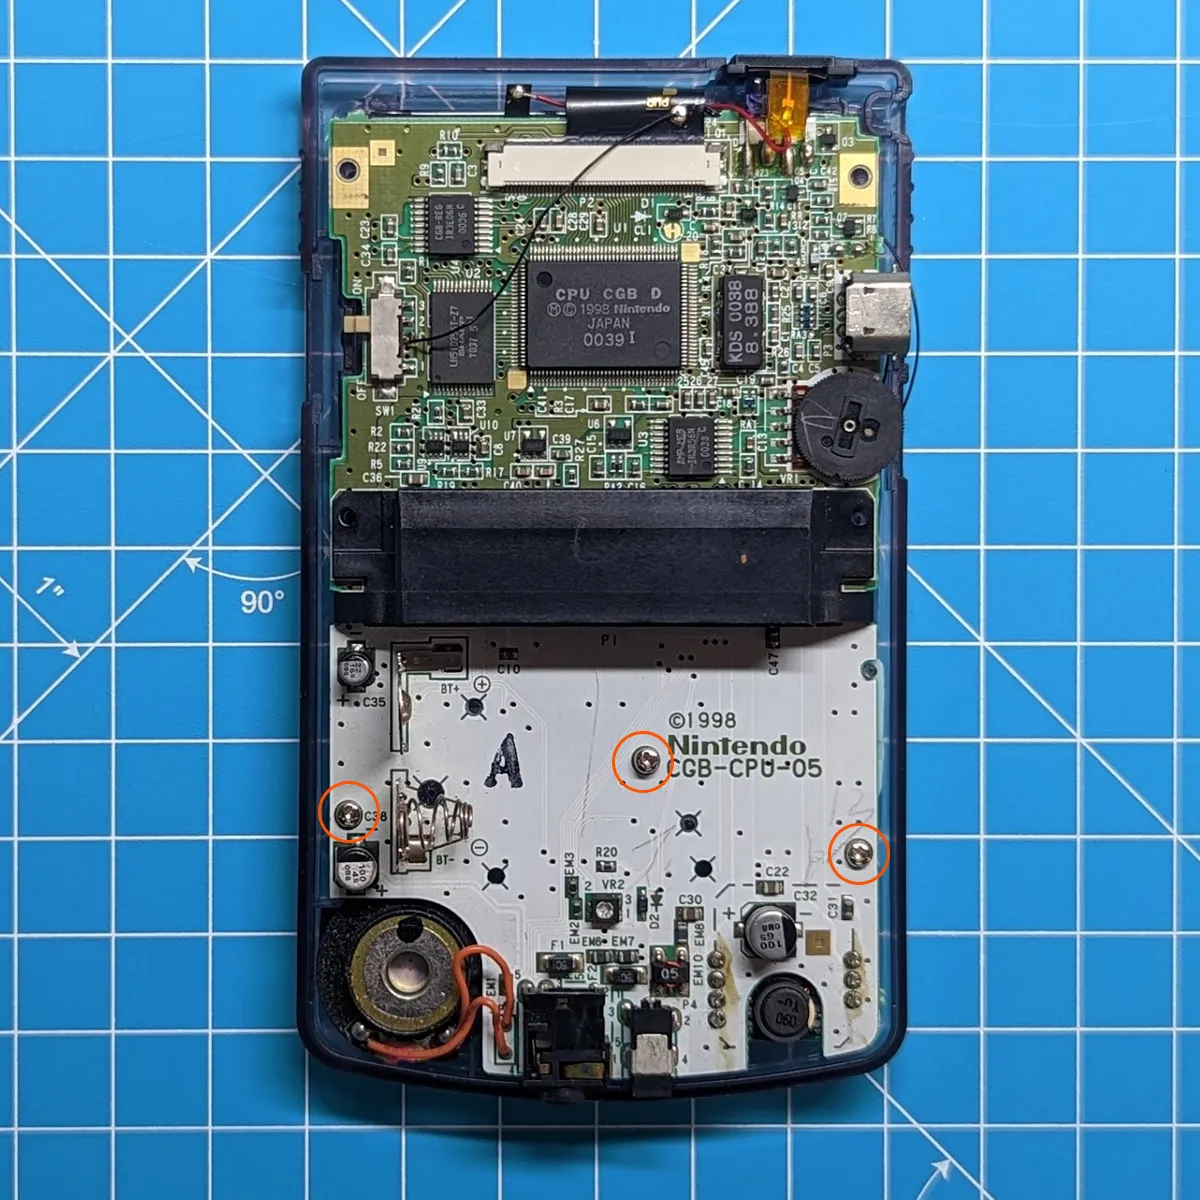
Finally, secure the mainboard with the 3 screws and screw the back of the shell back on.
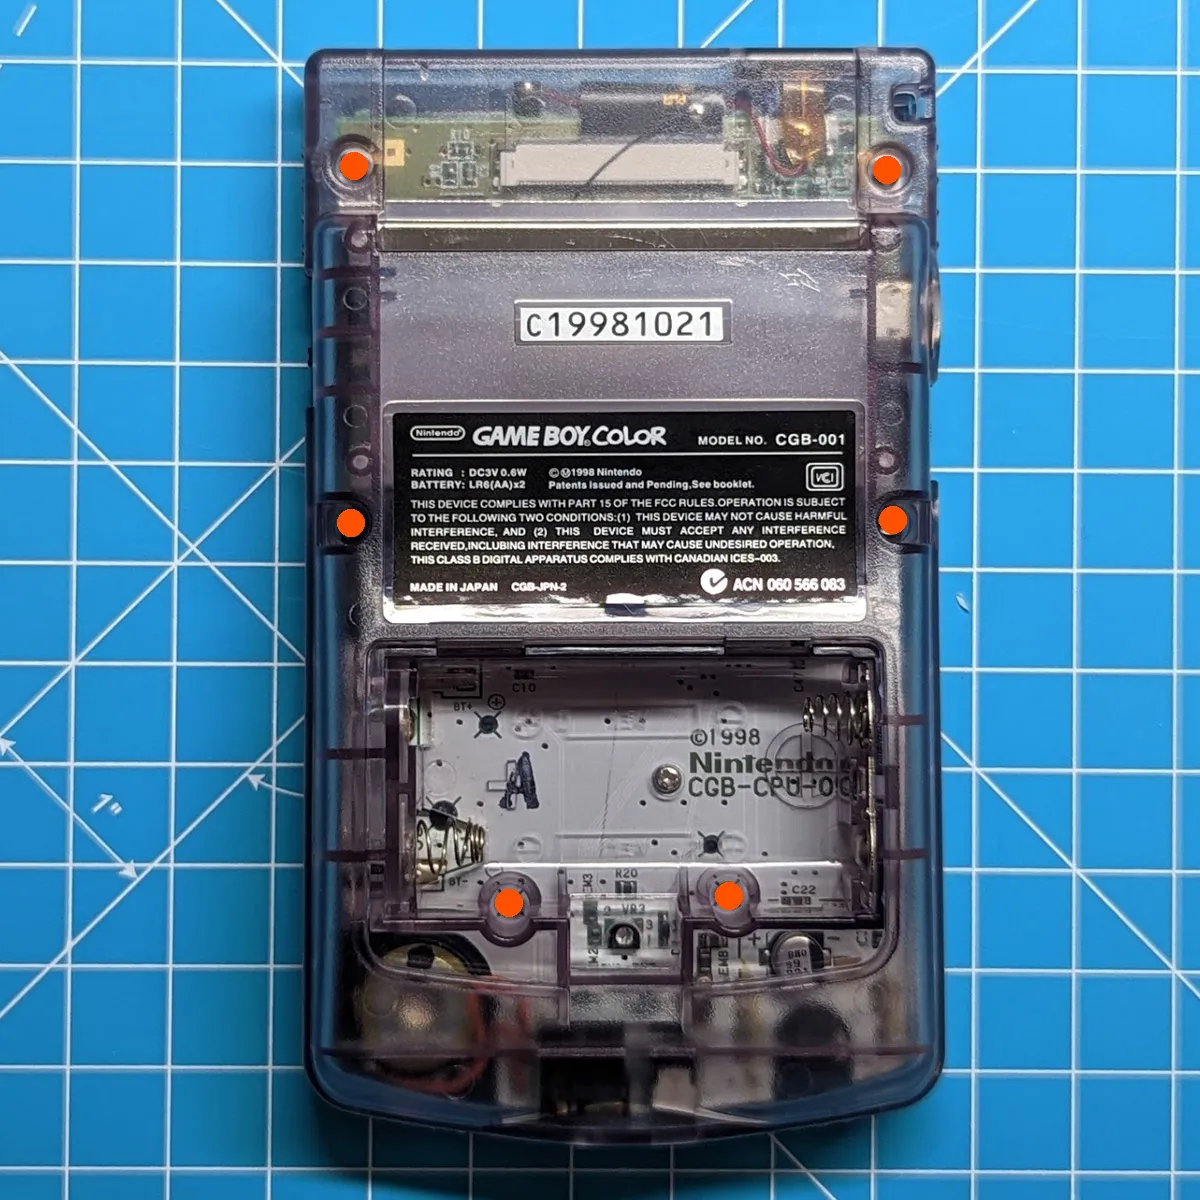
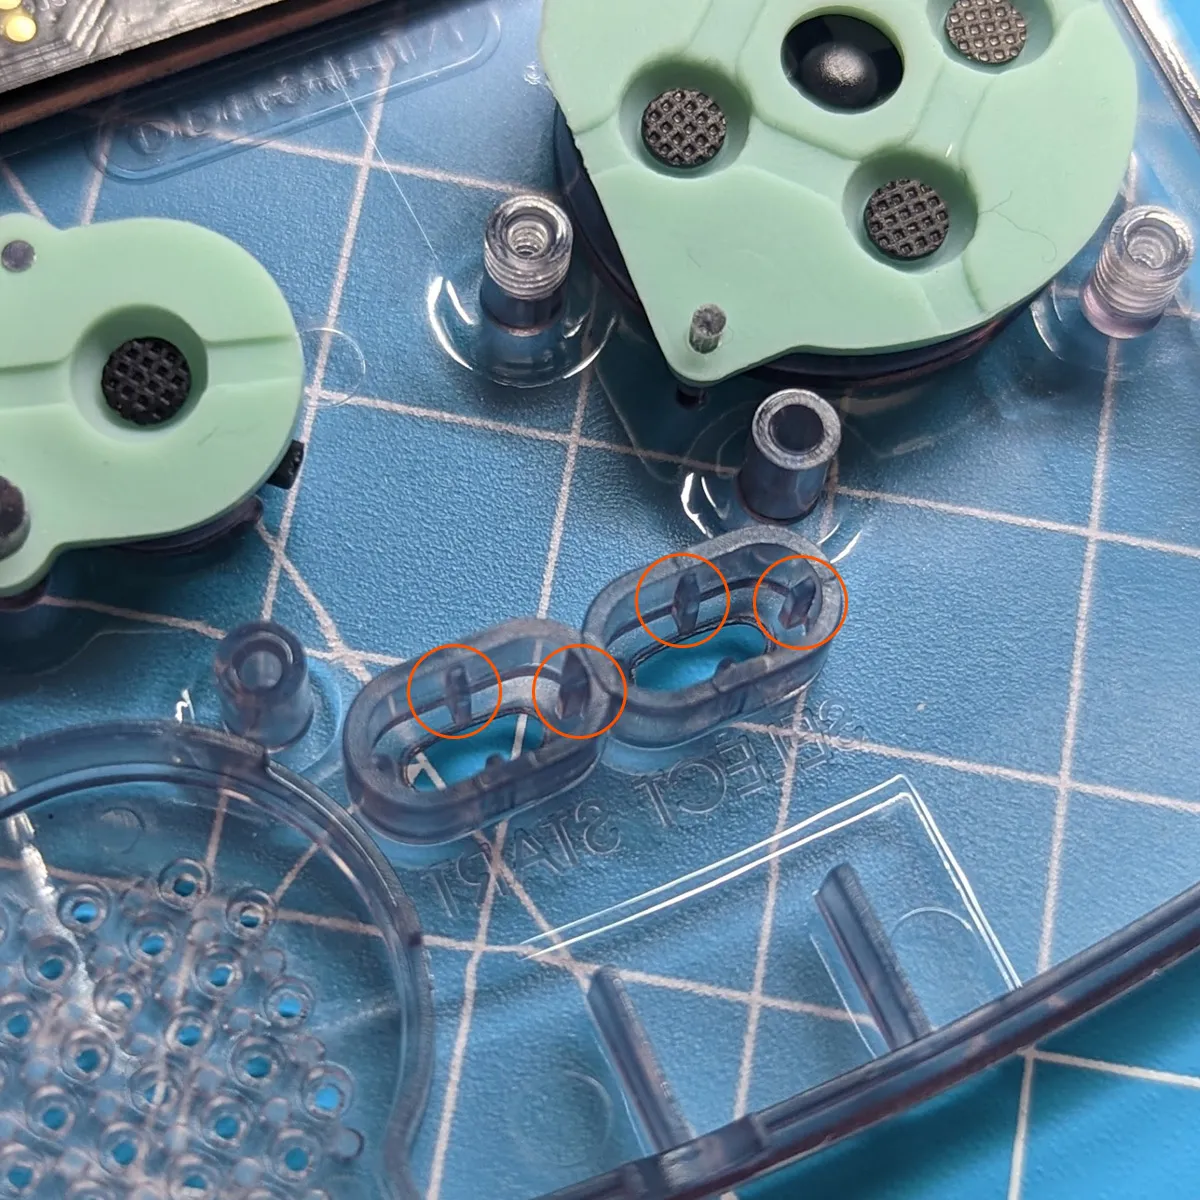
Tip: If the SELECT and START buttons are stiff or get stuck, it helps to trim the ribs inside the shell.
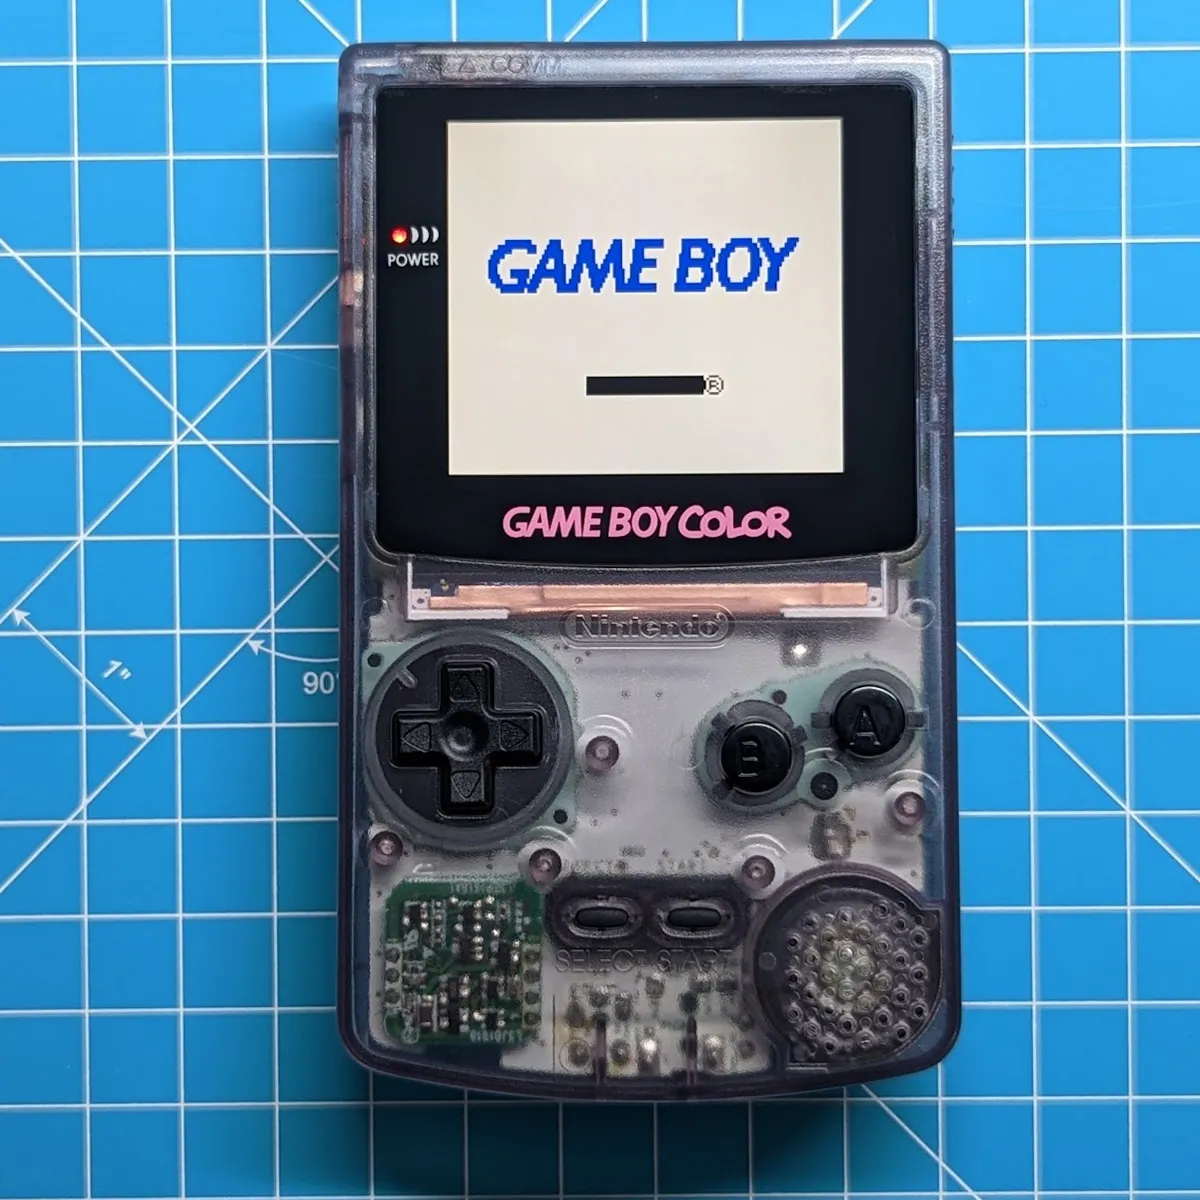
Your Game Boy Color is now ready to go
Controls
Section titled “Controls”- Hold START + SELECT together for a few seconds -> the word GAME lights up (mode 1). Here you can use START and SELECT to shift the image up/down
- Tap the touch sensor to activate mode 2 -> the word BOY lights up. Use START and SELECT to shift the image left/right
- Tap the touch sensor again to activate mode 3, now COLOR lights up. Use START and SELECT to cycle through the different colors
- Hold START + SELECT again for a few seconds to confirm and exit
- To switch between the different RetroPixel modes, tap and hold the touch sensor for a few seconds
Pixel effects
Section titled “Pixel effects”The kit offers 5 different display effects
- Full pixel mode (highest brightness, strong colors)
- Classic GBC look (imitates the original Game Boy Color LCD)
- Classic RGB look (like mode 2 with smaller pixel spacing, slightly darker image)
- RGB display (closest to the original LCD, brightness is rather low)
- Scan lines (imitates the display effect of the Game Boy Classic DMG-01)
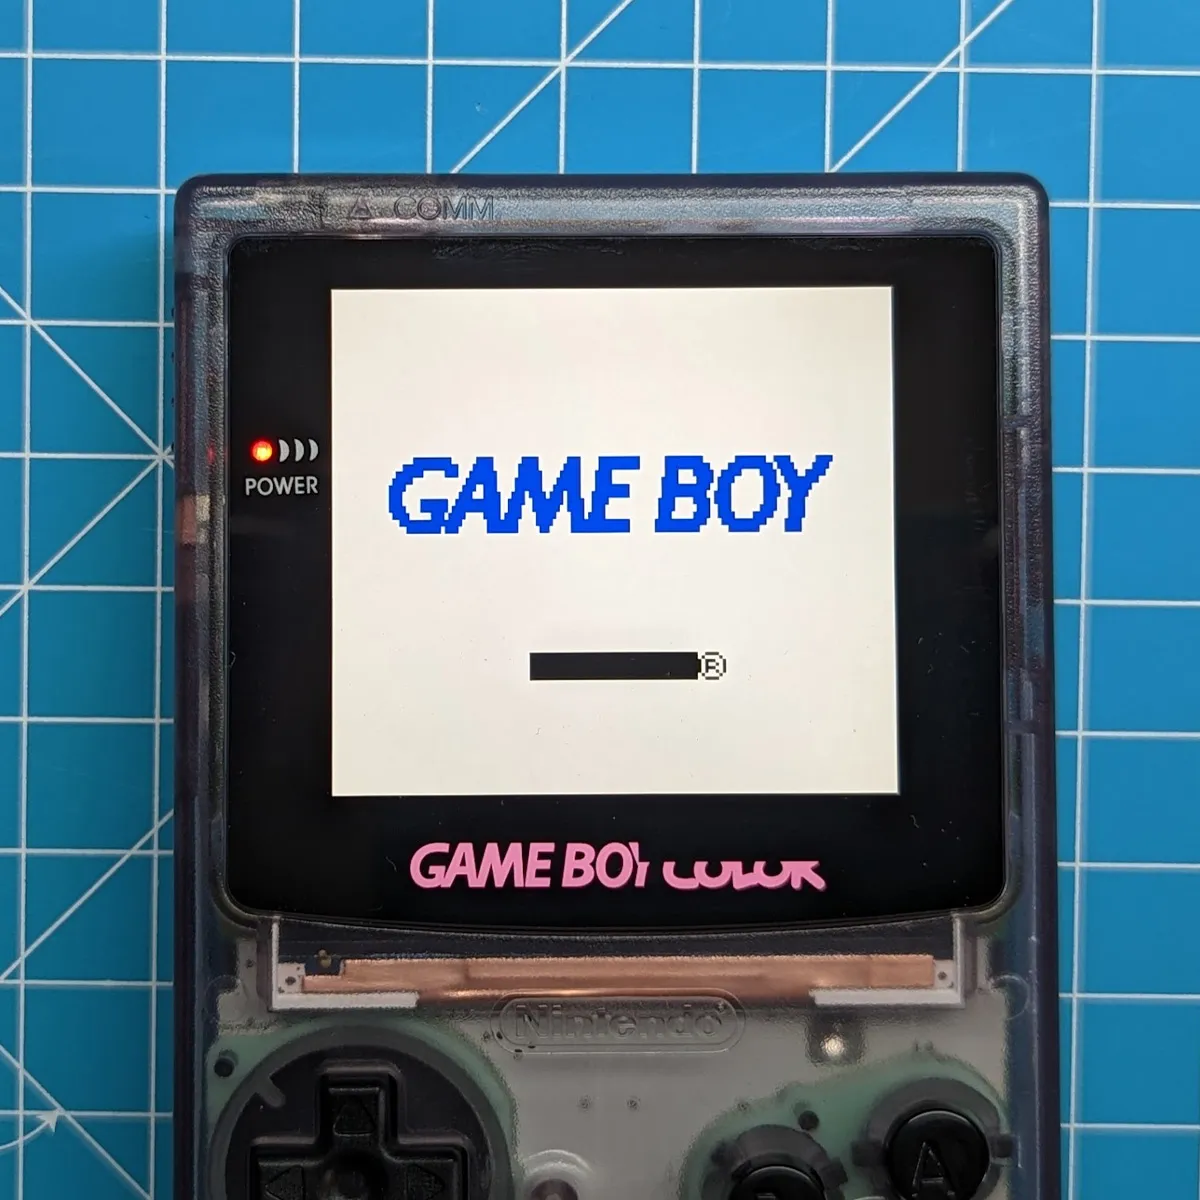
Tip: If the logo is lit incorrectly, simply hold START + SELECT for 5 seconds. Repeat if necessary until the logo is displayed correctly again.
Buy the GBC FunnyPlaying Retro Pixel 2.0 Laminated Kit at silentmodding.com