
[GBASP] RS CleanAmp Universal
The CleanAmp replaces the original audio board with a modern and much louder Class-D amplifier. It can be used universally in all handheld consoles of the Nintendo Game Boy series.
Installation
Section titled “Installation”Always start by checking whether the sound works at all. The most common cause of missing sound is a defective speaker. The test isn’t strictly required (your speaker may be dead), but if your console works first, that’s a good sign.
Opening the console
Section titled “Opening the console”- You’ll need a tri-point and, where needed, a JIS screwdriver. Undo the battery cover screw and remove the cover and battery.
- Remove the 6 visible screws around the edge of the console and lift off the back shell.
- Remove the 3 screws from the mainboard (one in the center, two below the cartridge connector). Gently lift the mainboard from the bottom, tilting it up, as the screen is still attached.
- Before lifting the board out, push the tabs on both sides of the ribbon connector at the top towards the top of the shell. This releases the ribbon cable so you can pull it out, leaving the screen in the shell. Now remove the circuit board.
- Lift the old speaker out of the front shell.
Installing the CleanAmp
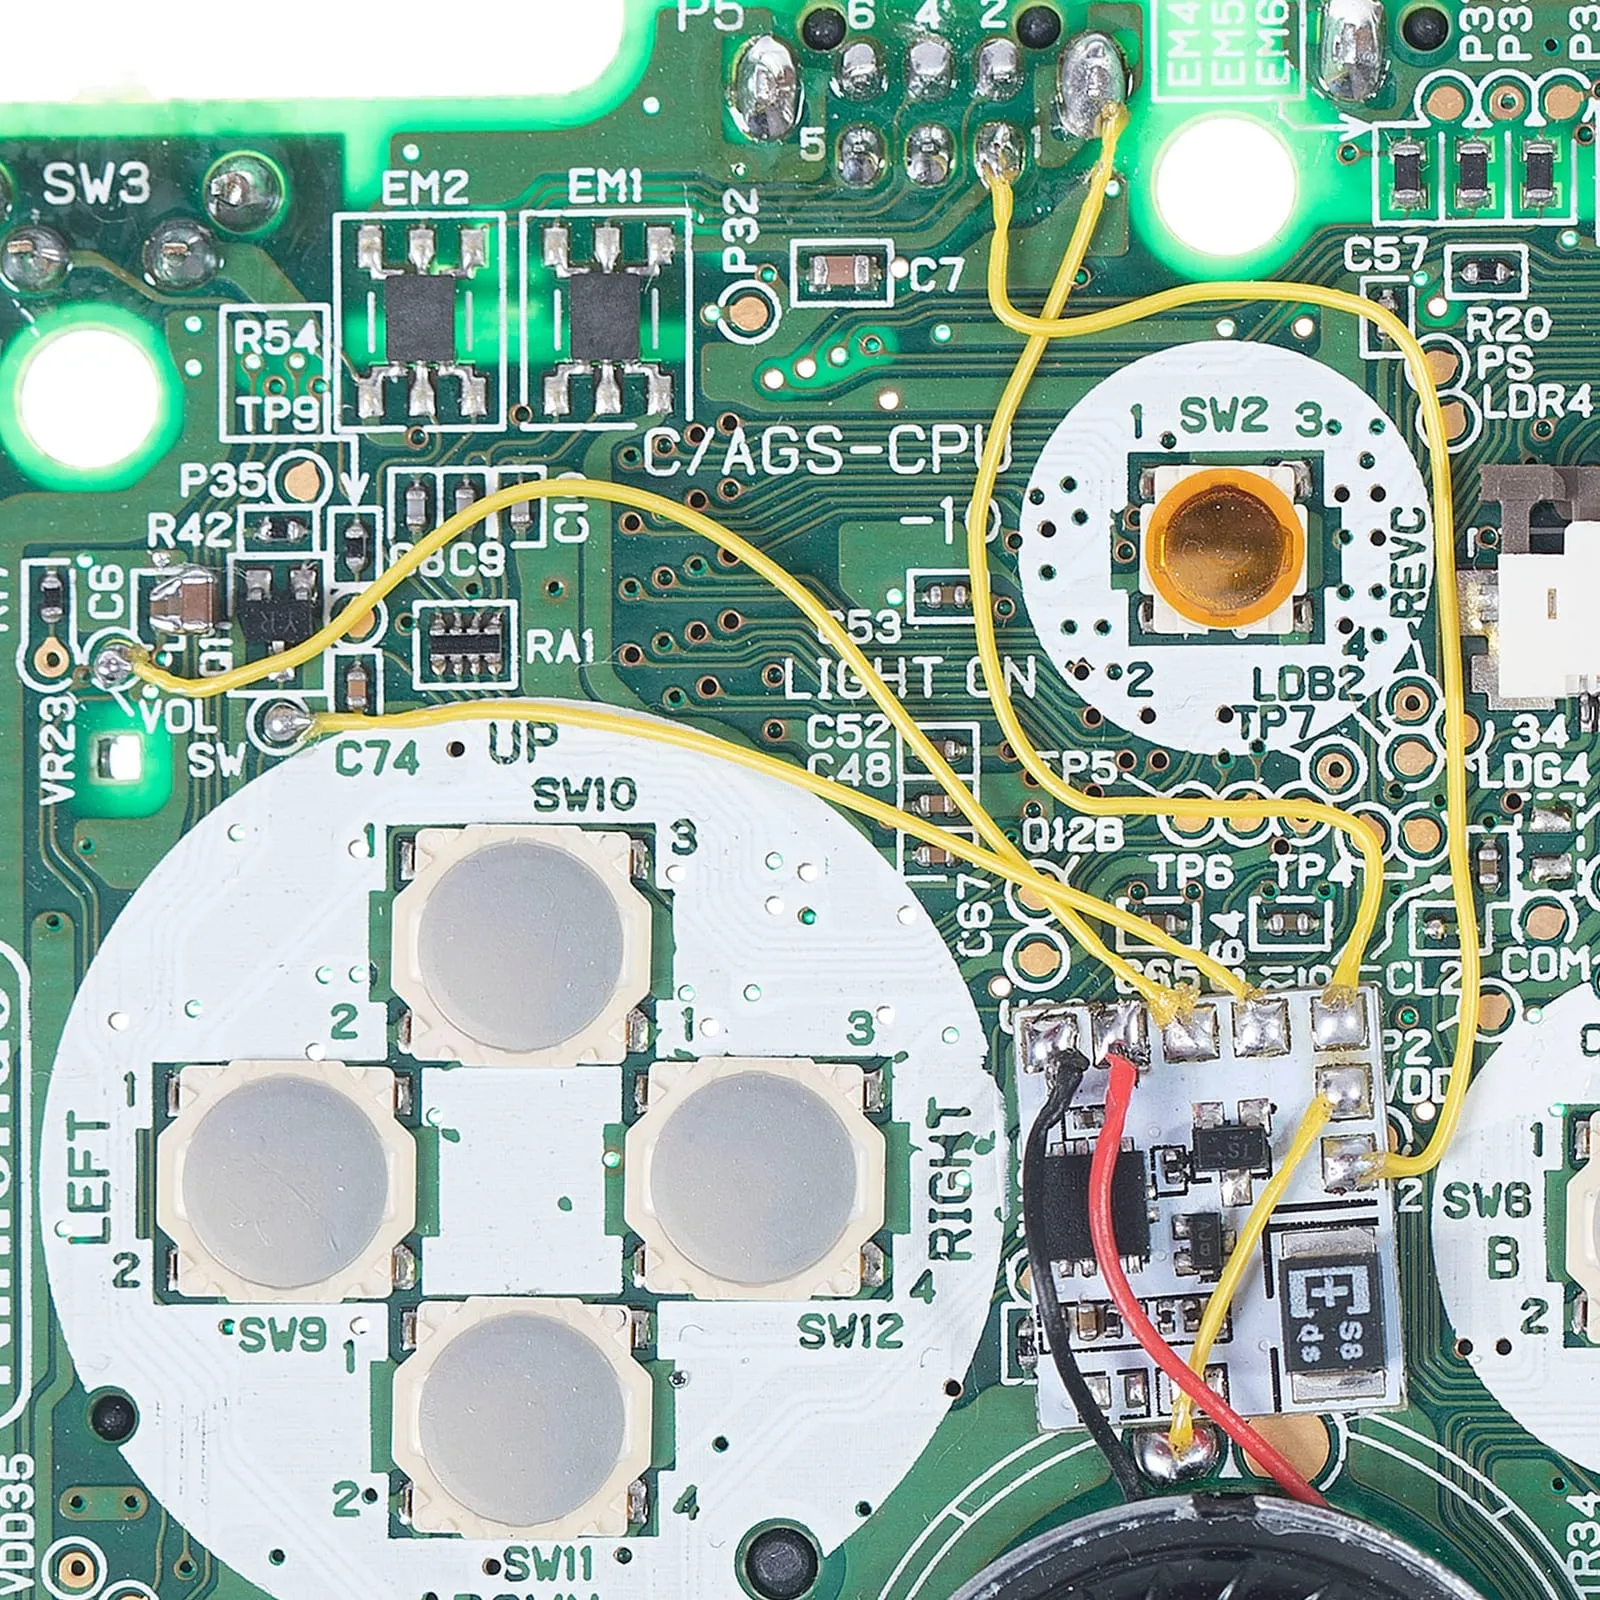
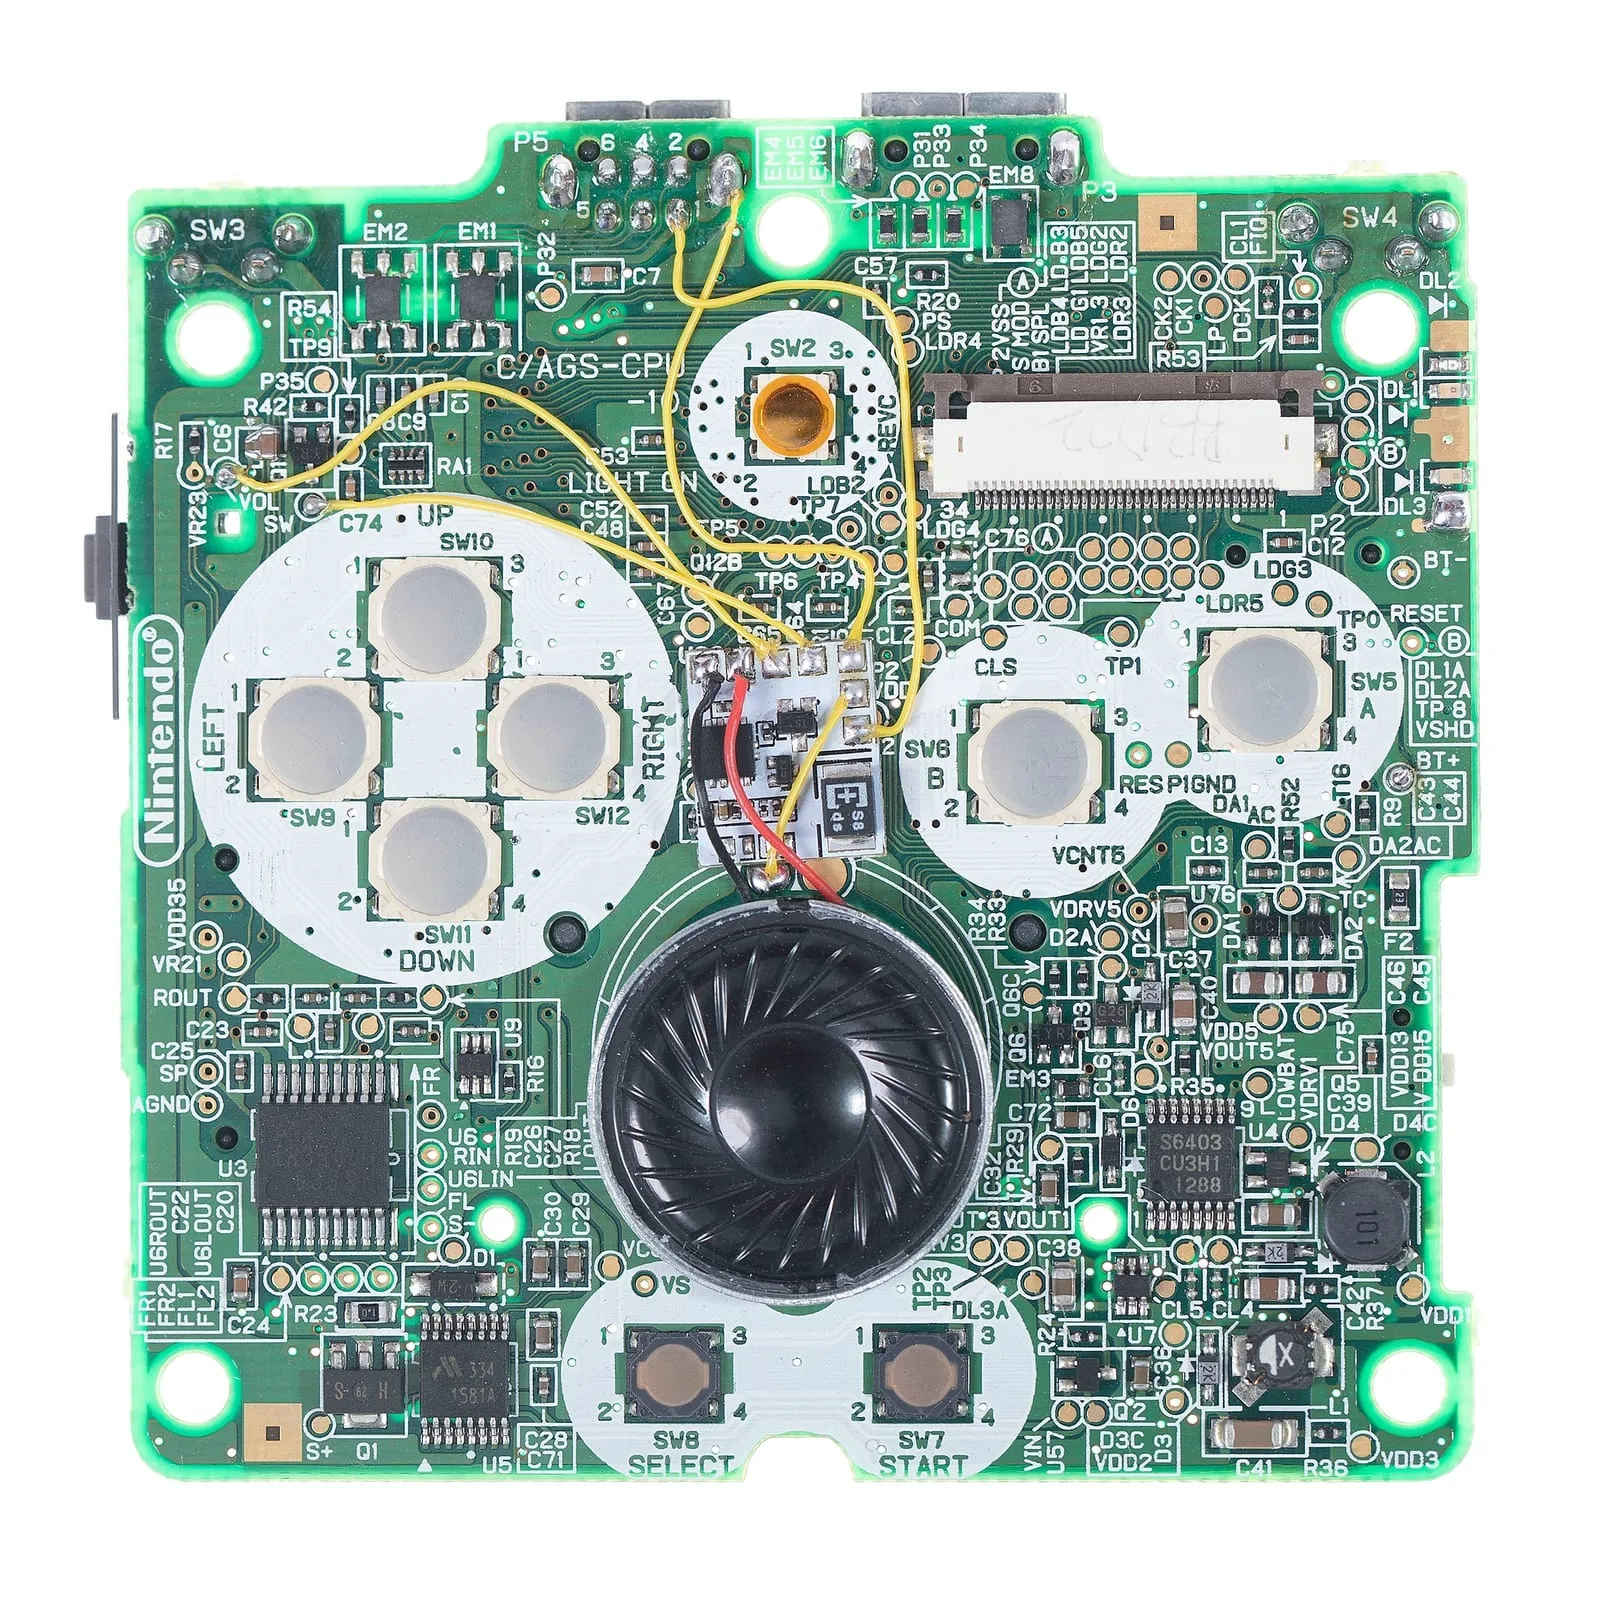
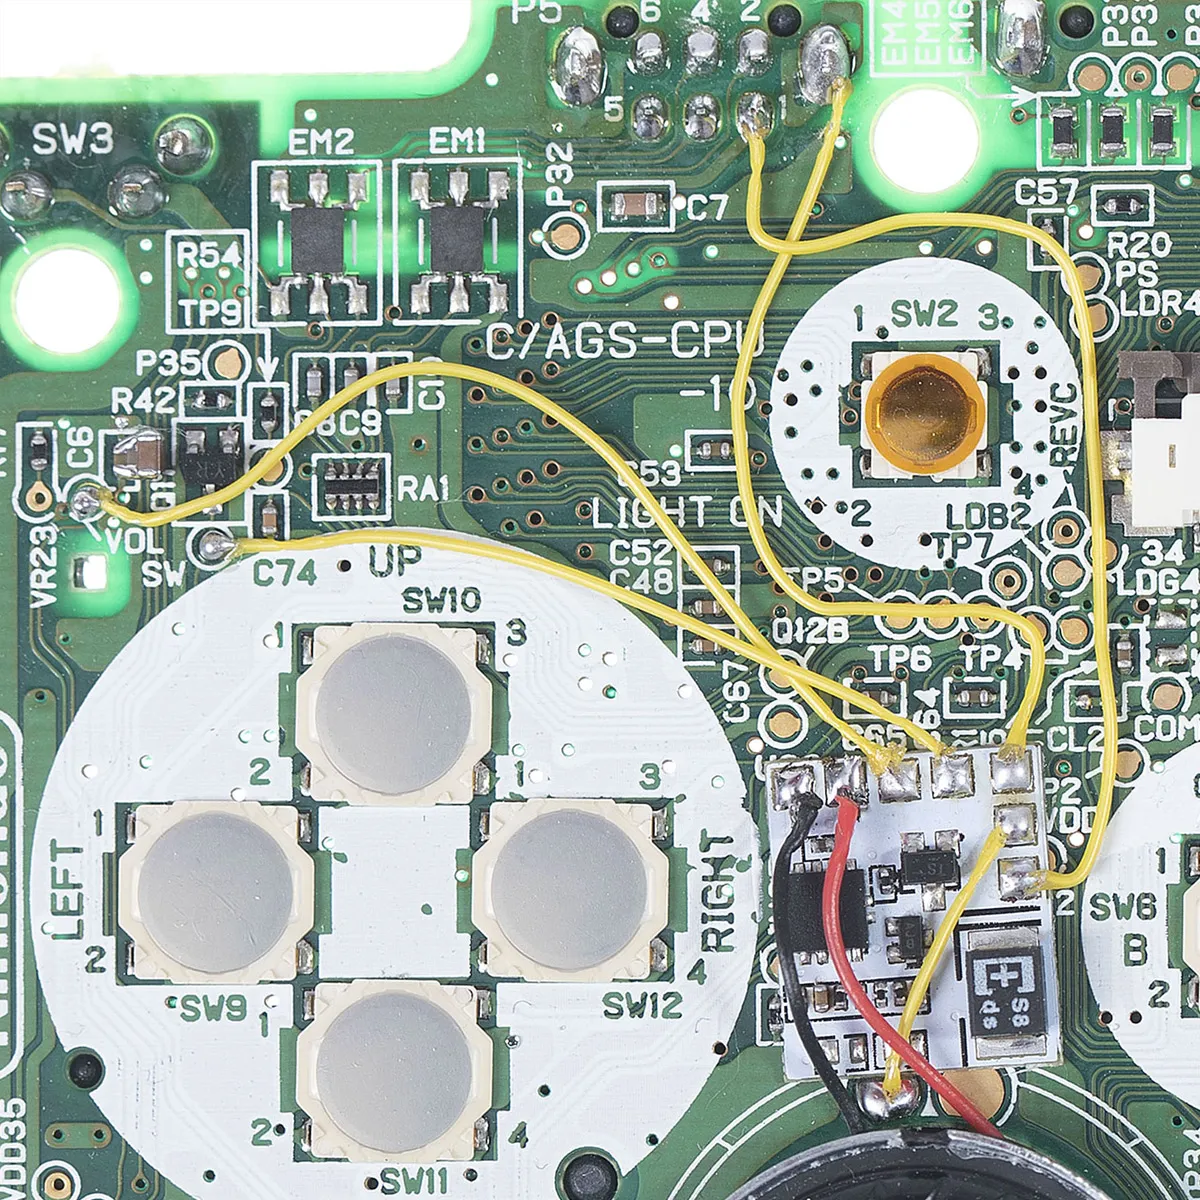
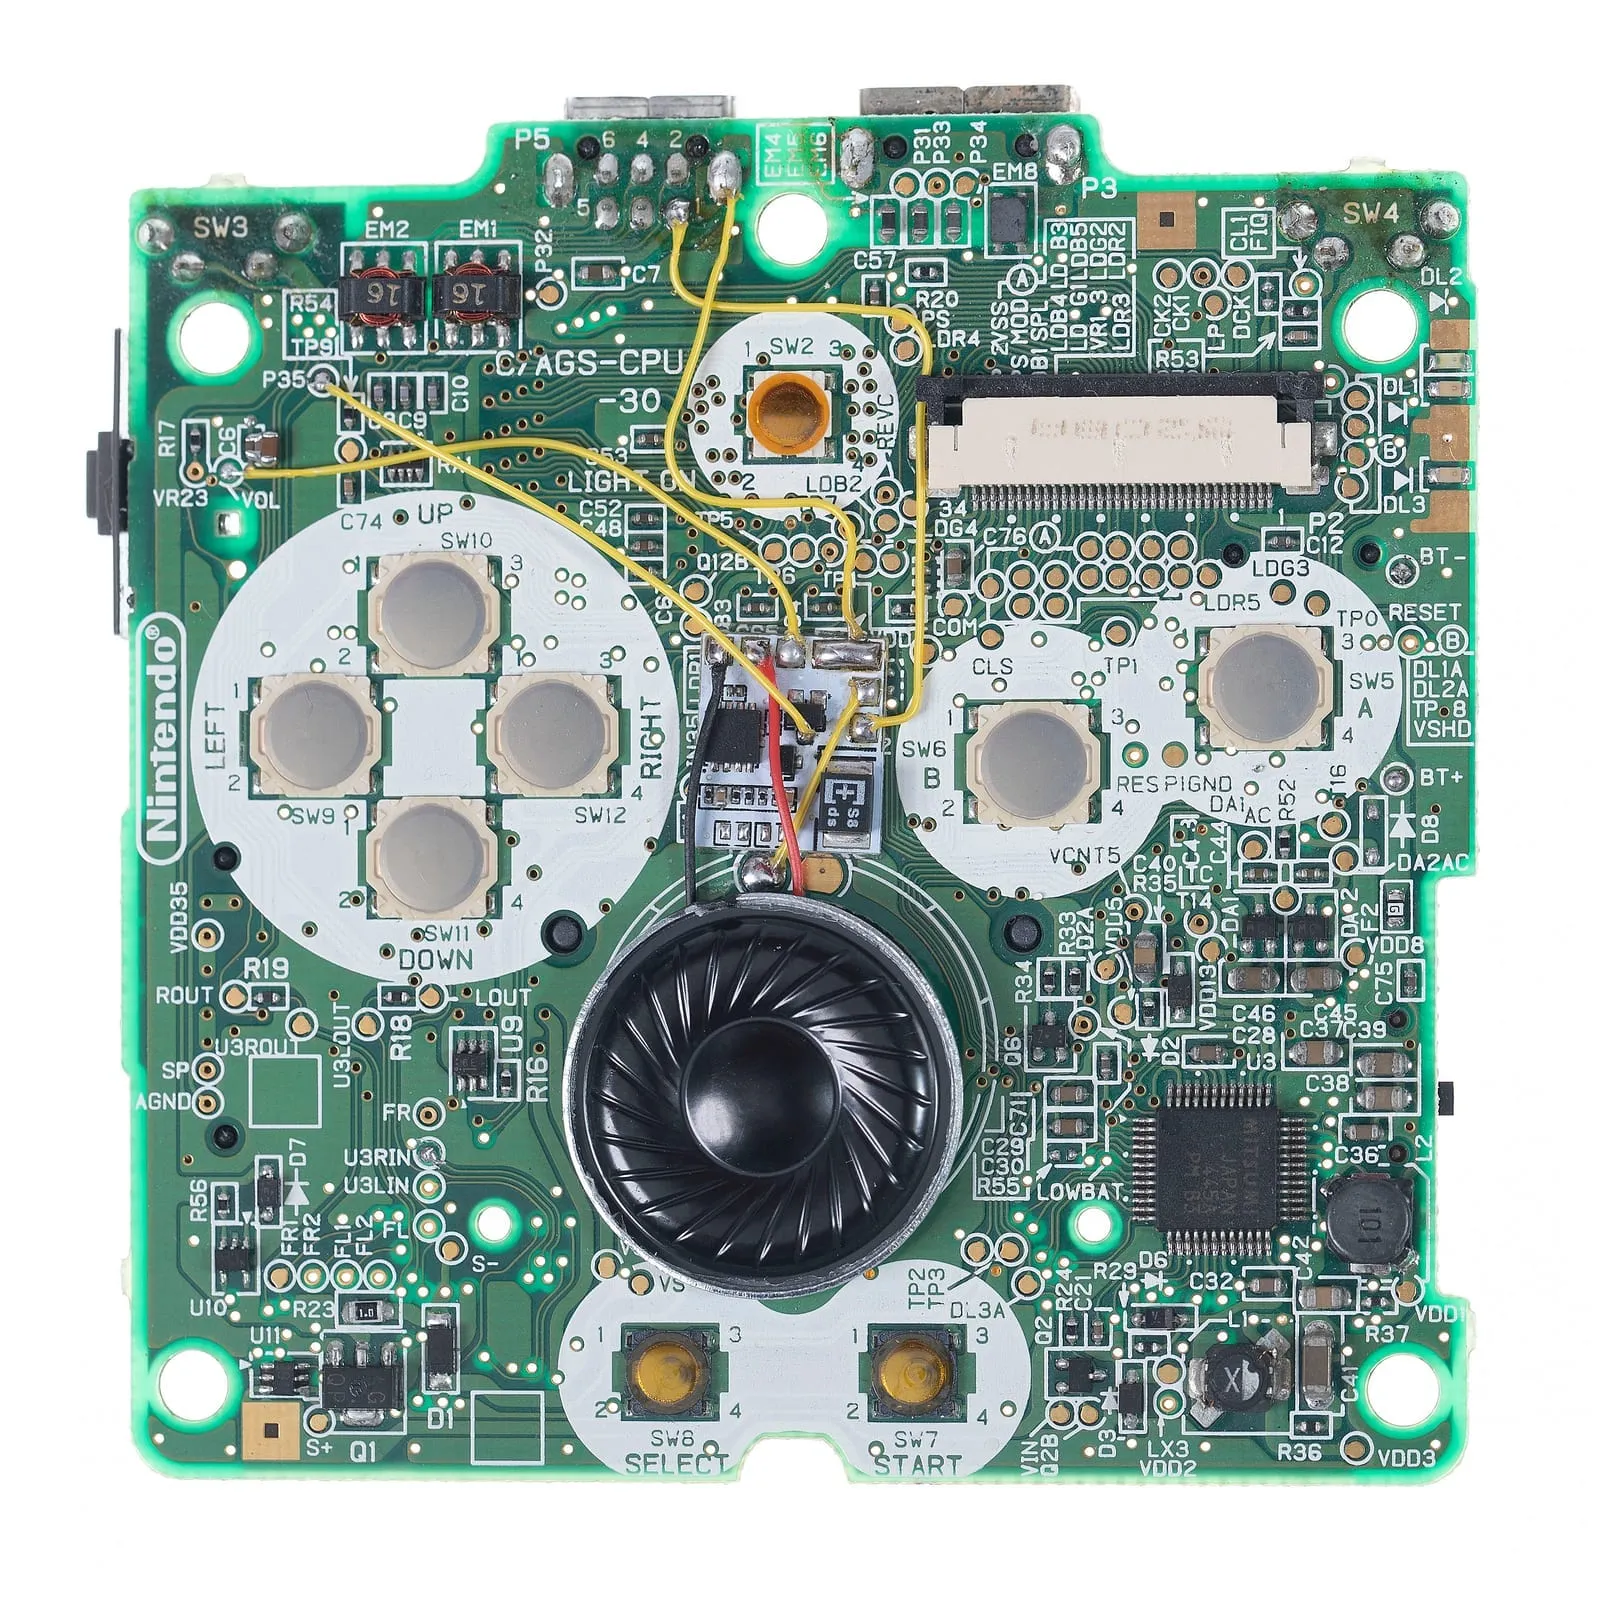
Section titled “Installing the CleanAmp”The best spot for the CleanAmp in the Game Boy Advance SP is above the speaker position (see pictures). Fix the board to the GBA-SP mainboard with some double-sided tape. The position matters so that the speaker and shell don’t press on the CleanAmp and the shell still closes.
To make room for the CleanAmp board, the shell has to be trimmed a little at the spot shown, using a utility knife, side cutters or a trim tool.
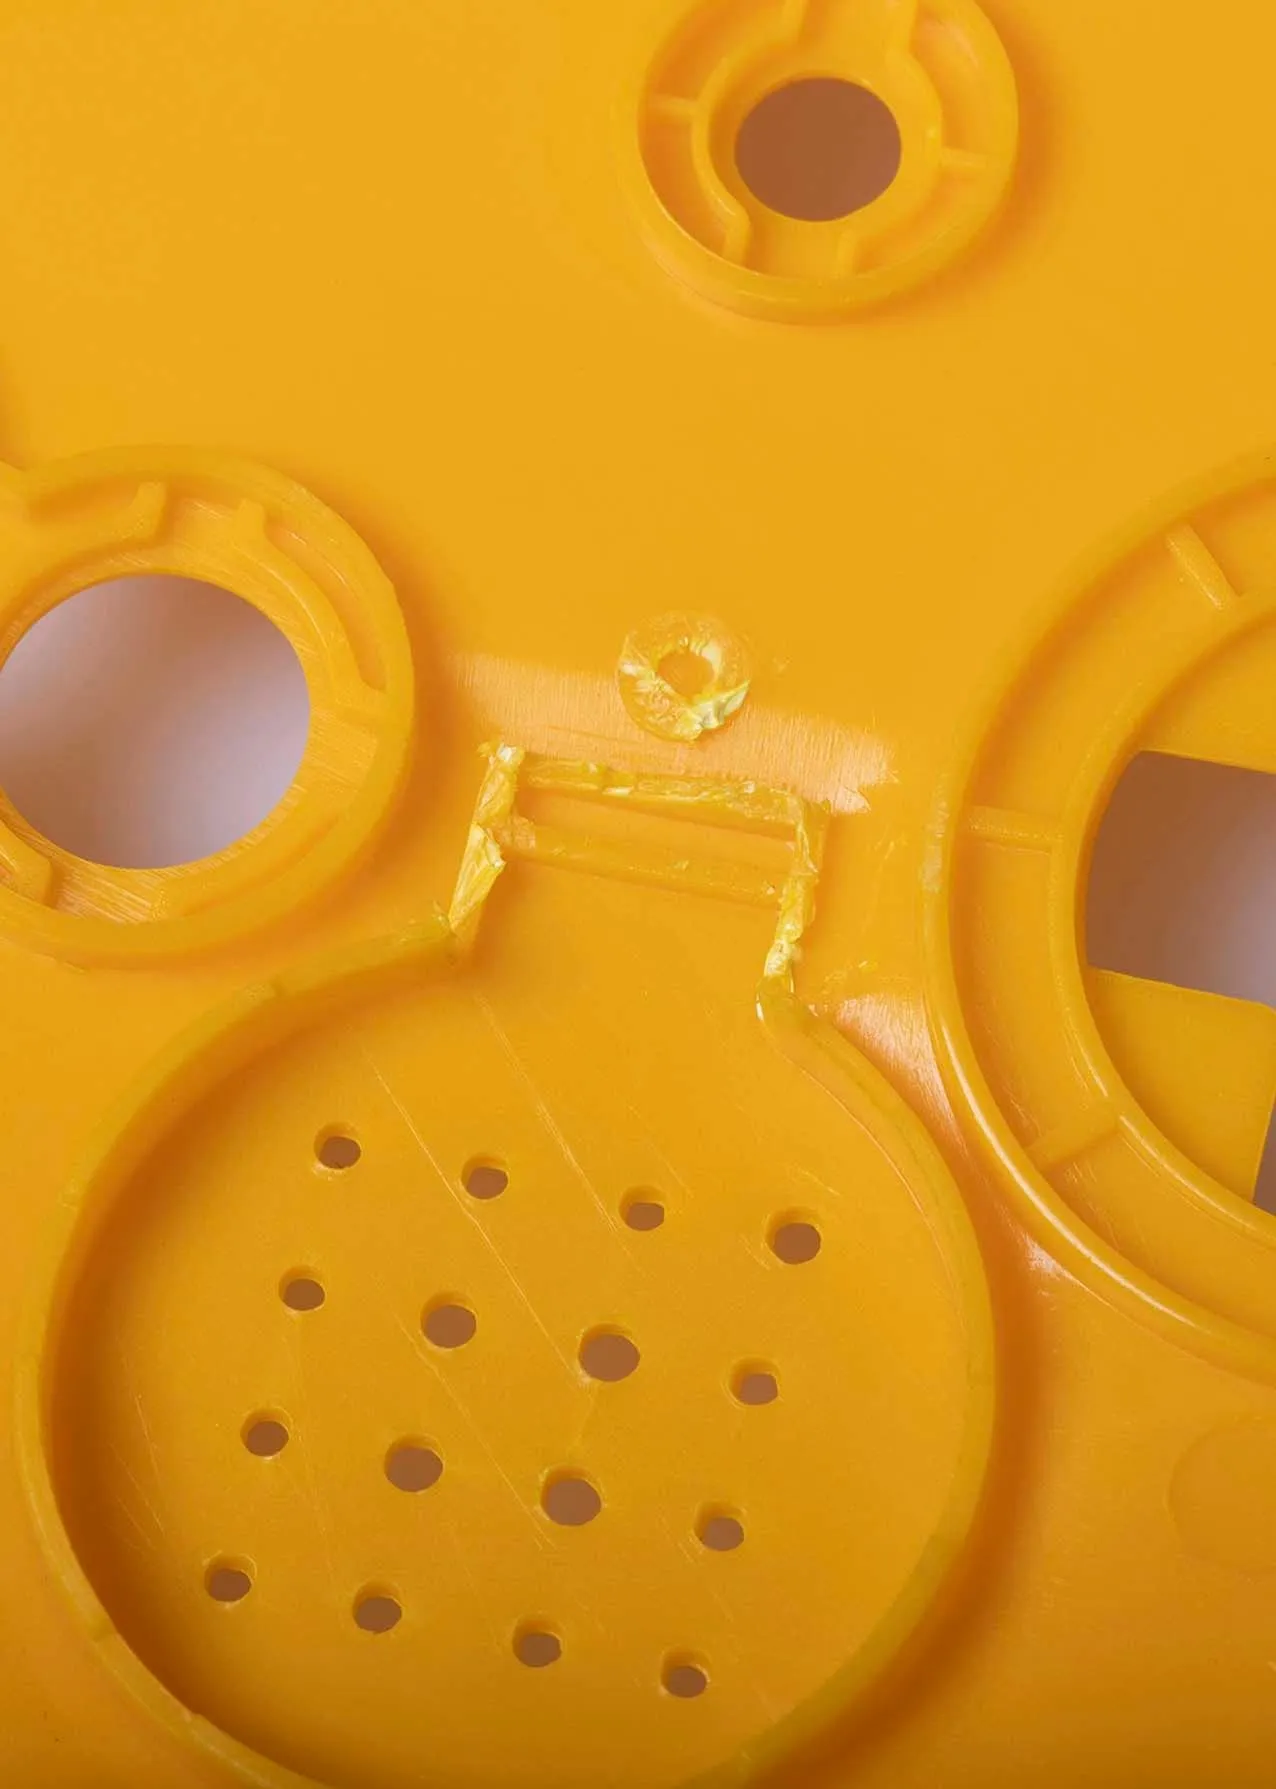
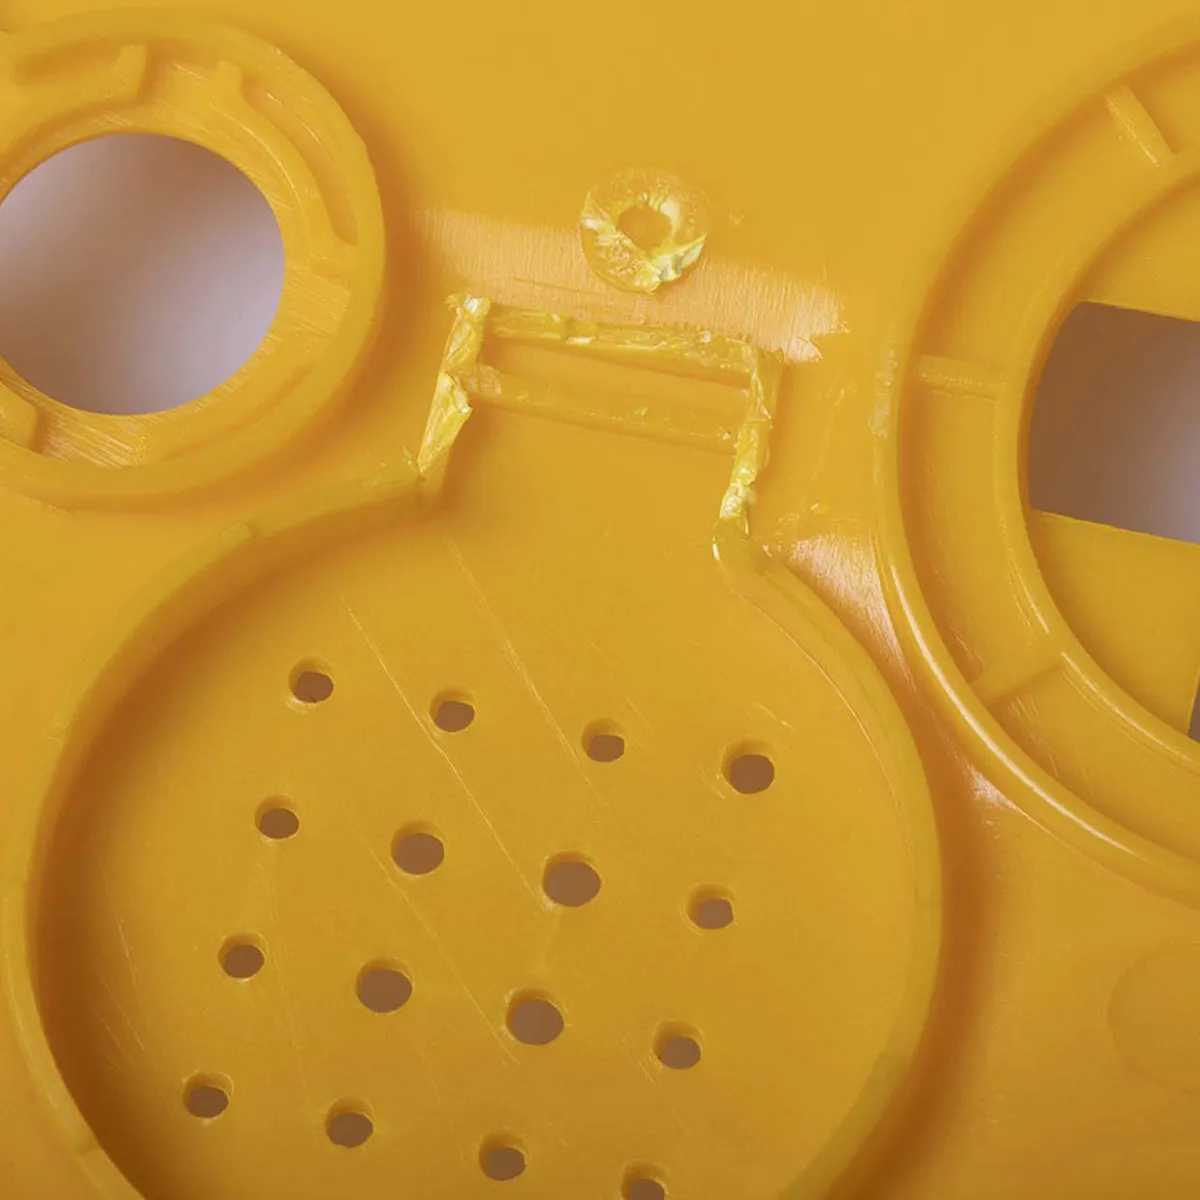
Use a sharp knife or side cutters to trim/peel off the plastic rim around the speaker to reduce its height. Otherwise the speaker presses on the shell and it won’t close properly.
Wire it up with thin Kynar/wrapping wire (30 AWG or 28 AWG); pretty much any insulated wire works, as long as it isn’t too thick and doesn’t block parts during reassembly. Cut the wires to length and solder the points on the Game Boy Advance SP to the pads on the CleanAmp as shown.
When soldering the CleanAmp pads, be careful not to short pads together or knock off the resistors or capacitors next to them.
Solder the two wires on the top left of the CleanAmp to the outer two pads of the speaker. Polarity doesn’t matter.
Even louder
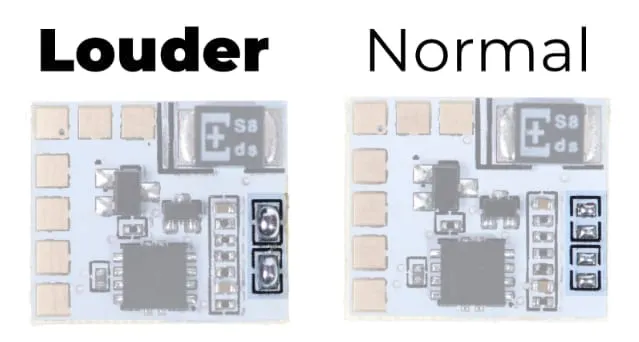
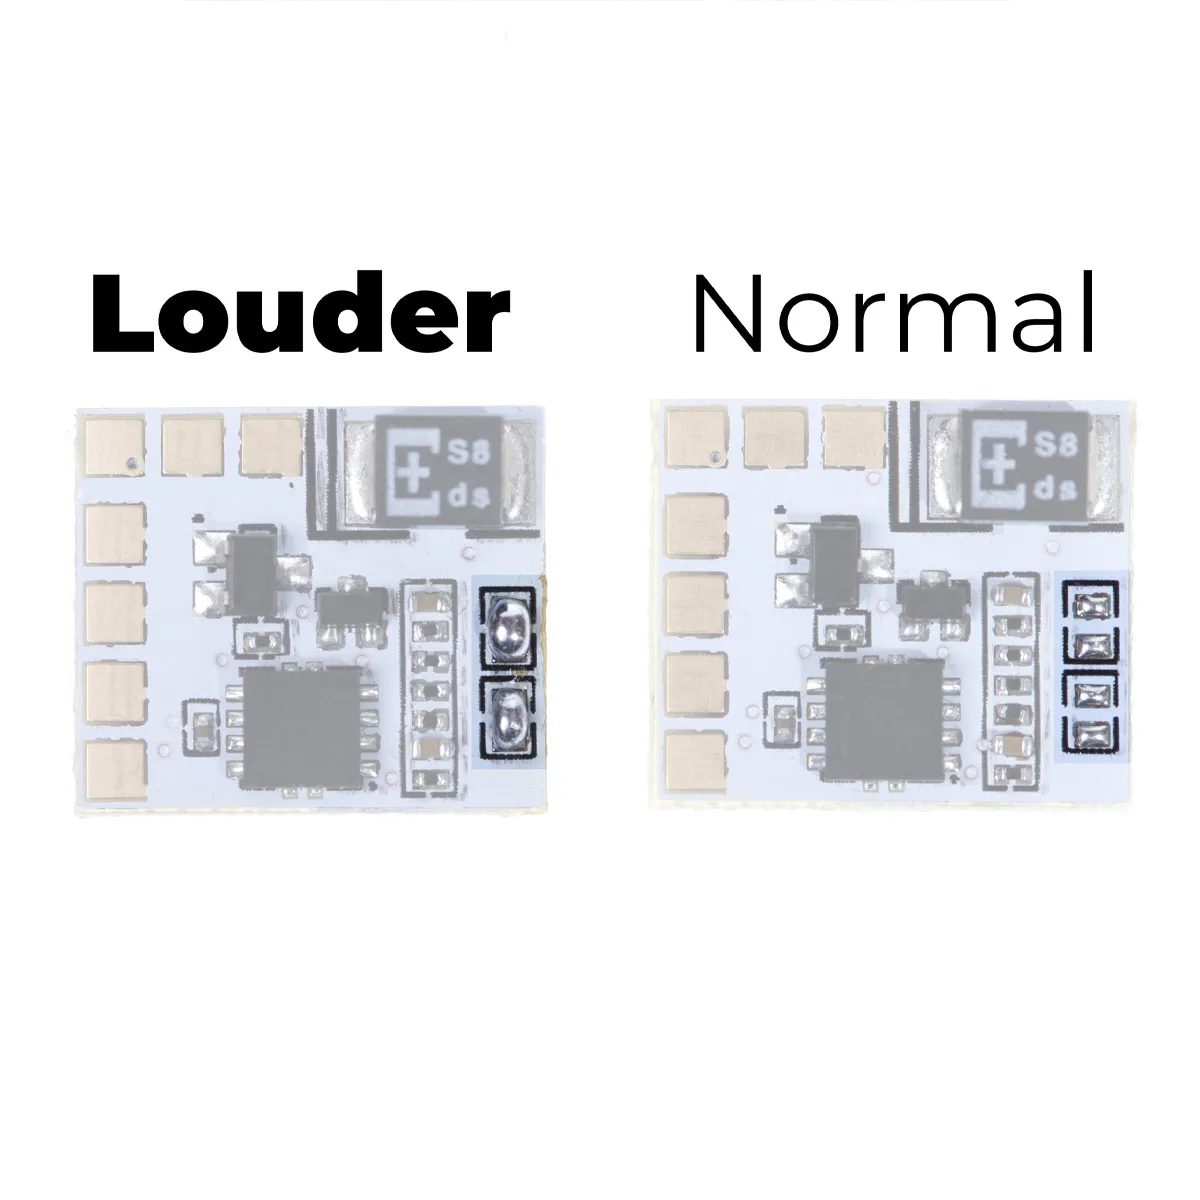
Section titled “Even louder”To make the sound even louder, you can bridge the jumpers on the right side of the CleanAmp board. This modification can easily be undone to restore the original volume: just remove the solder bridges again.
Alternative mainboard
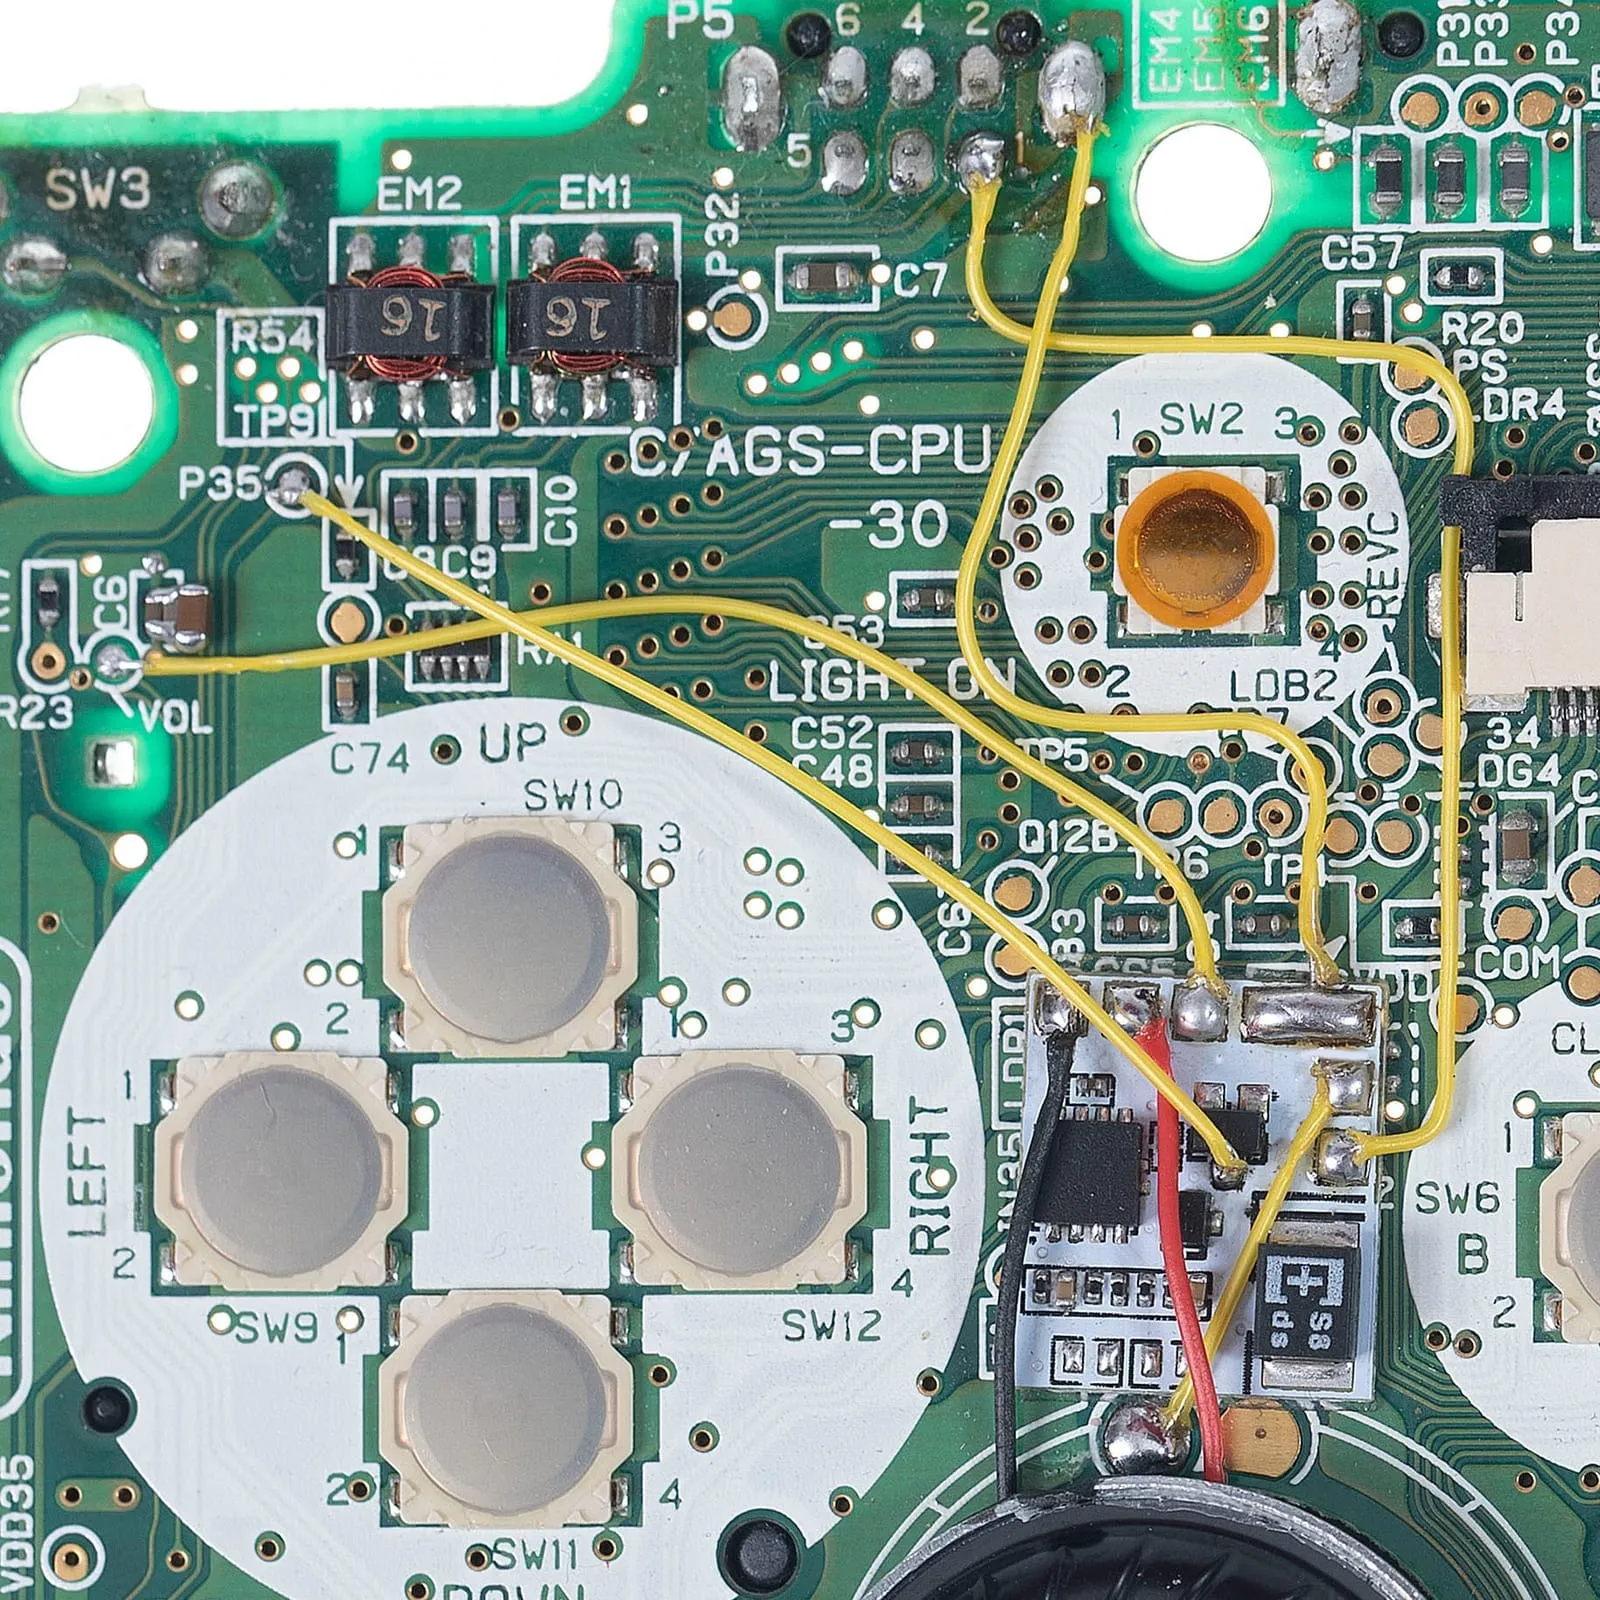
Section titled “Alternative mainboard”If your mainboard looks different, the wiring has to be done slightly differently (see pictures). Note the extra wire from P35 to the bottom of the small transistor on the CleanAmp, which has to be added for this variant. The top two right pins are also bridged to each other.
Troubleshooting
Section titled “Troubleshooting”- The top left two pins go to the speaker.
- The pin to the right of them (top middle) is the PureSilence pin. It connects to the volume wheel and, when low, mutes the speaker completely. If you need to narrow down an issue, you can remove this wire for testing.
- The next wire (second from top right) is the headphone pin. It should be grounded when no headphones are plugged in and floating when they are. If you have no audio, first try soldering this wire to the same pad as the ground wire (shield pin of the extension connector) or bridge the two pins. If audio works then, but not at the correct location, your headphone jack is damaged. You can leave the wire on the ground pad, but the speaker won’t turn off when you plug in headphones.
- The top right wire is ground, going to the right shield pin of the extension connector.
- The bottom right wire above the large capacitor is power in from the console.
- in the Game Boy Advance SP, the CleanAmp has a PureSilence mode that completely mutes the sound as soon as the volume control is set to 0
- along with the sound, background noise and interference are amplified too, which is why we recommend also installing the Dehum Dehiss Kit