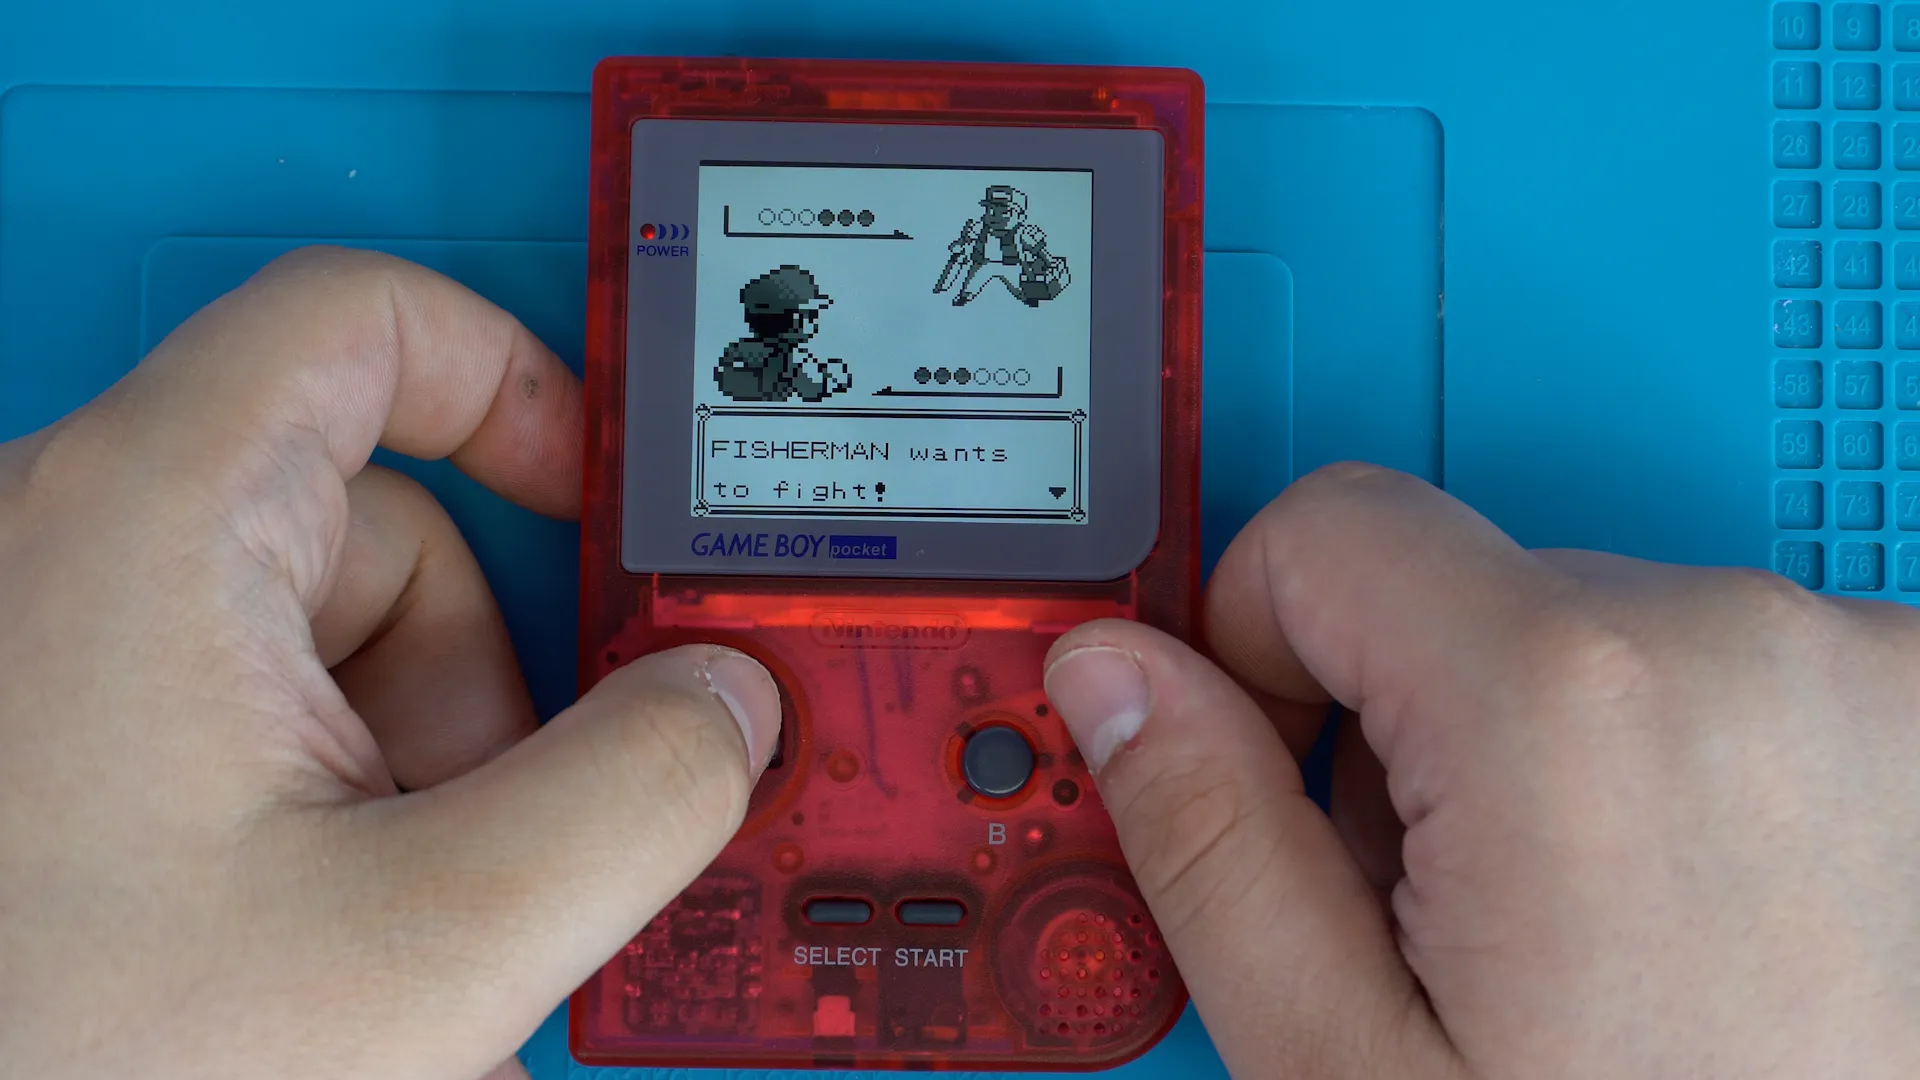
[GBP] Hispeedido IPS Kit
These are the installation instructions for the GAME BOY POCKET IPS LCD KIT - HISPEEDIDO
(This guide was kindly provided by handheldlegend.com)
Foreword
Section titled “Foreword”- Always do a function test , BEFORE you install the IPS kit! Kits that have already been installed cannot be returned under warranty. You can see how to test the kit externally here: How do I test the LCD
- The LCD is very fragile and sensitive to pressure, impacts, etc. Please be especially careful when handling the LCD during installation
- The IPS kit can generally be installed without soldering, but then you won’t be able to change the backlight color of the logo. The solder connection to the power switch is optional, but required to reach full brightness.
Required tools and parts:
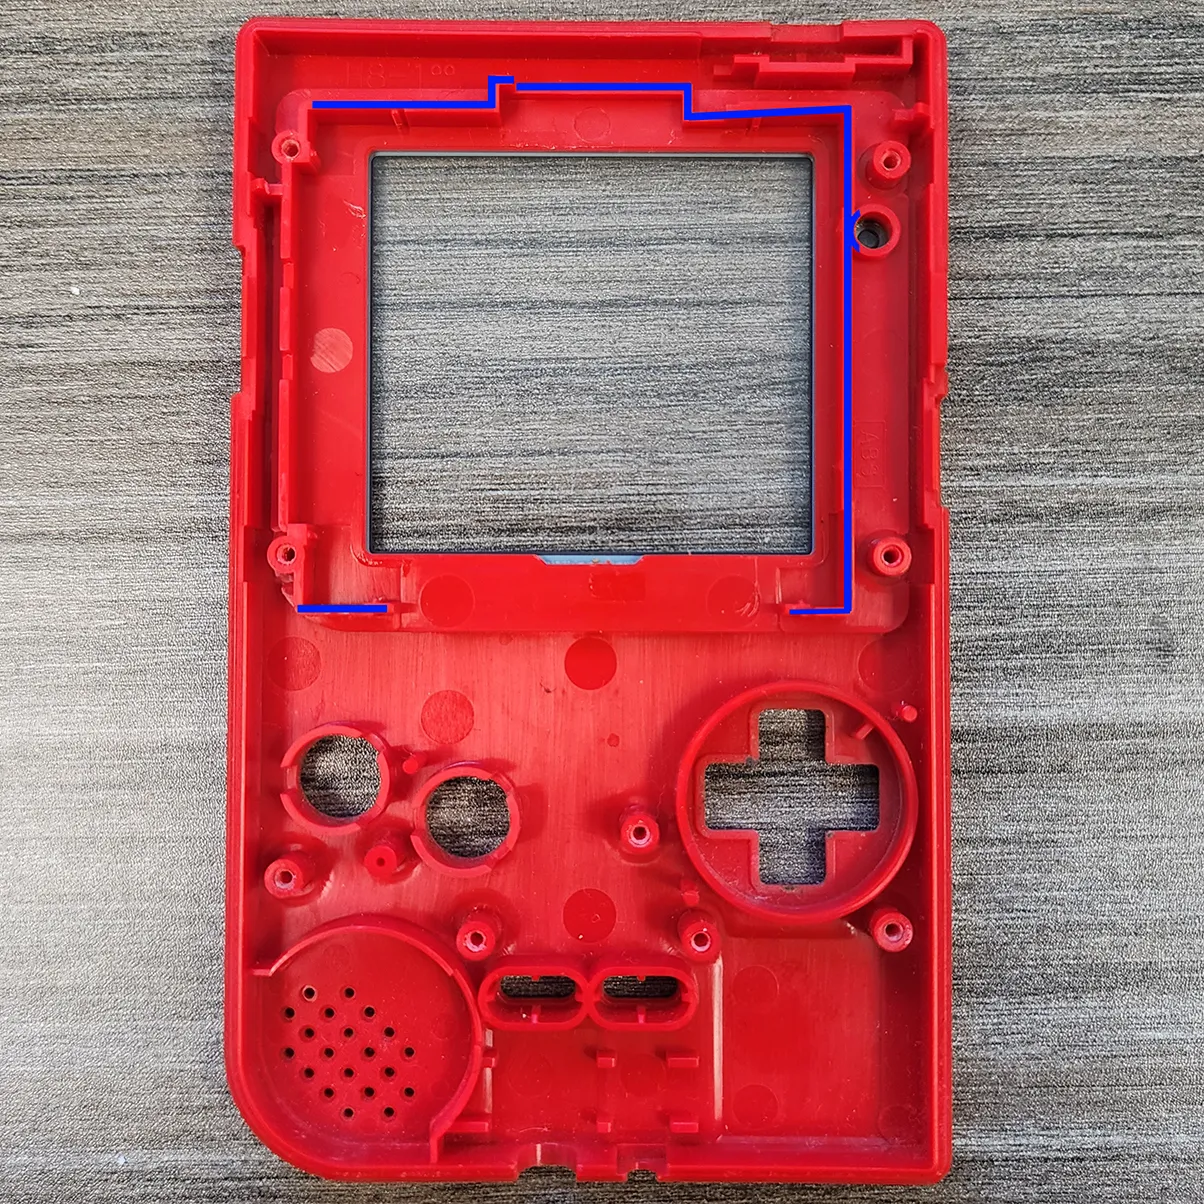
If you want to use this screen in an OEM shell, you need to remove all of the plastic marked in blue. Make sure to check the fit of the screen constantly so you don’t remove too much material.
Installation
Section titled “Installation”First, the wires are soldered to the board.
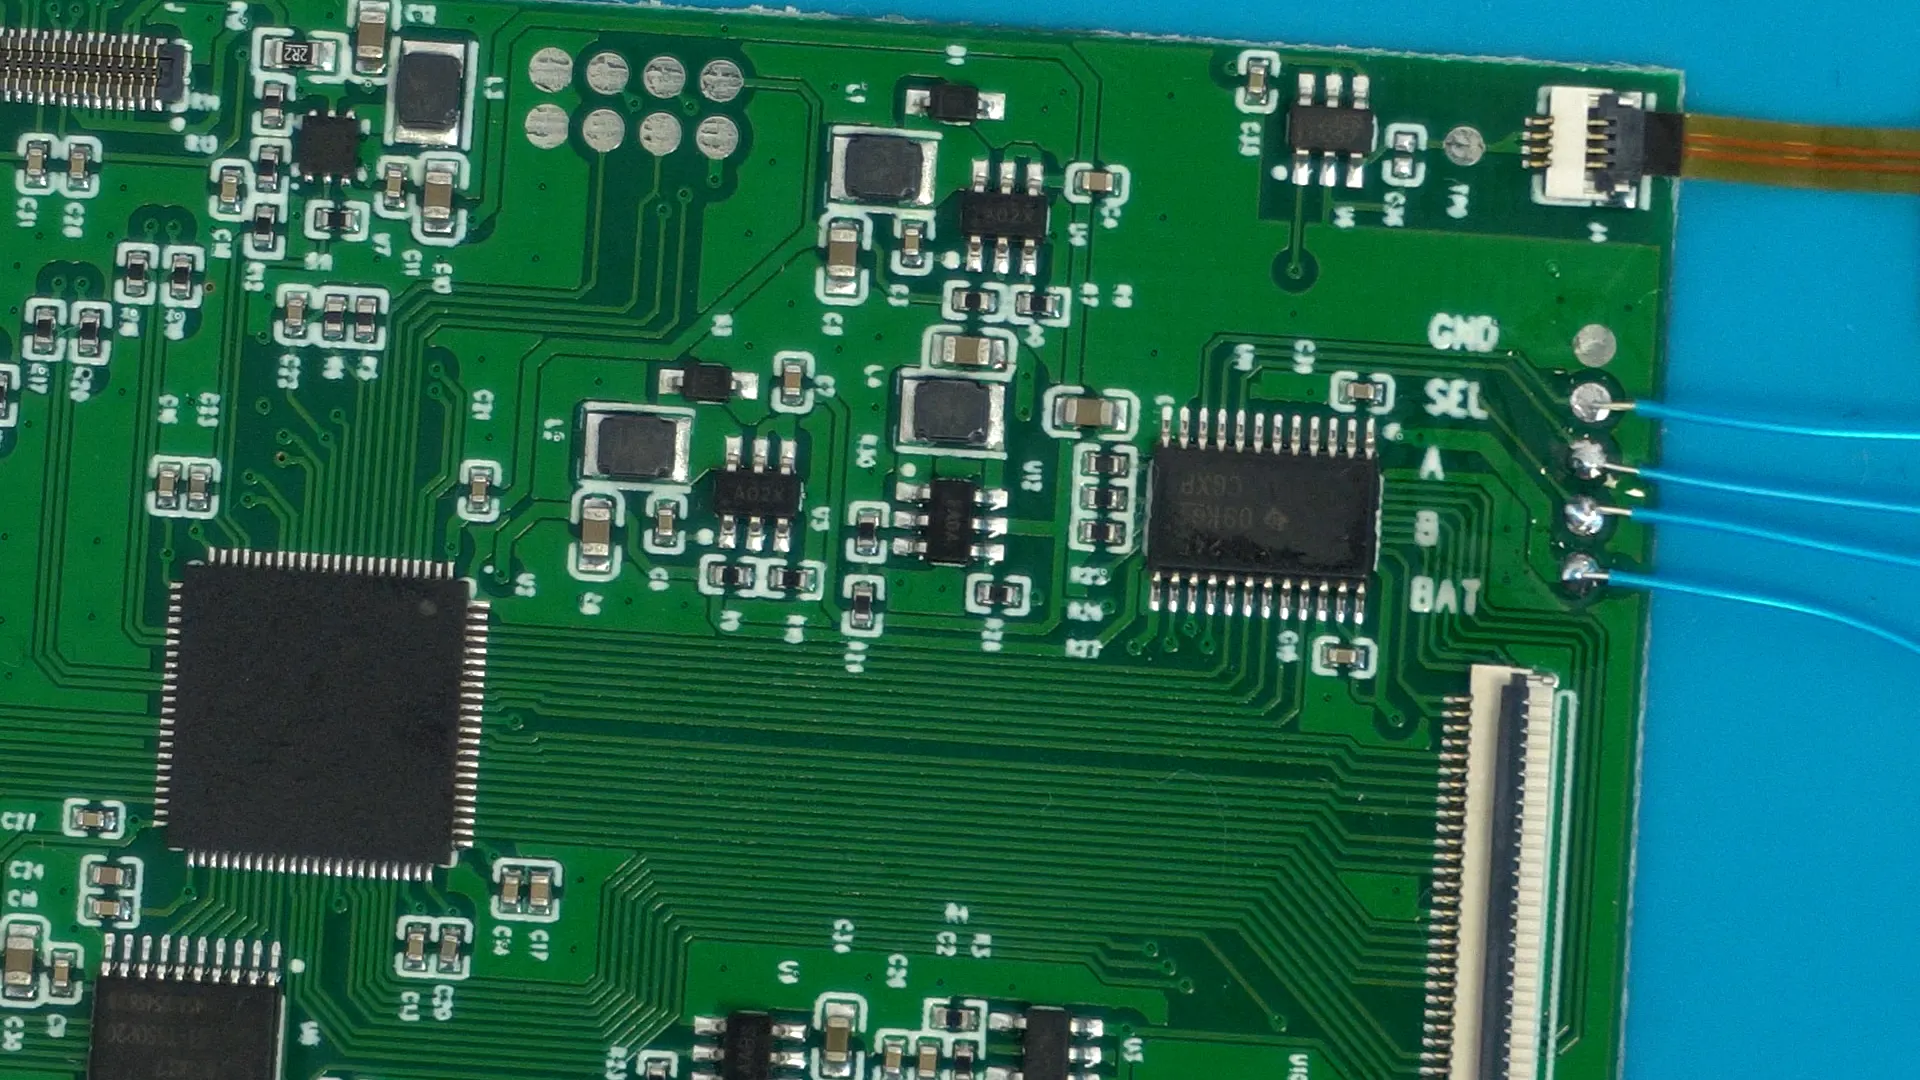
Once the wires are soldered to the board, you can insert the entire display into the shell. After soldering the wires to the control board, it’s time to connect them to the console. Since the Game Boy Pocket, unlike other Game Boy variants, has no exposed test pads, we’ll solder the wires to the vias connected to the respective buttons.
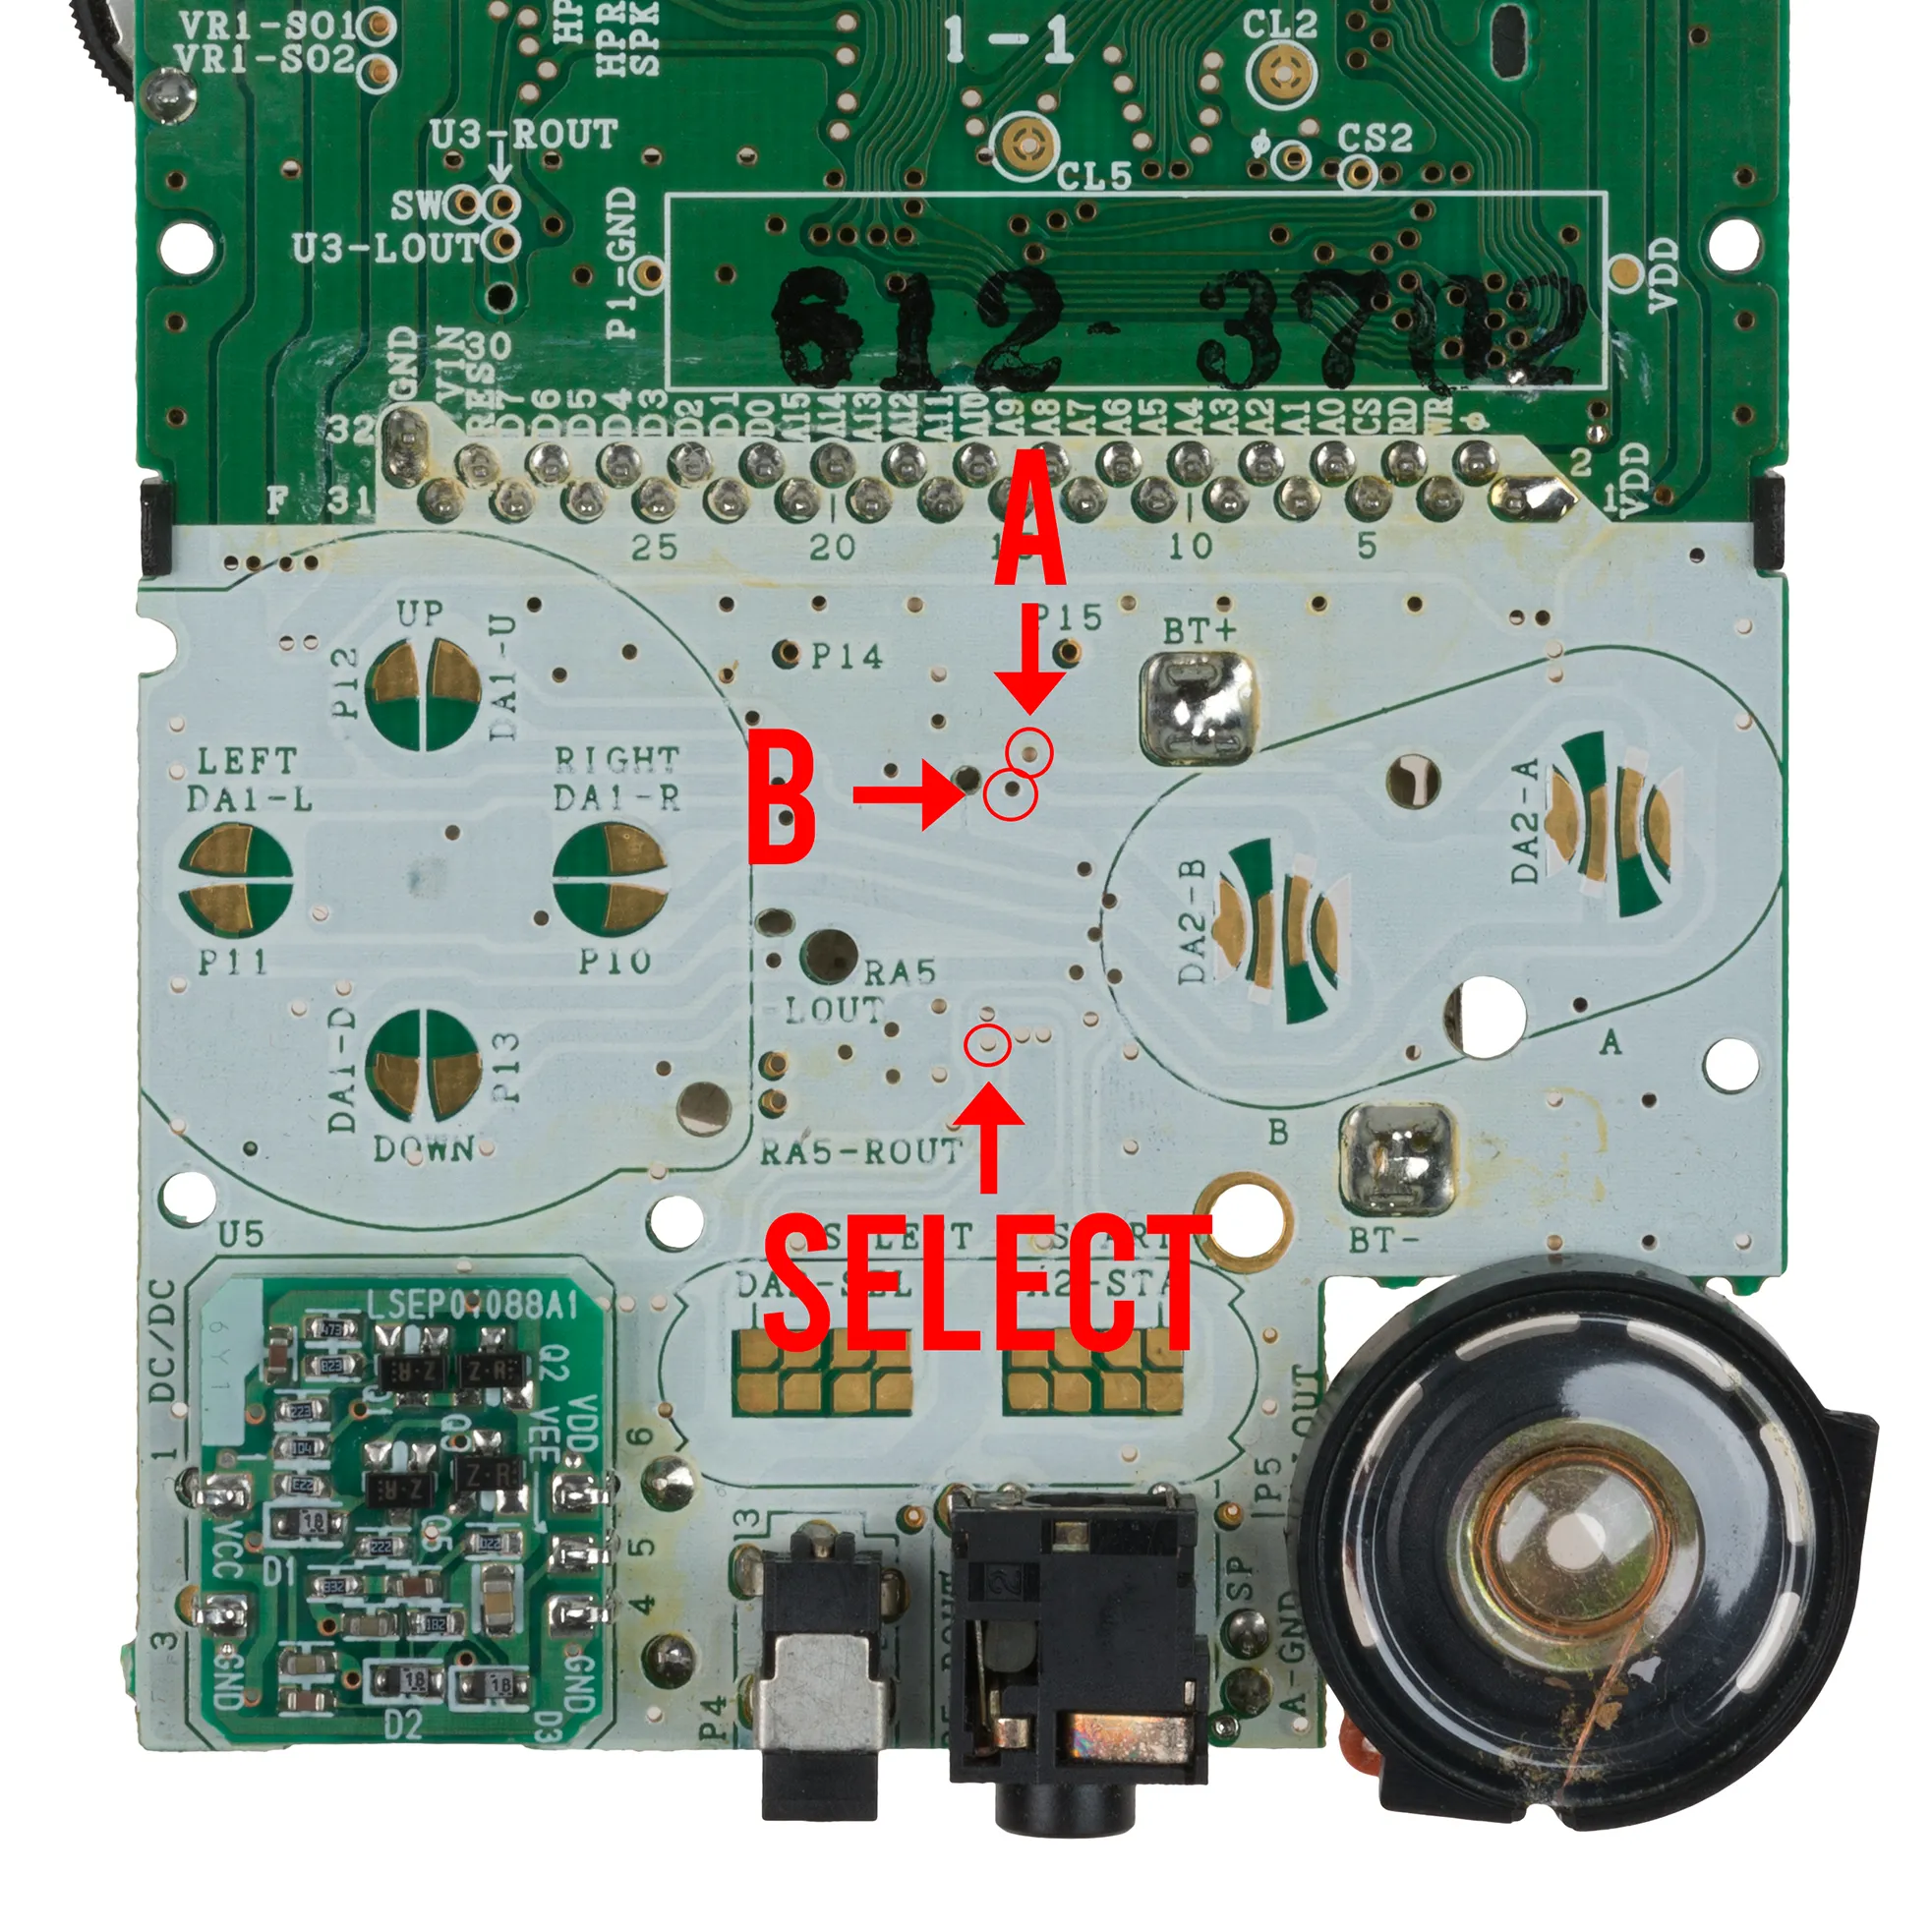
To do this, we first pre-tin each wire for installation. Then we insert the wire into the via and heat it from the outside so the solder completely fills the via. Make sure not too much bare wire sticks out on the other side of the board.
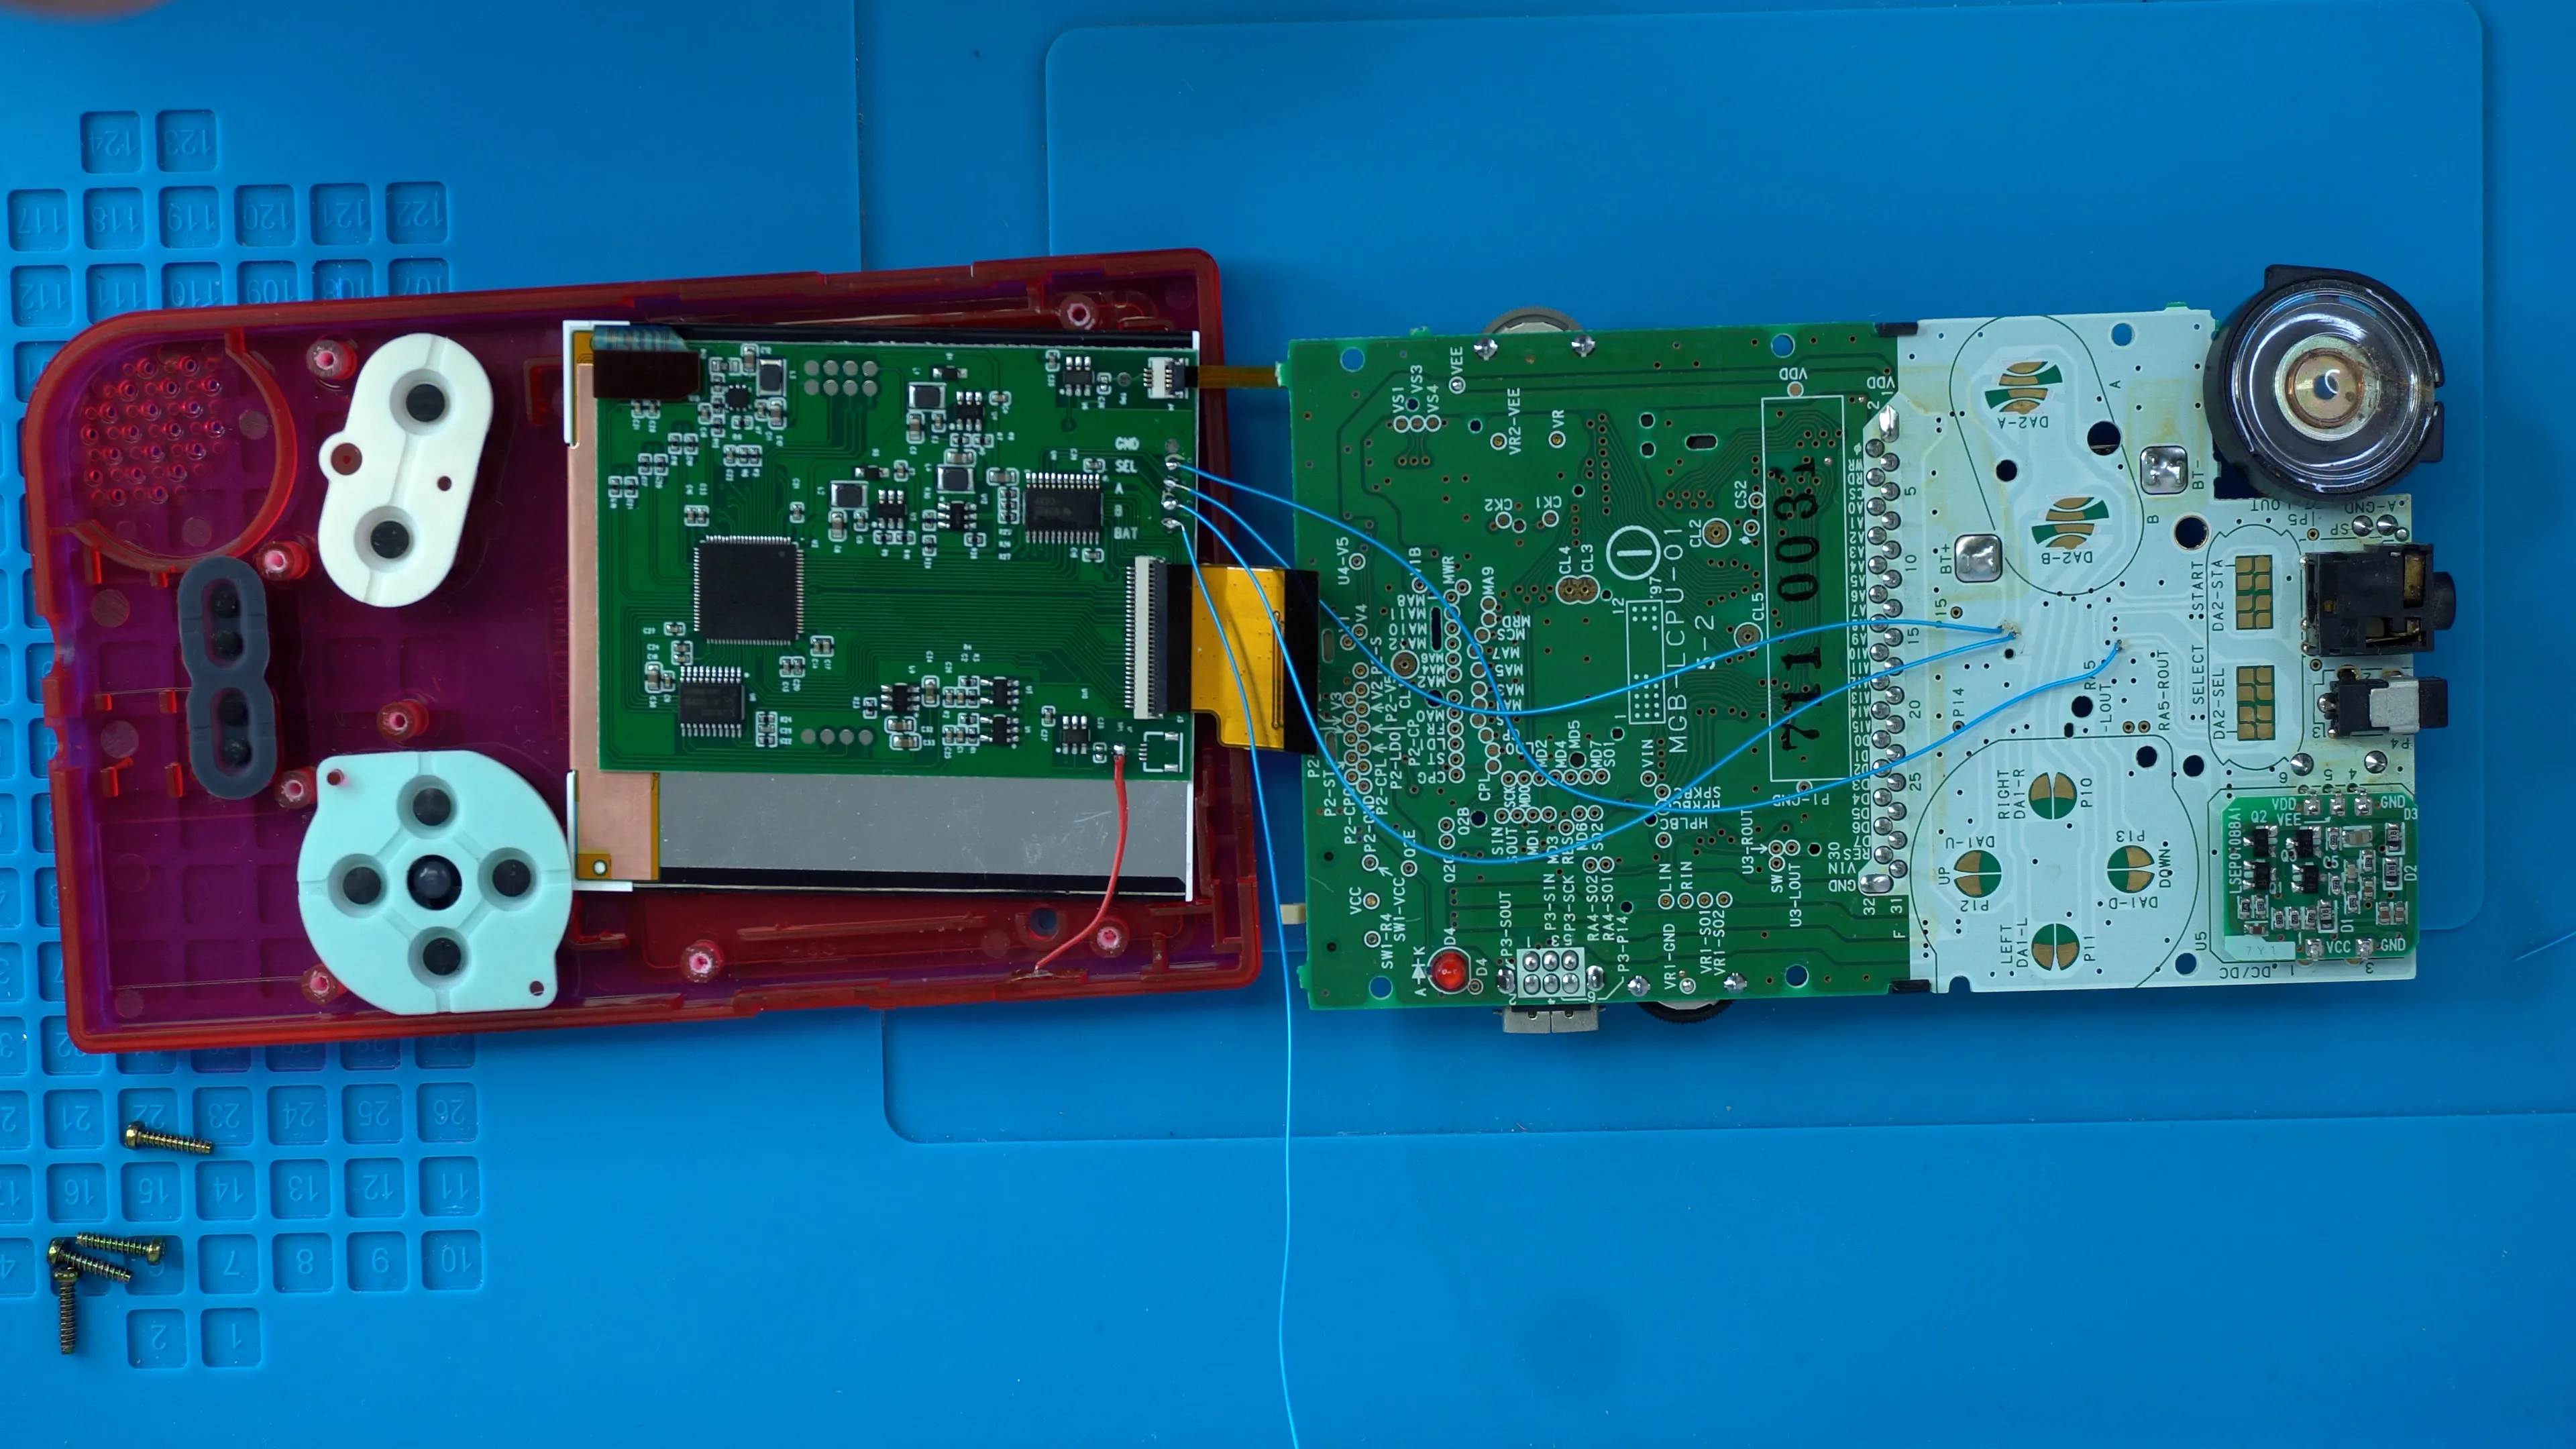
The touch sensor can be placed at the top of the shell, on the side. Make sure to route the power wire separately from the other wires, since it has to be connected to the console’s power switch. Then you can put the mainboard back into the console and screw it down.
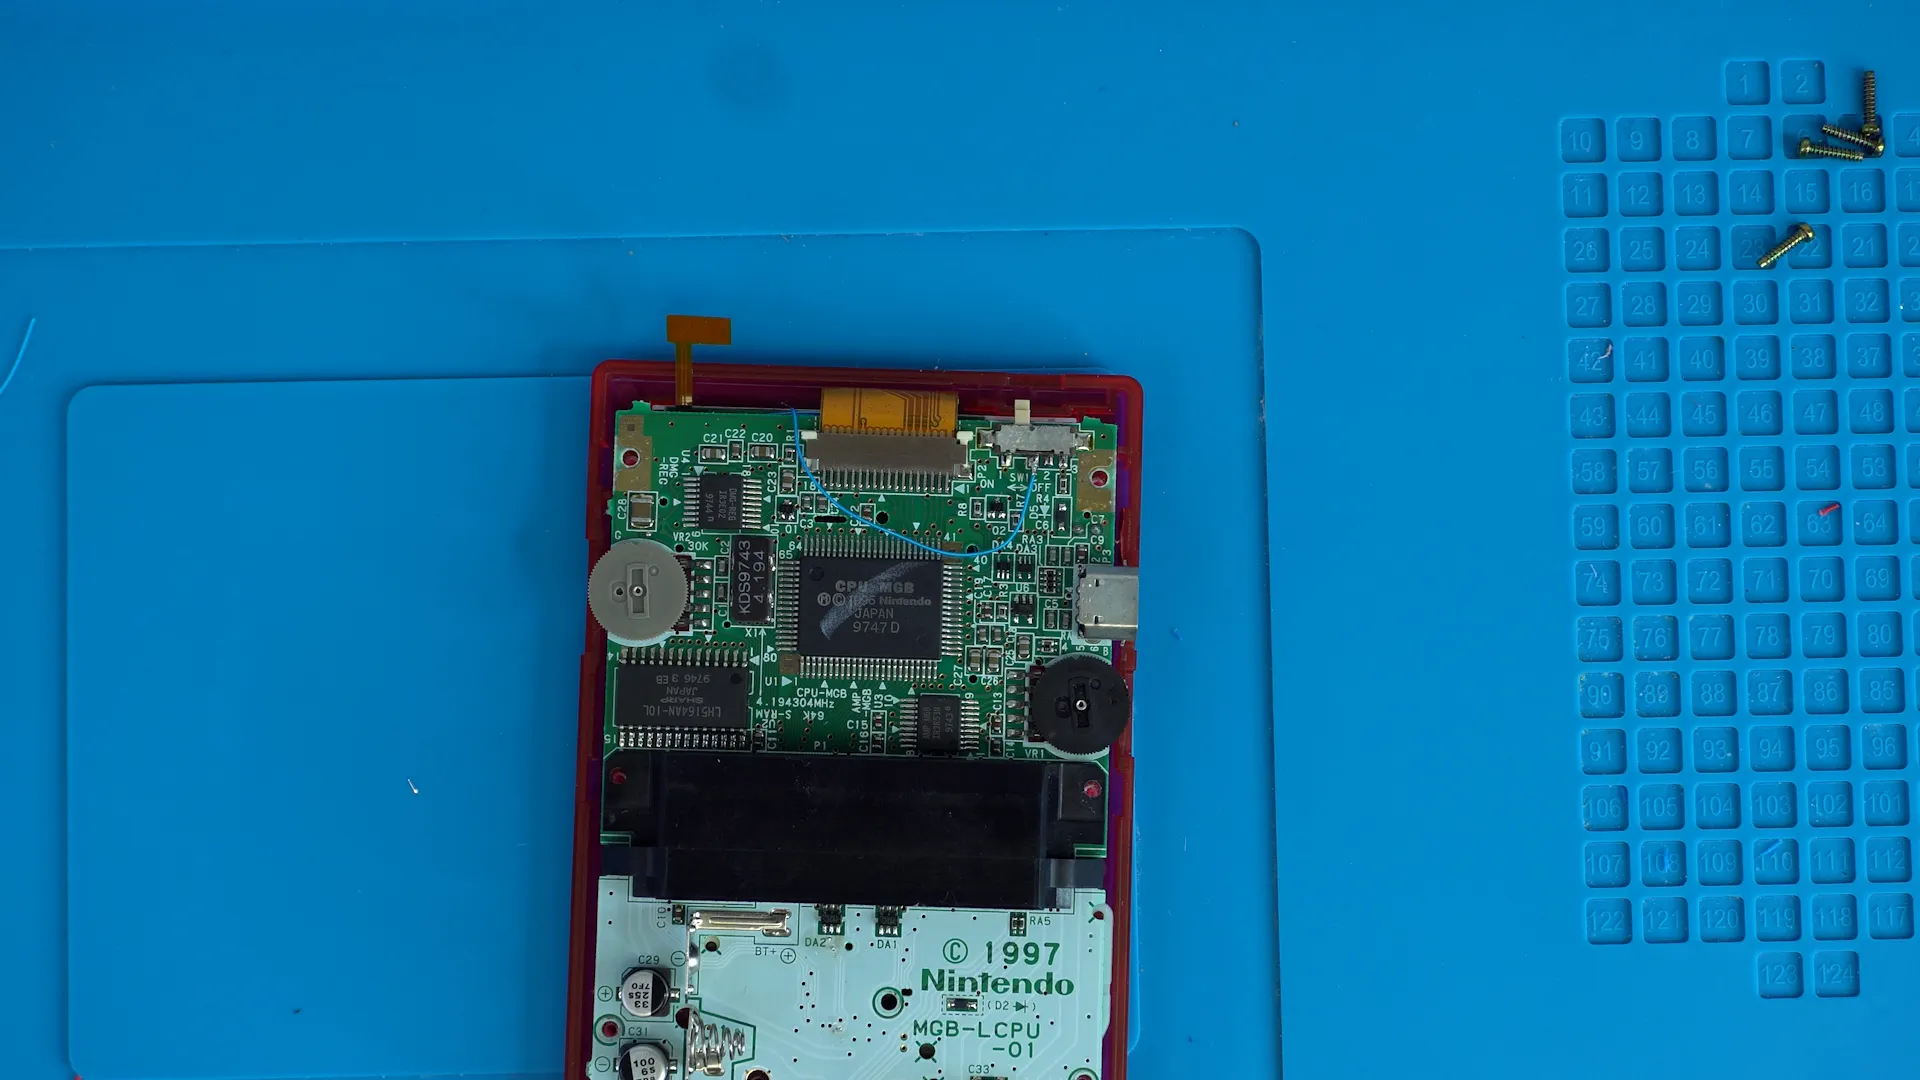
Now all that’s left is to secure the ribbon connector and solder the power wire to the third pin from the right on the power switch. Then you can tuck the excess touch sensor into the top of the shell and screw the console back together!