
[GBA] L&R Trigger LED Mod
Installation
Section titled “Installation”The LED trigger kits contain 2 resistors, 2 LEDs and wire. You’ll need a Game Boy Advance console to install them.
Start by unscrewing your GBA and removing the mainboard (PCB).
Trim the leads of the resistors. Also trim the legs of the LEDs, making a note of which leg was longer than the other. Don’t worry if you forget – you can always swap the LED legs after installation if it doesn’t work.
Start by placing the LEDs in the positions shown. Cut and solder the included wire so that one wire runs from the longer leg of the LED to the resistor, and the other side of the resistor goes to the S1 pin of the cartridge connector.
Repeat this process for both LEDs.
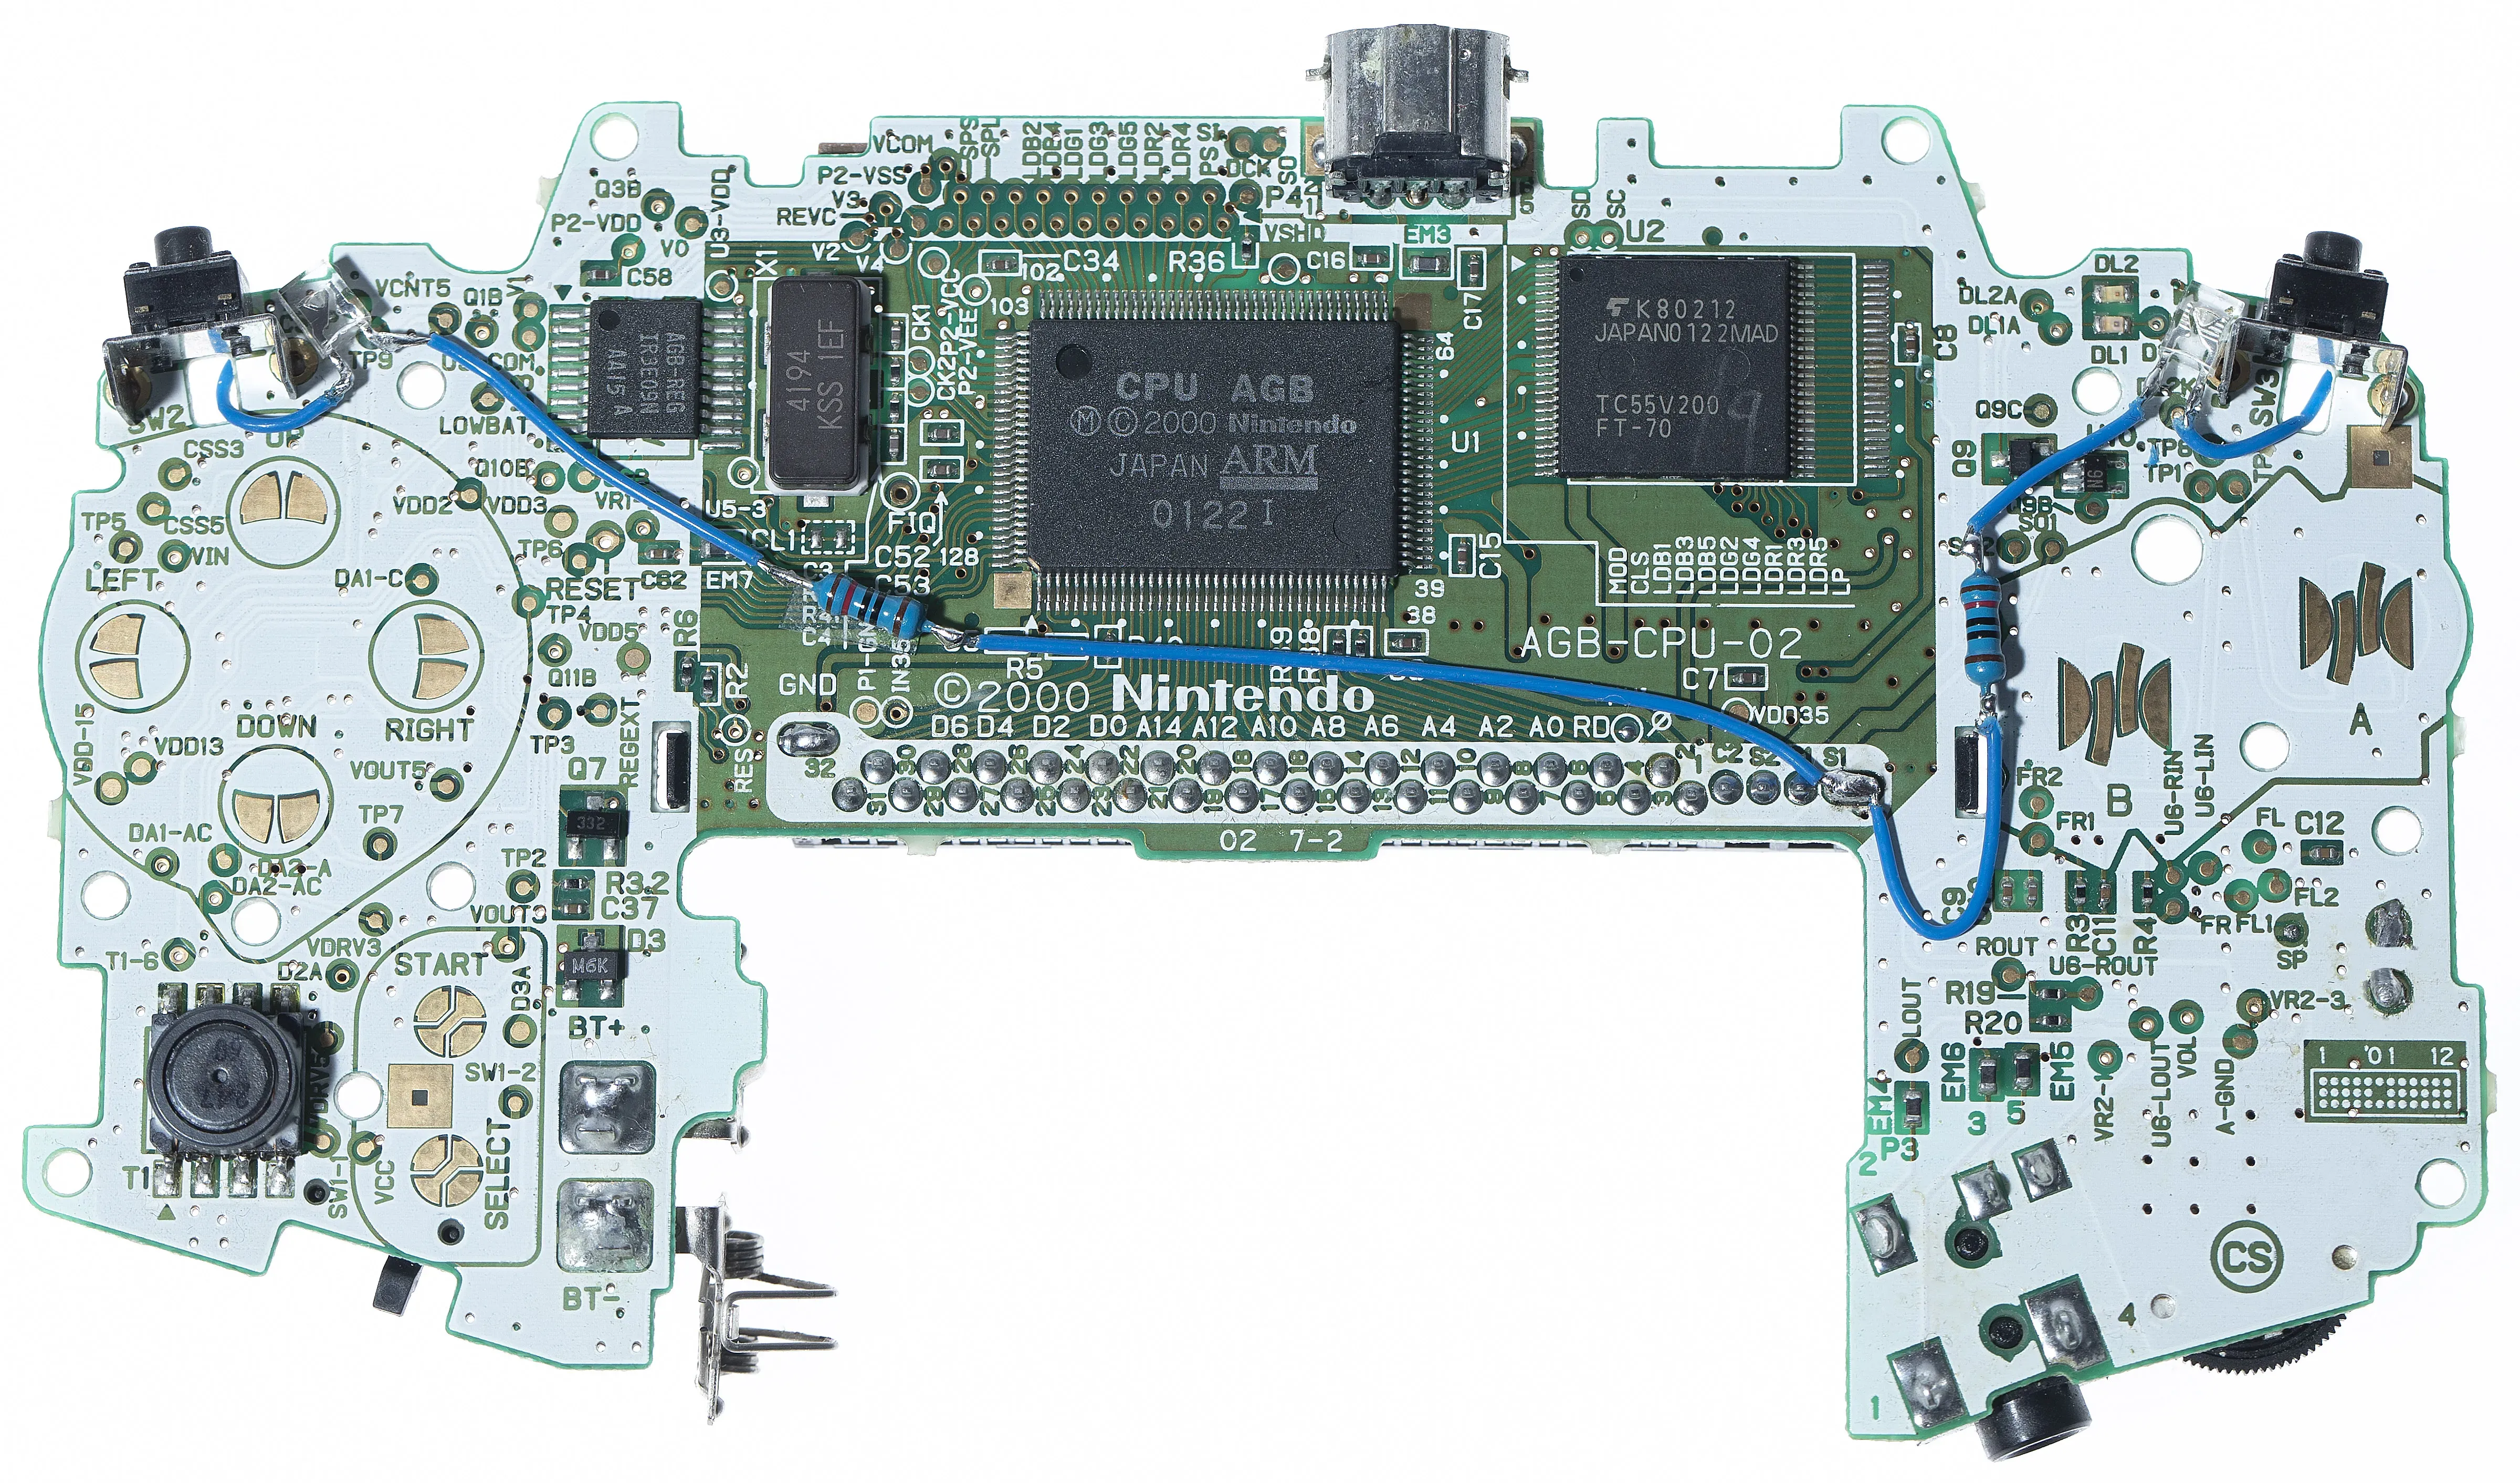
Solder a wire to the other leg of the LED, run it through the hole in the middle of the trigger button, and then solder it to the upper left pad of the button pins, as shown.
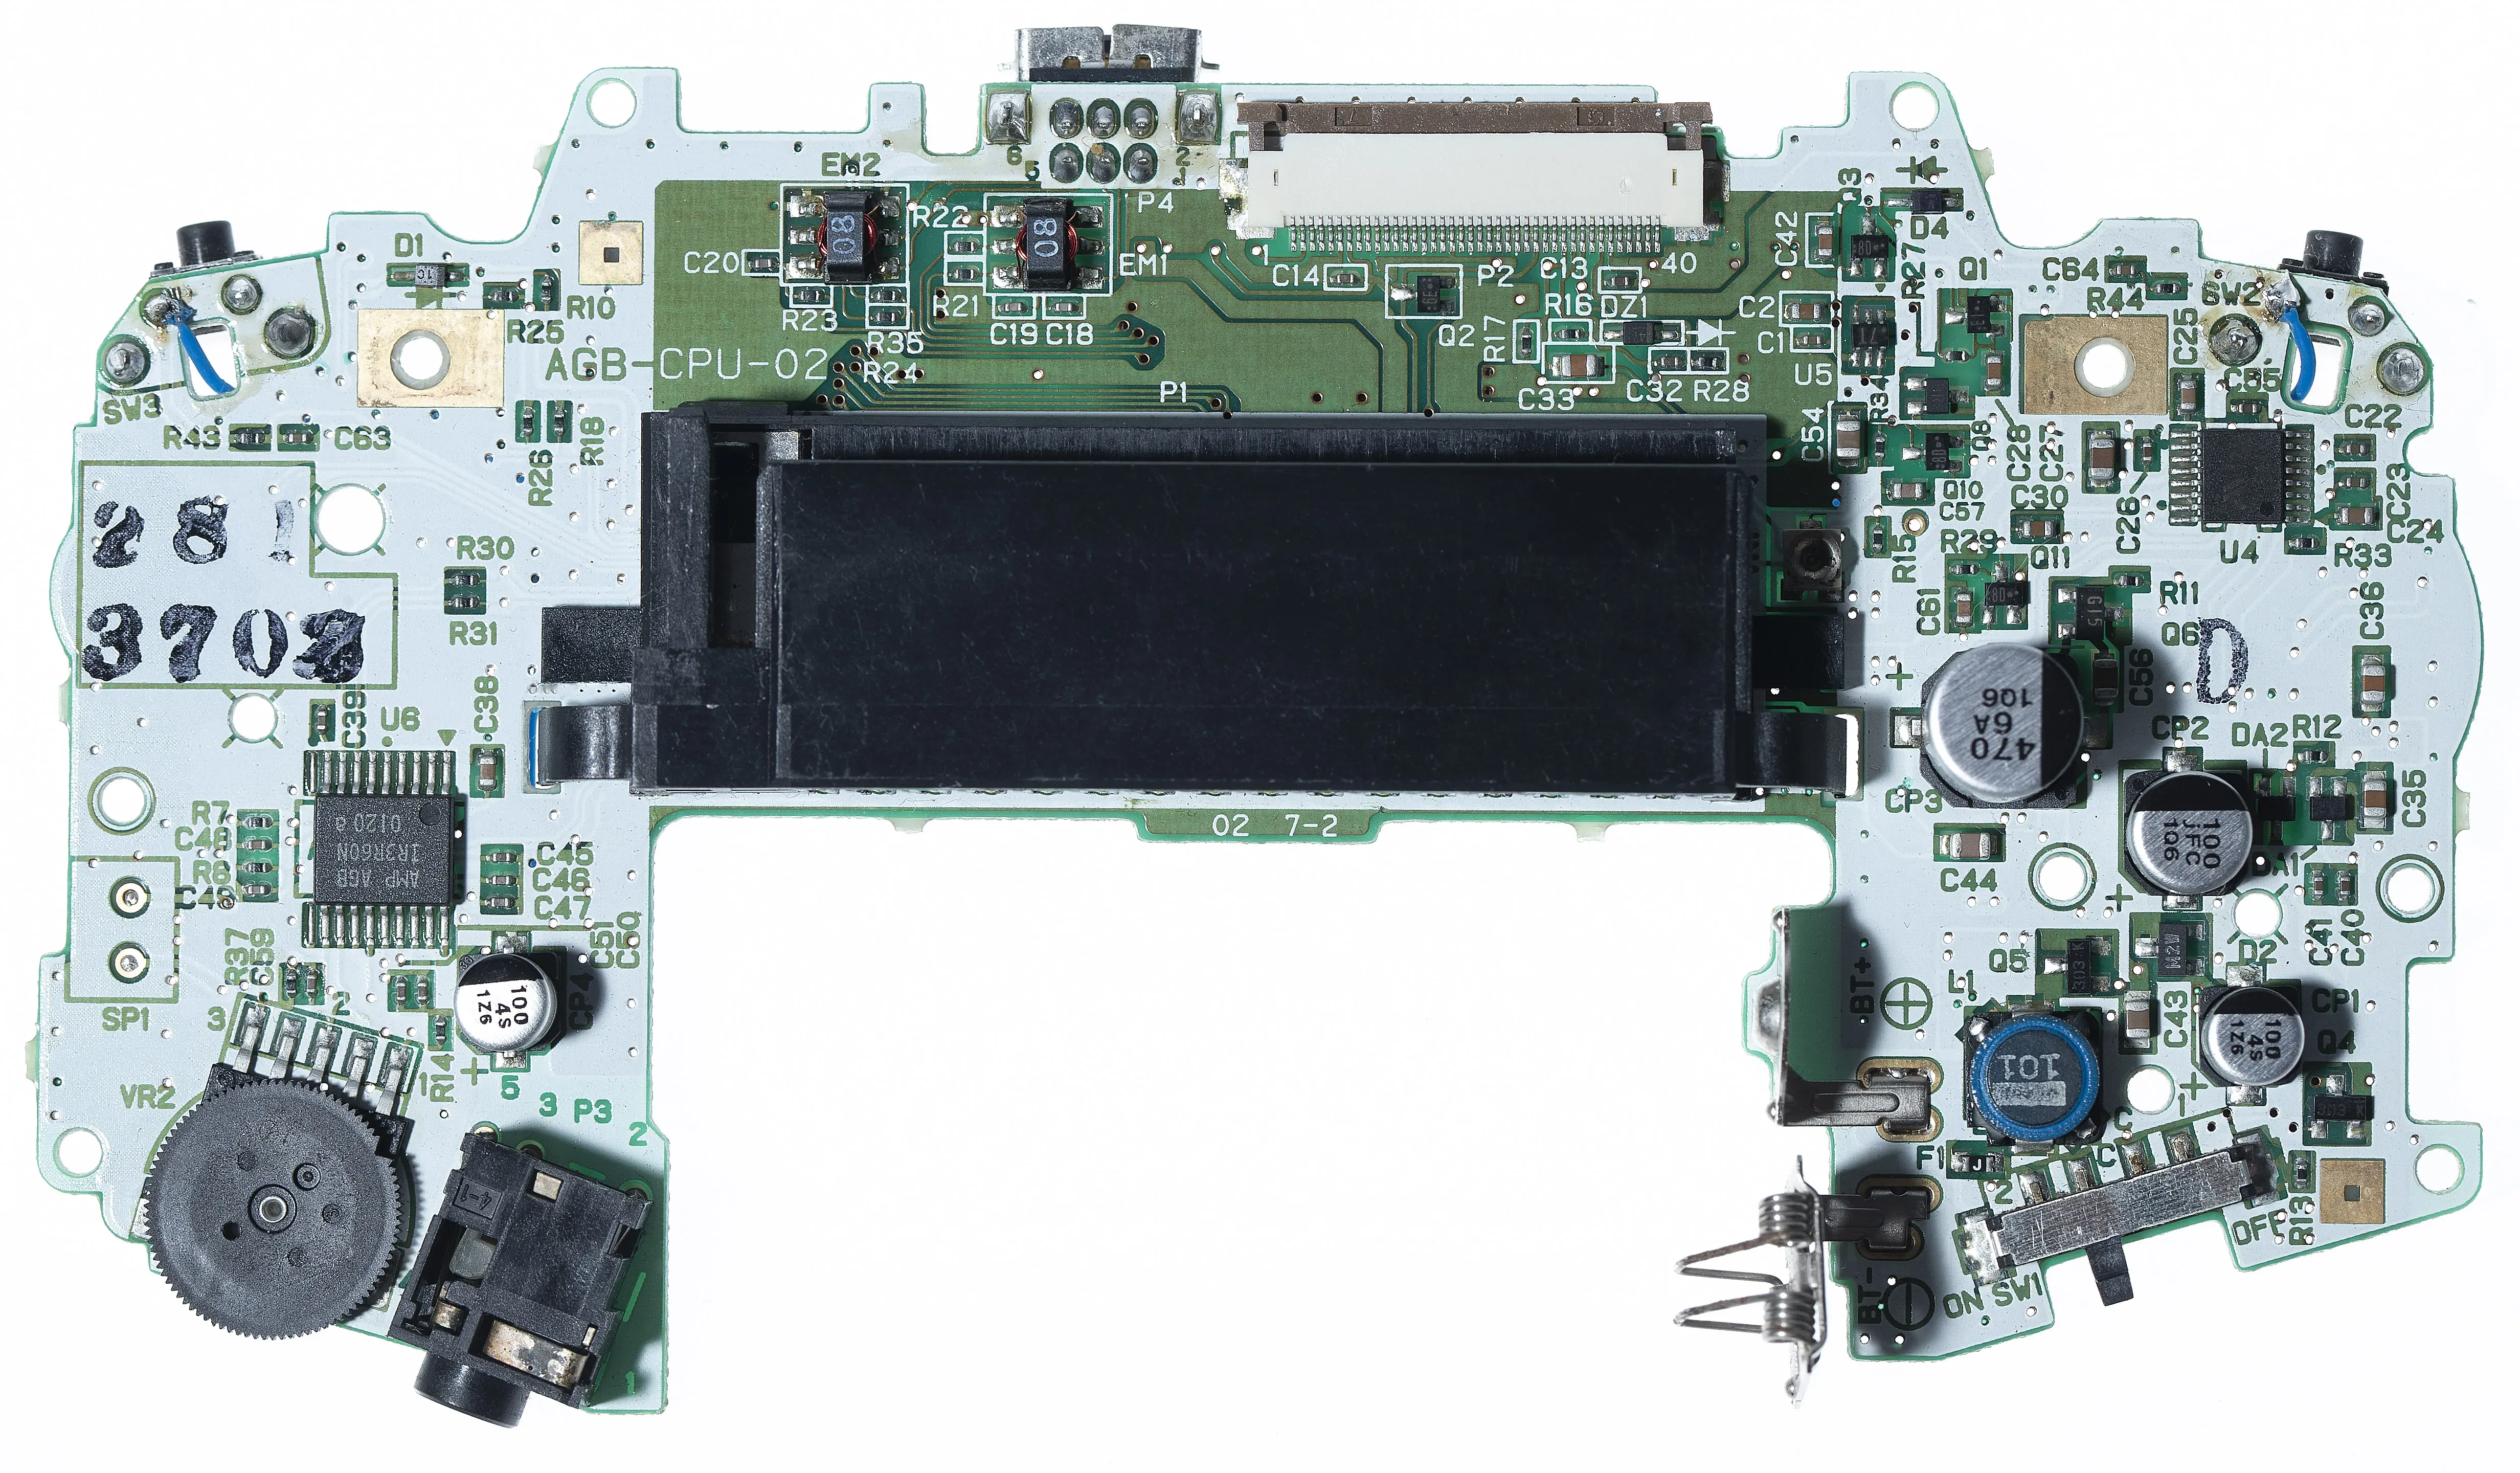
Now every time you press the trigger buttons, the LED for that trigger will light up.
Always-On Lighting
Section titled “Always-On Lighting”To keep the LEDs lit permanently while the console is switched on, solder the wires to the right pad of the buttons instead of the left pads shown above.