
[DMG] RetroSix CleanPower
The CleanPower replaces the original voltage regulator (DC CONV DMG) of the Game Boy Classic. The board has been revised since (currently CleanPower V2), but the installation is still the same.
You can check beforehand with a multimeter whether your original regulator needs replacing at all: Checking the Voltage Regulator.
Installation
Section titled “Installation”-
Open the Game Boy with a tri-wing screwdriver: remove the 6 screws on the back (2 of them inside the battery compartment). See also Shell Disassembly.
-
As you open the console you will see a wide ribbon cable connecting both halves. Grab it firmly and pull it out of the white connector in the bottom half.
-
Put the front half aside. In the back half, undo the 4 screws (2 on the top PCB, 2 on the audio PCB) and remove the back PCB assembly.
-
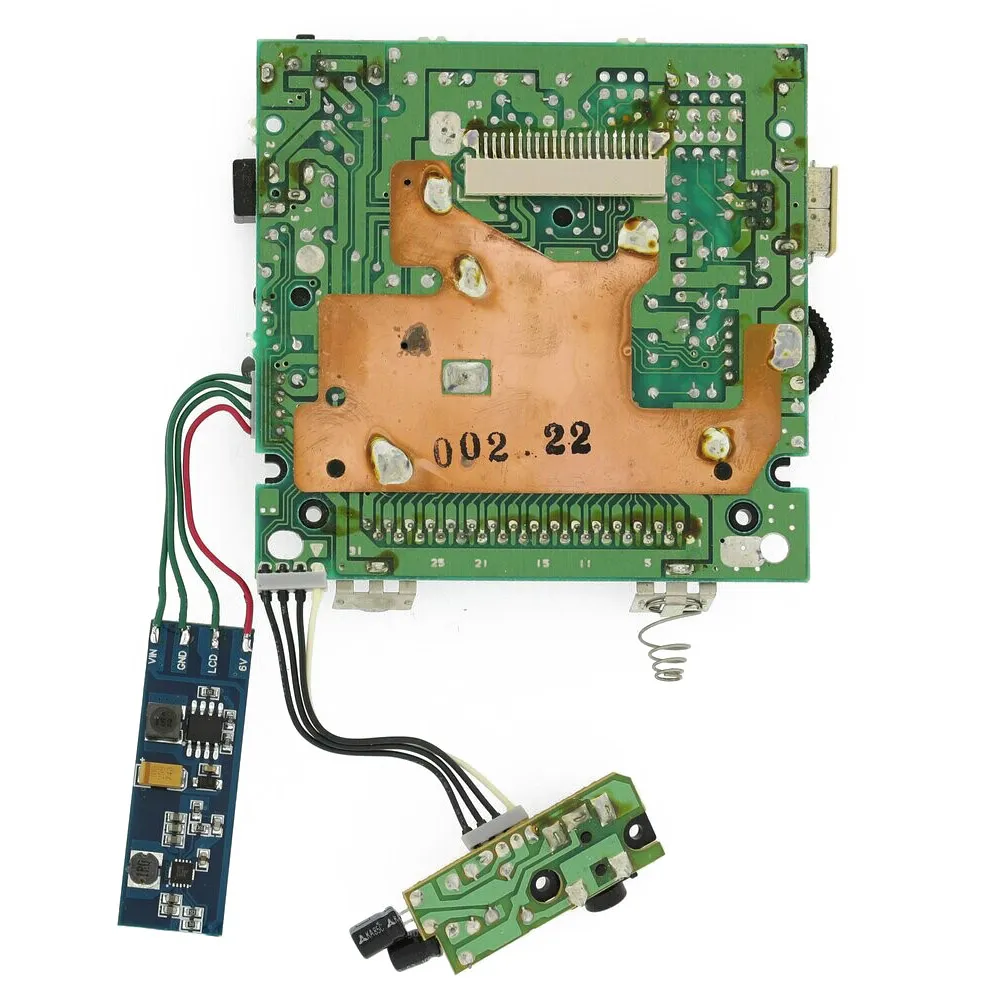
With your soldering iron, heat the joints of the 4 wires connecting the original regulator to the wire harness (3 green wires and 1 red wire) and pull the old regulator off the wires.
-
Solder the wires to the CleanPower in the same order: the first green wire to VIN, the second green to GND, the third to LCD and the red wire to the last pad.
-
Put the PCB back into the back half. The CleanPower goes down the side of the battery compartment, where the original regulator was. Screw the PCB assembly back together.