
[GBC] HHL RetroGlow LED Kit
Video guide
Section titled “Video guide”Tools and supplies
Section titled “Tools and supplies”Required
Section titled “Required”- J0 and Y1 screwdriver bits
- Solder (leaded is recommended)
- Soldering iron
- Kapton tape
- Fully charged or new AA batteries
Recommended
Section titled “Recommended”- Solder flux (paste or gel)
- Isopropyl alcohol (70% or higher) for cleaning flux residue, plus a dispensing pump
- Plastic spudger
- Tweezers
- Cotton swabs
- Solder braid/wick
- Solder sucker
- Transparent Game Boy Color buttons
- Transparent Game Boy Color membranes (silicone button pads)
Installation
Section titled “Installation”Fully disassemble your Game Boy Color
Section titled “Fully disassemble your Game Boy Color”See this guide on iFixit for full details.
Remove the power LED
Section titled “Remove the power LED”Heat the two legs from the rear side of the board with a soldering iron. Lifting the board up at an angle while heating the LED should make the LED drop out. Use solder wick or a solder sucker to help if needed.
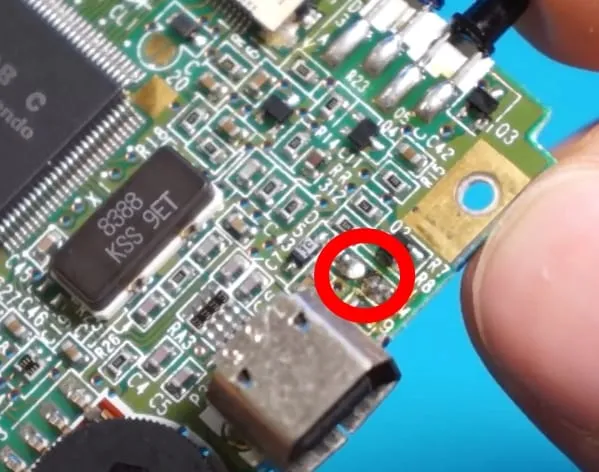
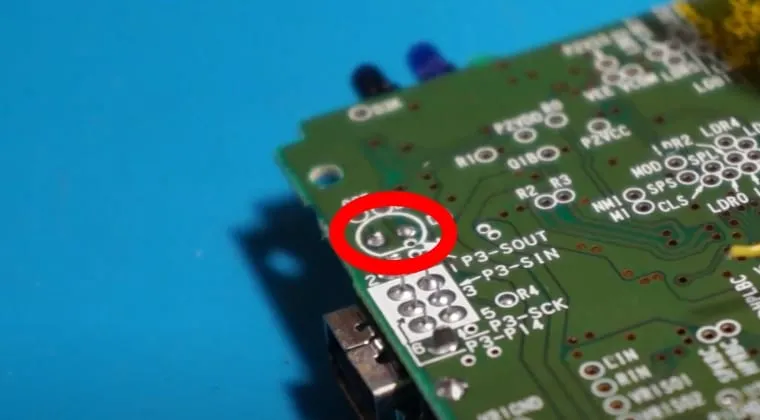
Solder the 5V connection
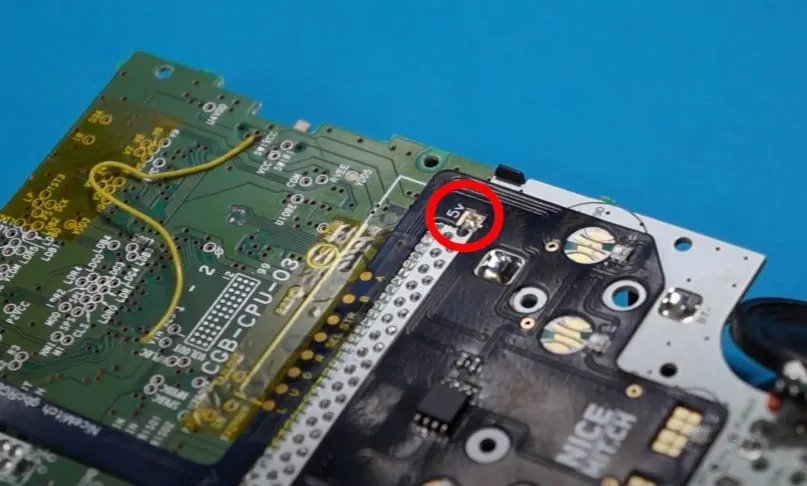
Section titled “Solder the 5V connection”Align the PCB as well as you can: all of the gold holes need to line up with the test pads on the main board. Use Kapton tape to hold the alignment while soldering. Solder the 5V connection first: it acts as an anchor and lets you fine-tune the PCB position by reheating that one spot. Use generous flux to get a good connection.
Recommended soldering iron temperature: 365 °C
Solder the button vias
Section titled “Solder the button vias”Solder each of the points circled in red. Check your alignment and take your time before soldering. Kapton tape helps to hold the board in place.
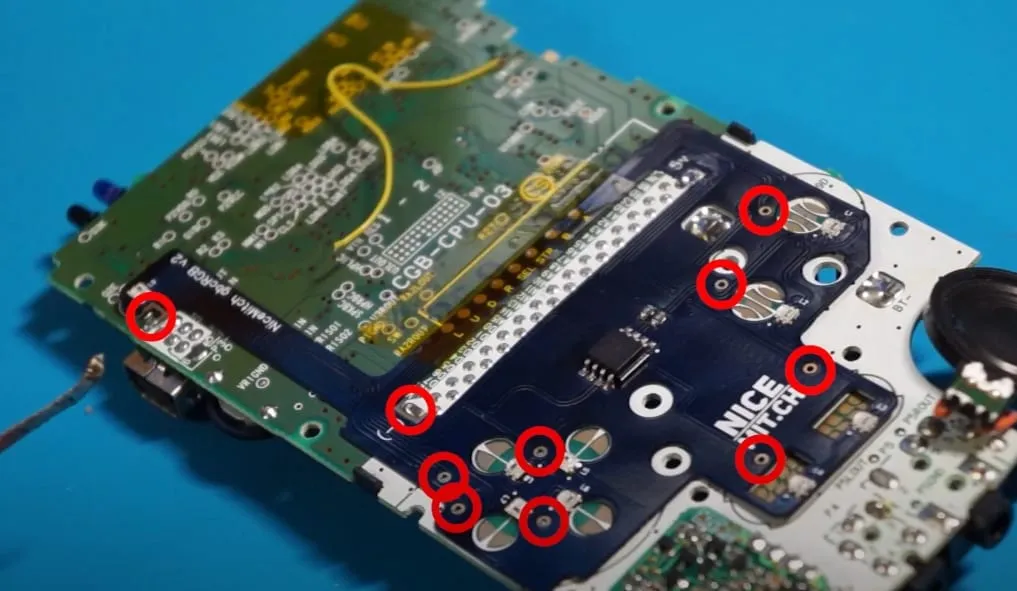
Optional: solder the IPS control wires
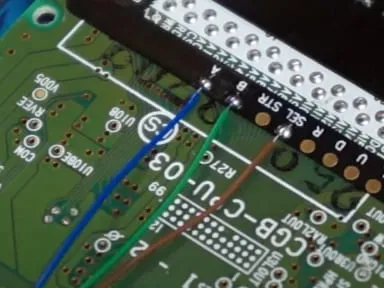
Section titled “Optional: solder the IPS control wires”Use the labelled pads along the top of the flex PCB to wire up the controls of your GBC IPS display. This kit does not interfere with those controls; however, with some IPS kits we recommend using an alternate button such as ‘Start’ or ‘D-pad Down’ for the ‘Select’ wire, since these kits typically require pressing both buttons simultaneously. This gives a very clean result without any visible wires. Use flux as needed.
Test before reassembly
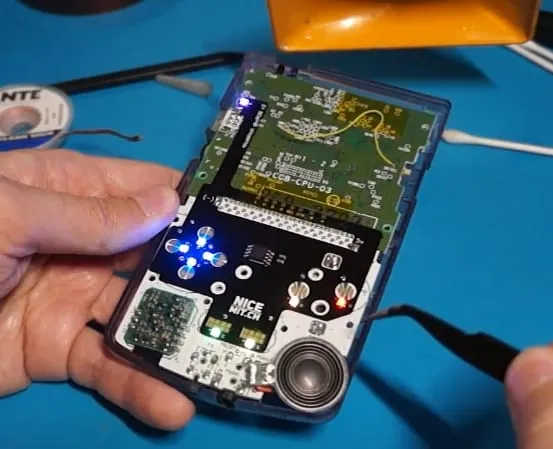
Section titled “Test before reassembly”Place the main board into the rear shell, insert the AA batteries and power on the console. On first power-up all LEDs should light up red, orange, yellow, green, blue and purple from right to left. If anything looks wrong, see the troubleshooting section at the bottom of this guide.
Final reassembly and second test
Section titled “Final reassembly and second test”Follow the disassembly in reverse to put your Game Boy Color back together. If you are installing an IPS kit, follow the guide for that kit. Install your choice of transparent buttons and membranes.
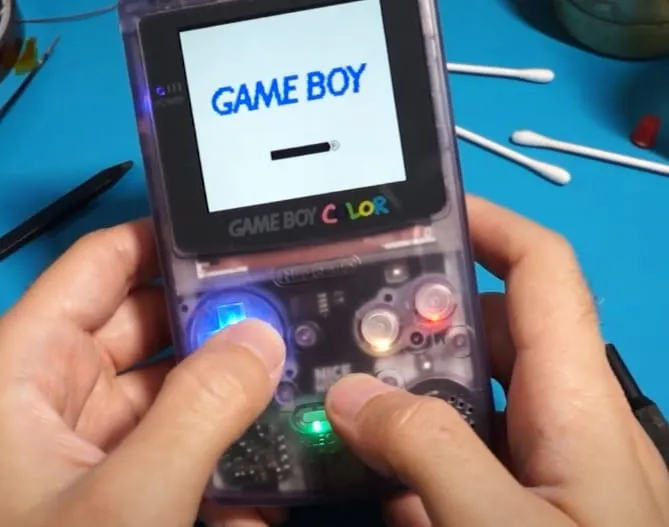
Power on your Game Boy Color and check that all LEDs light up properly. Button feel may vary depending on where your buttons and membranes come from. With an aftermarket Game Boy Color shell you may need to slightly loosen the J0 screws behind the main board to relieve some button pressure.
Quick function test: hold Select and press Right on the D-pad. The lights should flash green twice. You can now press Left or Right to lower or raise the LED brightness. If this doesn’t work, see the troubleshooting section.
Mode selection
Section titled “Mode selection”To enter the menu, hold Select first, then press Right while still holding Select.
You can cycle through several modes. Navigate the menus by holding Select and pressing Left or Right. You’ll know you’ve entered a menu when the LEDs blink twice. These are the menu options with their controls, in order:
- Default mode
- No other controls
- Brightness mode
- Press Left or Right to adjust the brightness level
- Colour mode selection
- Press Left or Right to change the colour mode
- Colour mode edit
- See Colour mode edit
- Save all settings
- No other controls. Entering this menu saves all selections and reboots the LED controller
Colour mode edit
Section titled “Colour mode edit”In colour mode edit, the controls and options depend on the colour mode you have selected:
- User Preset – pick a unique colour for each button or the power LED
- Press Select once to toggle between BUTTON SELECT, HUE SELECT and SATURATION SELECT.
- In BUTTON SELECT, press Left or Right to choose the button you want to edit.
- In HUE SELECT, press Left or Right to change the hue.
- In SATURATION SELECT, press Left or Right to change the saturation.
- Rainbow – fades through all colours and repeats
- Press Select once to toggle between SPEED SELECT and SATURATION SELECT.
- In SPEED SELECT, press Left or Right to adjust the fade speed.
- In SATURATION SELECT, press Left or Right to change the saturation.
- Fairy – twinkles each button and makes it look magical
- Press Select once to toggle between SPEED SELECT, SATURATION SELECT and HUE SELECT.
- In SPEED SELECT, press Left or Right to adjust the fade speed.
- In SATURATION SELECT, press Left or Right to change the saturation.
- In HUE SELECT, press Left or Right to change the hue.
- Solid – one colour across all LEDs
- Press Select once to toggle between HUE SELECT and SATURATION SELECT.
- In HUE SELECT, press Left or Right to change the hue.
- In SATURATION SELECT, press Left or Right to change the saturation.
- To save all settings, hold Select and press Right.
Usage chart
Section titled “Usage chart”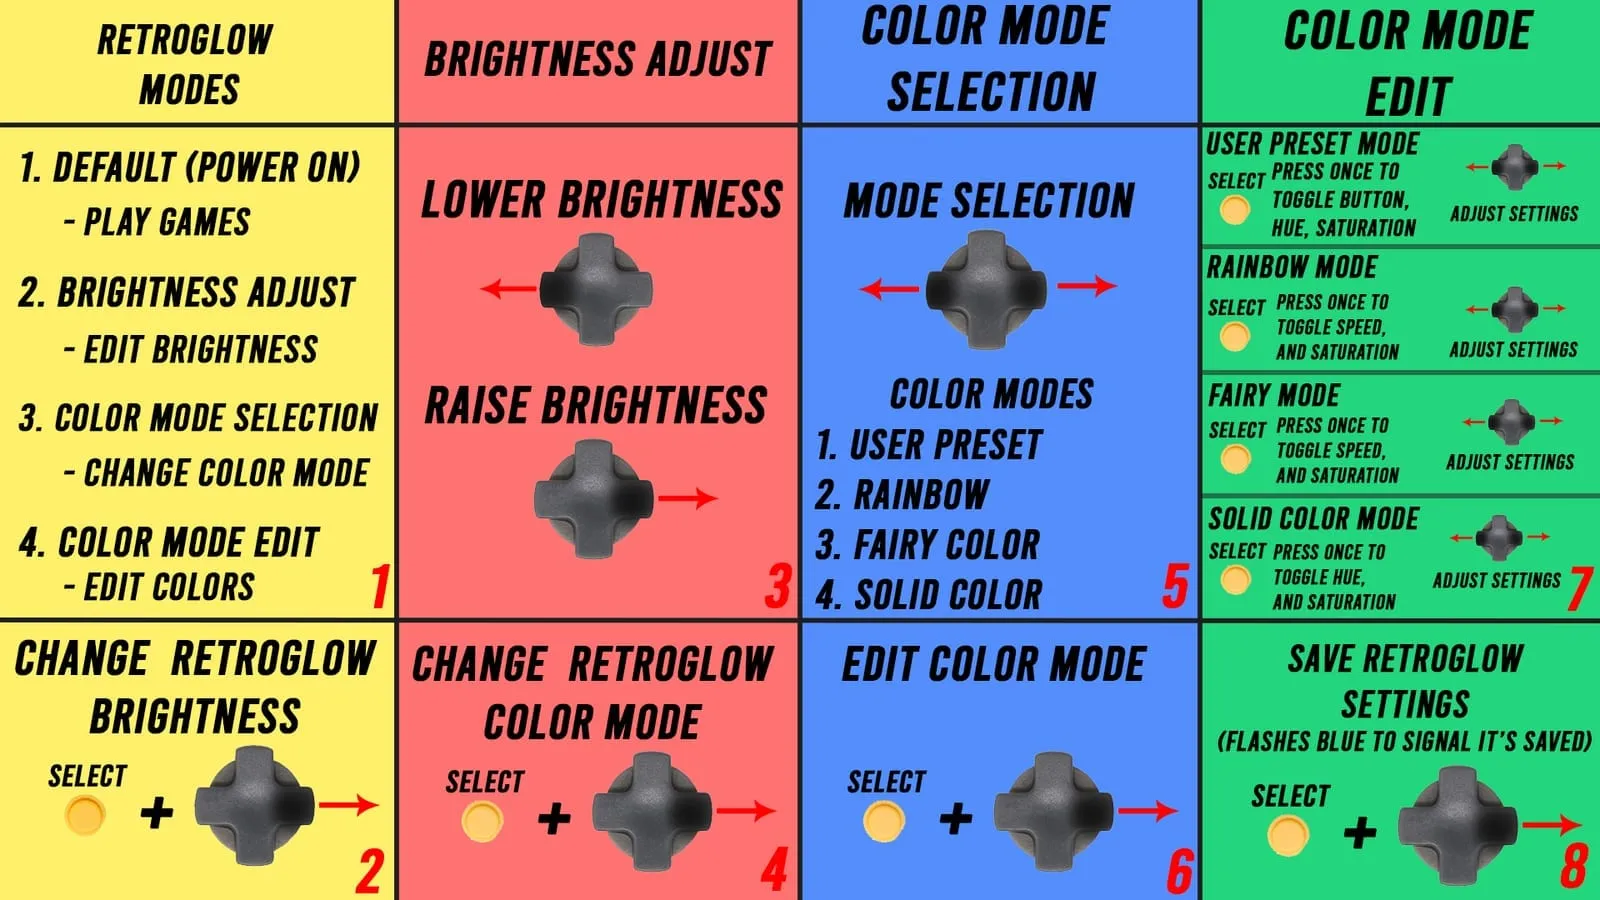
Installation problems and solutions
Section titled “Installation problems and solutions”| Problem | Solution |
|---|---|
| LEDs are flickering | Double-check all solder points. Use flux and go over each connection point once more. |
| Some or none of the LEDs light up | Hand Held Legend asks you to contact support@handheldlegend.com with a photo of the issue. |
| All LEDs light up, but the controls don’t work (no double green flash when testing) | Clean your button membranes with a cotton swab. Make sure all button contacts (gold pads) are free of flux residue; scrubbing with IPA is highly recommended for a clean, conductive surface. Rub some graphite from a standard #2 pencil onto the membranes to improve conductivity and button response. |
| Select button / strange LED behaviour | If you soldered a wire from an IPS kit’s Select point to the RetroGlow Select point, move that wire to a different RetroGlow point such as Start. |